As more users rely on cloud storage, files often end up scattered across several platforms. Managing multiple cloud services can become confusing and time-consuming. Thankfully, tools like RiceDrive help centralize your content and streamline file management.
RiceDrive lets you connect OneDrive, Google Drive, Dropbox, Box, MEGA, pCloud, and many others in one place. Once connected, you can transfer files between platforms with just a few clicks.
This guide shows you how to migrate your files from OneDrive to pCloud quickly and safely using RiceDrive — perfect for beginners or anyone consolidating cloud storage.

Step 1 – Create a RiceDrive Account
- Visit the official RiceDrive website and log in with your email.
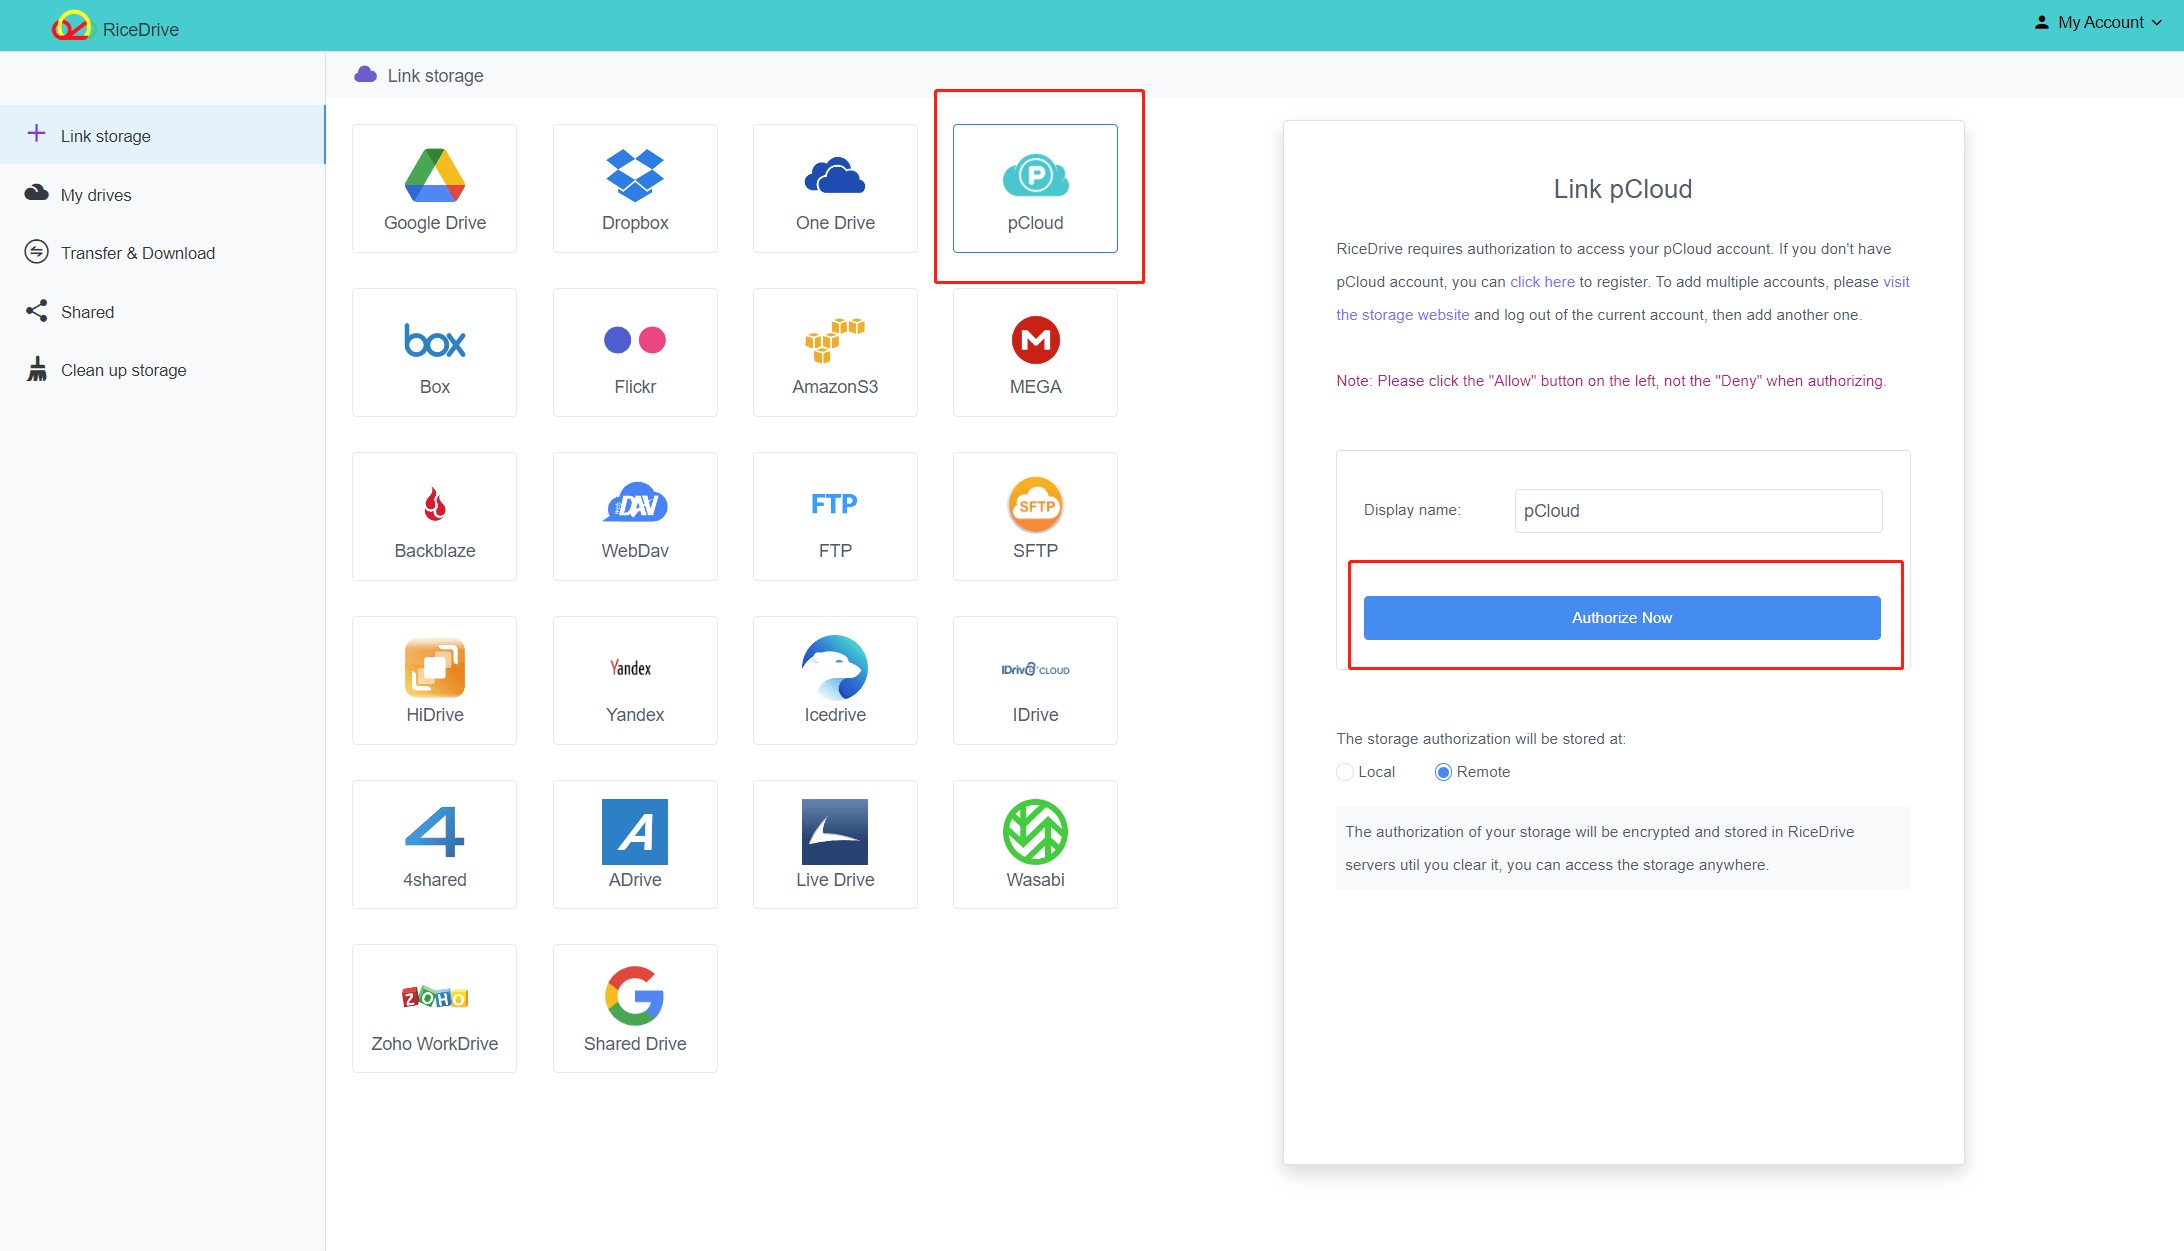
- Click "Link Drive", choose OneDrive, and sign in with your Microsoft account.
- Then, repeat the process to link your pCloud account.
Both storage services will appear in your RiceDrive dashboard.
Step 2 – Create a Destination Folder in pCloud
Before starting the transfer, create a new folder inside your pCloud drive — for example, "OneDrive Migration".
This folder will store all migrated files from your OneDrive account.
Step 3 – Choose Transfer Options
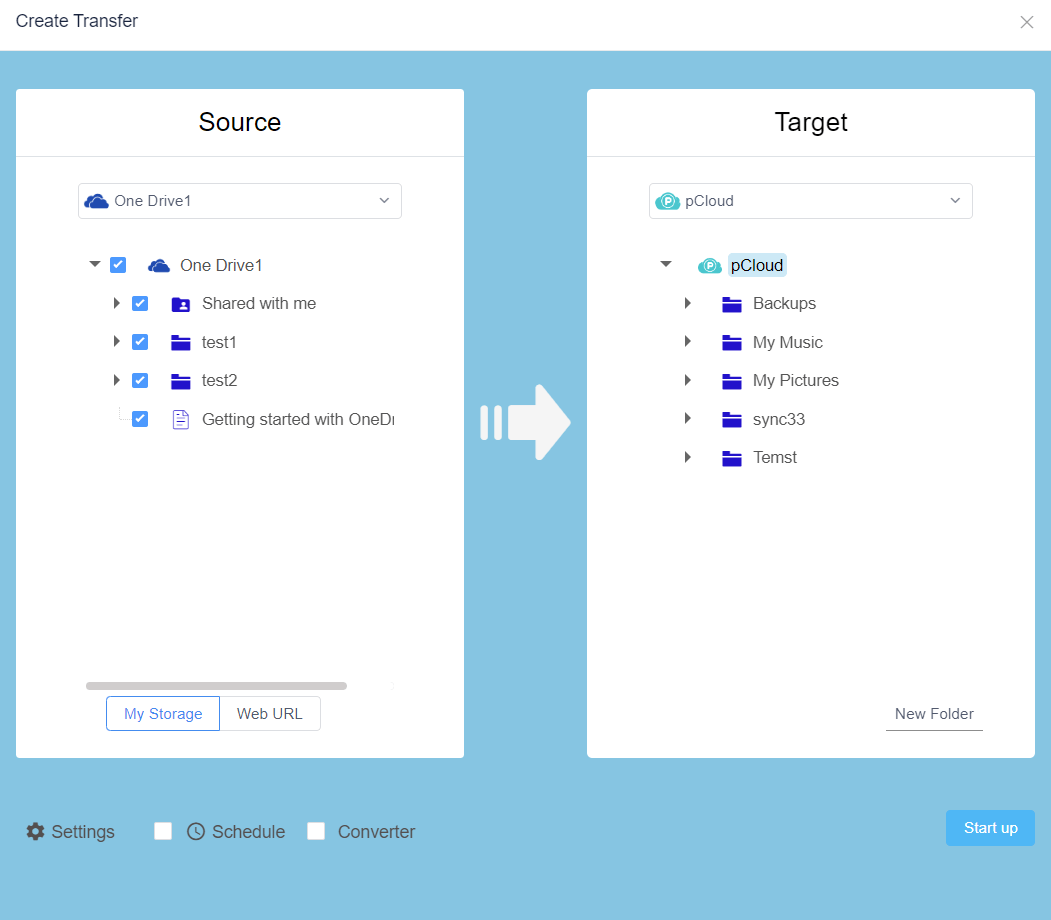
- Click Cloud Transfer → Create Transfer to open the popup.
- In the OneDrive panel, select the files or folders you want to migrate.
- On the right side, choose your pCloud account and locate the destination folder.
If your OneDrive includes shared files, RiceDrive can migrate them as well.
You can choose between two modes:
- Cloud Transfer – Copies the files to pCloud while keeping the originals in OneDrive.
- Cloud Sync – Moves the content from OneDrive to pCloud, keeping both sides consistent.
- Cloud ZIP – Unzip/Compress files to the selected cloud drive.
For a complete migration, Sync is usually the best option.
Step 4 – Start the Transfer
Click "Start up" to begin.
RiceDrive will automatically queue, process, and manage your migration tasks. Once started, RiceDrive transfers your files between cloud drives offline — the process does not rely on your network or device, so you can safely close your browser or computer at any time.
RiceDrive also supports multi-threaded transfers and automatic retries to ensure a fast, stable, and efficient migration.
Step 5 – Verify Your Files in pCloud
Once the migration finishes, open your pCloud drive and check the destination folder.
Your files and folder structure should appear exactly as they were in OneDrive.
If any items failed to transfer, RiceDrive will show them in the task logs so you can retry individually.
Additional Features
RiceDrive offers several useful functions to improve your cloud-management experience:
- File Preview – View documents, images, and videos instantly.
- Direct Web Downloads – Save files directly from URLs to your cloud storage.
- Mobile Apps – Manage cloud files from iOS and Android.
- Bandwidth Control – Limit speeds to avoid network congestion.
- Remote Access – Mount cloud storage to other devices.
Upgrading to RiceDrive PRO unlocks enhanced features such as versioning, remote mounting, faster transfers, and priority support.
Conclusion
Migrating large amounts of data between cloud services doesn’t have to be difficult. With RiceDrive, simply connect your accounts, choose your files, and let the automated transfer process handle the rest.
If you want to simplify cloud management or consolidate OneDrive, Google Drive, Dropbox, MEGA, Box, and pCloud files into one organized system, RiceDrive is an excellent solution.