In today's digital world, many of us have photos scattered across different cloud storage services like Google Photos, MEGA, Dropbox, OneDrive and more. It can be tedious to manage photos in multiple locations. Thankfully, services like RiceDrive make it easy to consolidate your photos into one place.
In this article, we'll walk through how to use RiceDrive to transfer photos from Google Photos to OneDrive.
Benefits of Transferring to OneDrive
There are a few key reasons you may want to transfer your Google Photos library over to OneDrive:
-
Consolidate all your photos into one place for easier management and backup.
-
Take advantage of OneDrive's built-in photo editing and enhancement tools.
-
Seamlessly integrate your photos into Office apps like Word, Excel and PowerPoint.
-
Get more free storage than Google Photos offers (15GB free on OneDrive versus unlimited compressed storage on Google Photos).
-
Enjoy OneDrive's sharing and collaboration features to easily share photos with friends and family.
Step 1: Sign in RiceDrive
Go to https://www.ricedrive.com/ or click the "Apps" button to install RiceDrive on your phone. No registration required. Login to RiceDrive with any email address.
A new window will pop up asking you to sign in to your Google account. Enter your Google credentials and click "Allow" to grant RiceDrive permission to access your Google Photos library.
Once connected, you'll see your Google Photos account appear in the RiceDrive drive list on the right. All your photos and albums will now be accessible through RiceDrive.
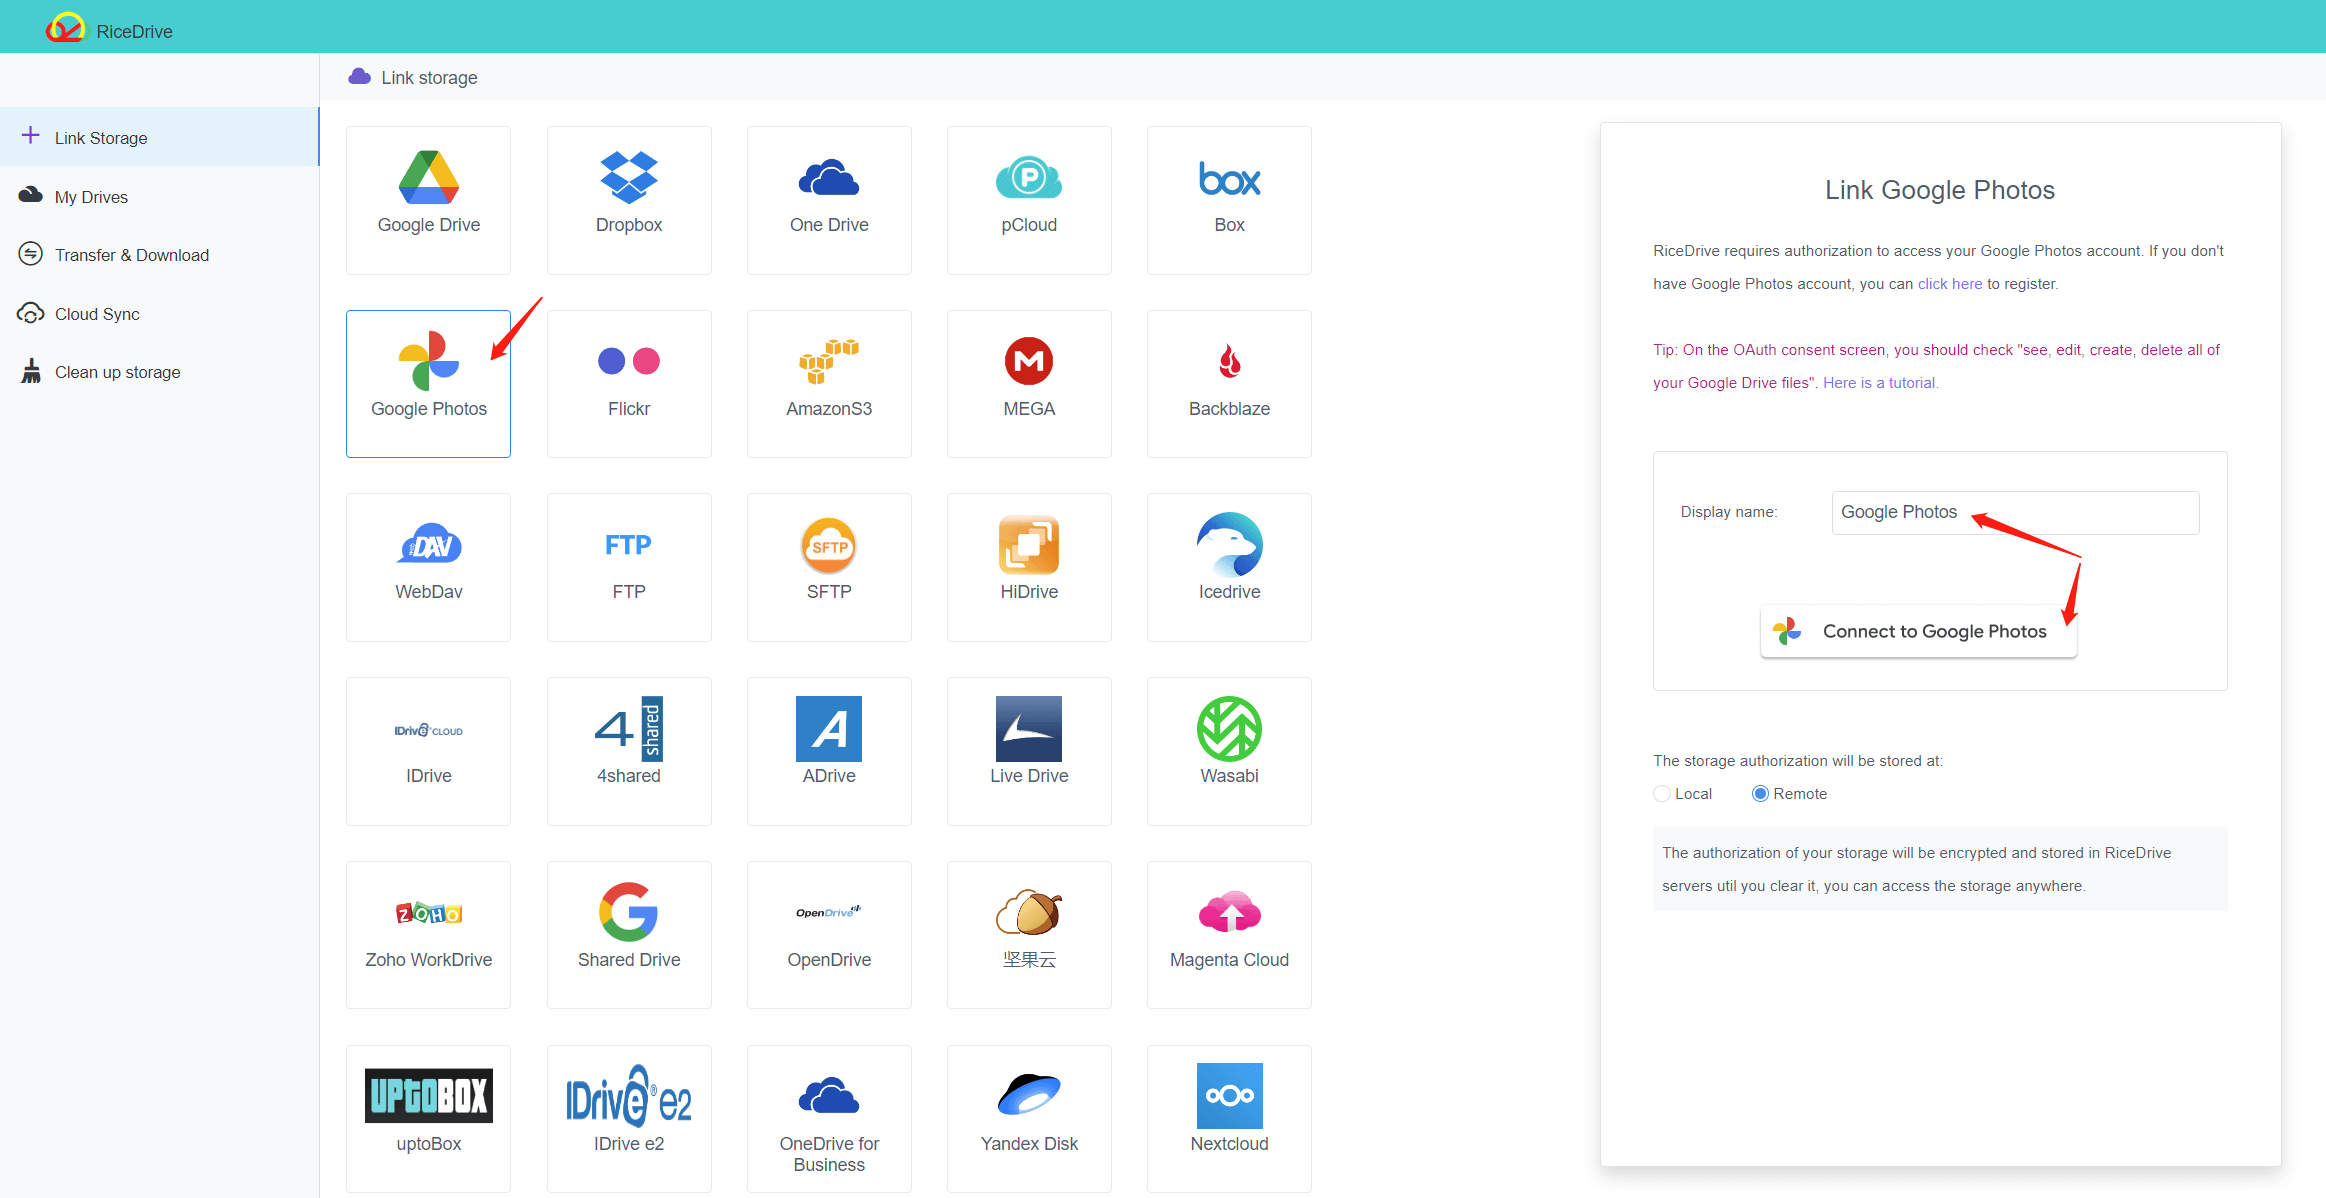
Step 2: Connect Google Photos
Next, you need to connect RiceDrive to your Google Photos library. In RiceDrive, click the "Link Storage" icon and select "Google Photos" from the dropdown.
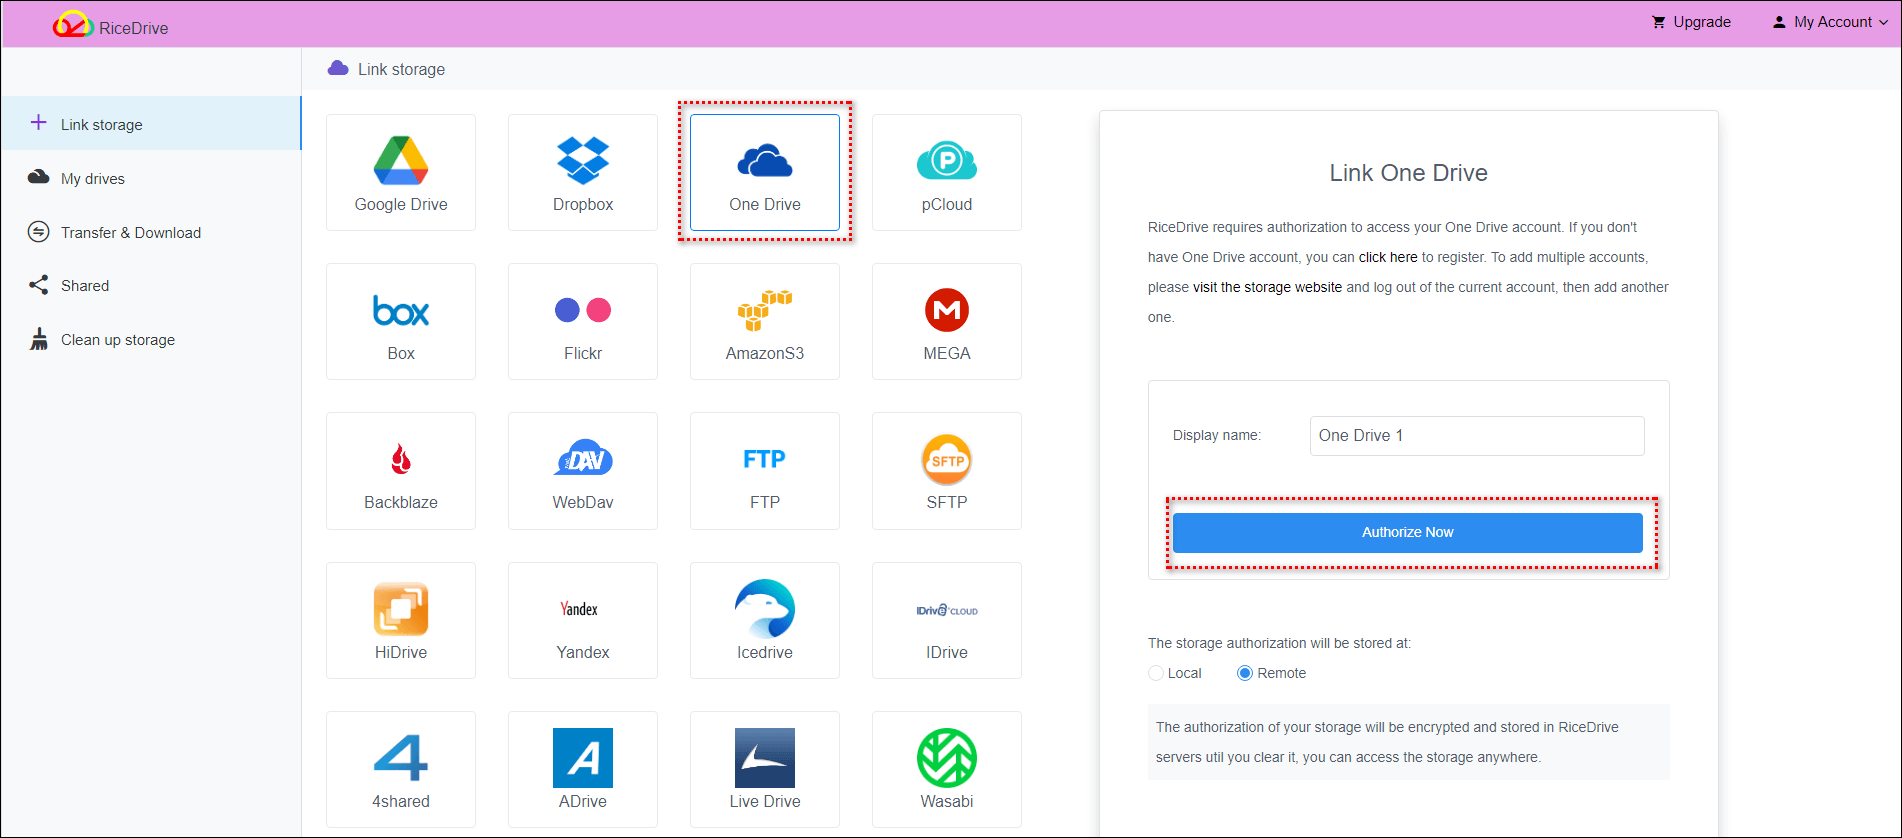
Step 3: Connect OneDrive
Follow the same process to connect your OneDrive account to RiceDrive. Click the "Link Storage" button, select OneDrive, and enter your Microsoft credentials when prompted.
After allowing access, your OneDrive library will also show up in the RiceDrive interface. Now both your Google Photos and OneDrive are linked.
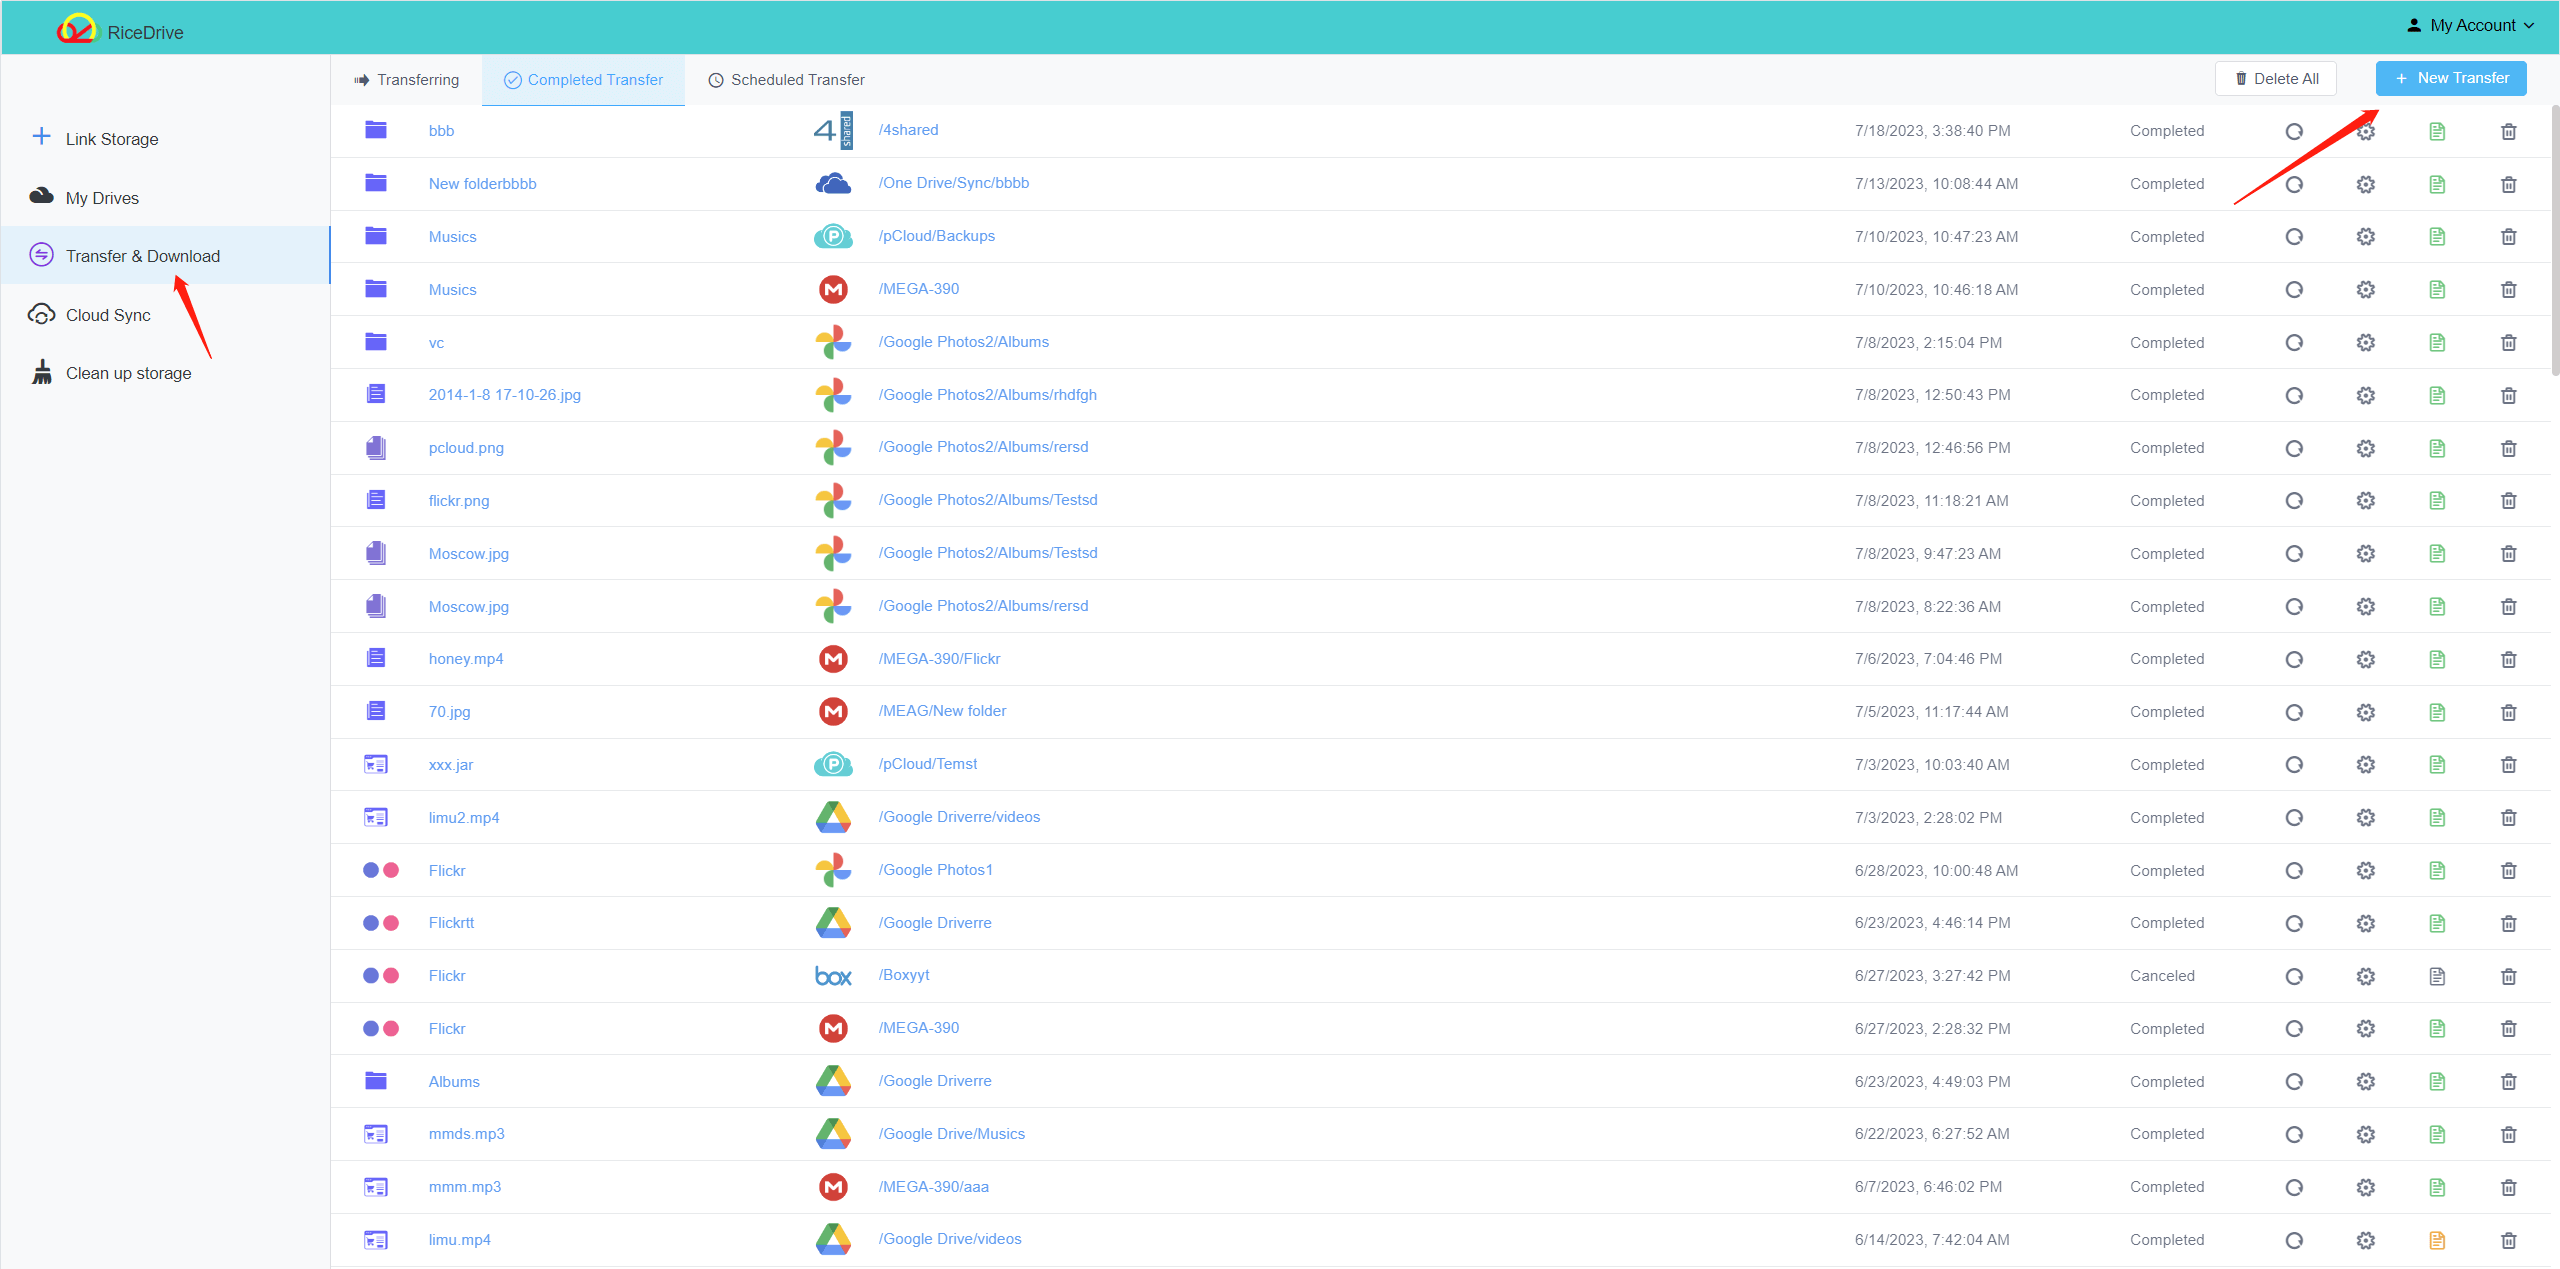
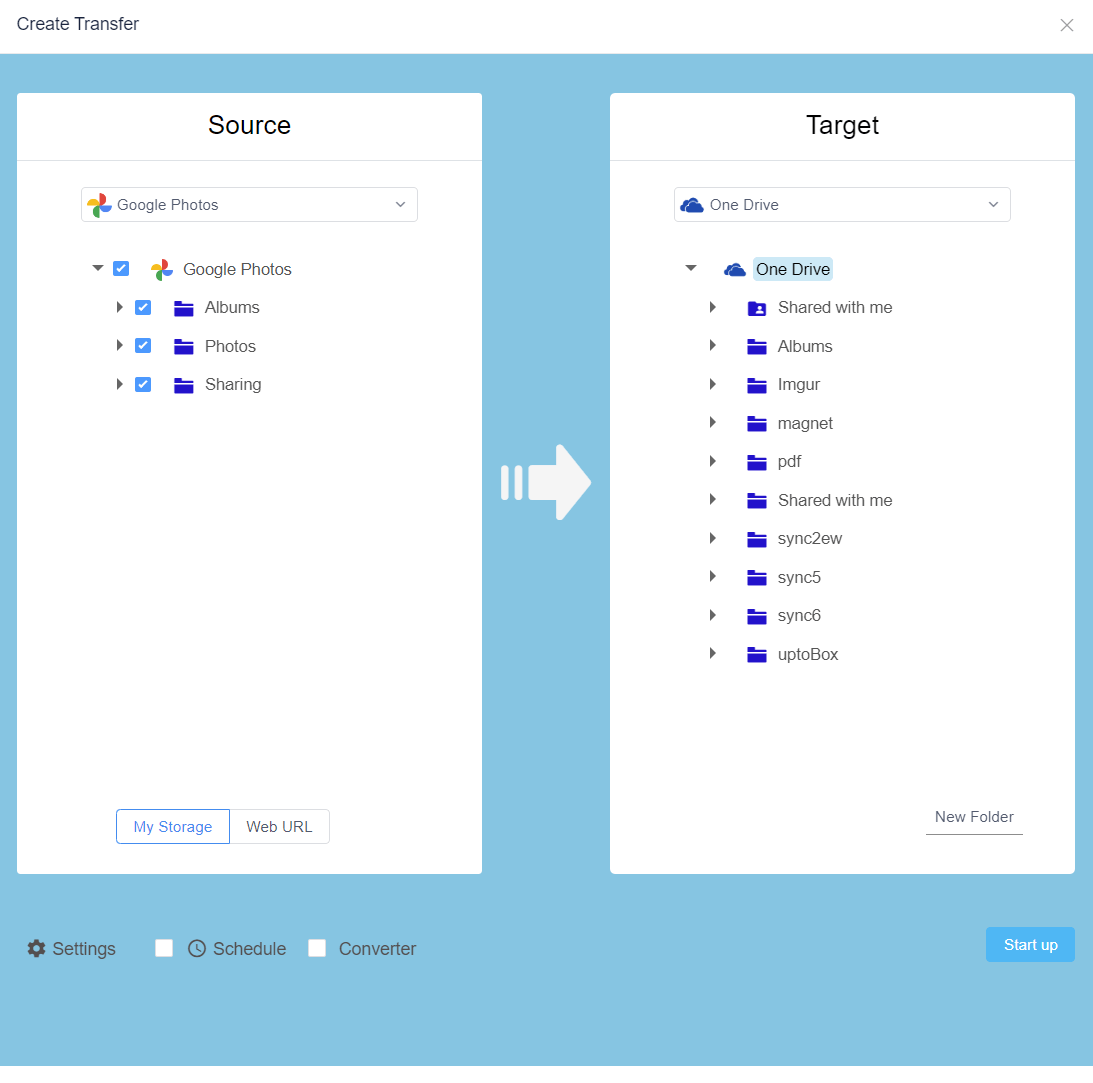
Step 4: Select Transfer Source
From the drive list on the left, click "Transfer & Download" button and "Create Transfer". This will open "Create Task" interface in the right panel.
Switch to Google Photos, it will list your photos and albums, you can select photos to transfer.
Step 5: Select Transfer Destination
In the destination, pick a OneDrive folder as the destination for your transfer.
Select the OneDrive account from the dropdown menu. Then browse to choose which folder or album in OneDrive you want to transfer the photos into.
Step 6: Begin and Monitor Transfer
The transfer speed will depend on your internet connection. For large transfers, RiceDrive has a built-in speed booster and you can enable multiple concurrent transfers for faster transfers.
The app will show the total progress of the transfer so you can monitor the status. Any issues during transfer will also be indicated.
Step 7: Verify Transferred Files
Once the transfer finishes, check your OneDrive account to verify that all the photos moved over properly. Open the destination folder to ensure the files are there.
You can also double check that the original photos are still intact in your Google Photos library if you want to keep them in both locations. RiceDrive does not delete or alter the source files.
And that's it! Following these steps will seamlessly transfer your photos from Google Photos to OneDrive using the free RiceDrive tool. Now all your photos are consolidated into one place for easier management and backups.
Additional Tips for Transferring Google Photos
Here are some additional tips to ensure a smooth and successful transfer of your Google Photos library:
-
Break up large transfers into smaller batches if you experience any issues.
-
For the fastest transfers, enable RiceDrive's speed booster feature in the settings.
-
Stick with the default file settings in RiceDrive for preserving metadata like timestamps.
-
OneDrive limits individual file size to 100GB, so files larger than that will fail to transfer.
-
If you want to keep your photos in both places, make the transfer one-way only from Google Photos to OneDrive.
-
You can also use RiceDrive to transfer from OneDrive back to Google Photos if needed.
Conclusion
Moving your photos from one cloud storage service to another doesn't have to be painful. RiceDrive streamlines the transfer process with just a few clicks.
Consolidating your Google Photos into OneDrive makes it easier to manage, edit and share your memories. With your photos unified into one library, you'll spend less time worrying about storage limits and more time enjoying your photos.
Give RiceDrive a try the next time you need to transfer content between cloud drives. It's a simple and free way to wrangle your digital life!