This article will comprehensively explore four effective methods for transferring Google Photos to OneDrive. Whether you are transitioning to OneDrive or need to synchronize Google Photos with OneDrive, we have provided solutions to meet your requirements. Without further ado, let's dive straight into these methods.
Transfer Google Photos To OneDrive (RiceDrive Online Tools)
RiceDrive is an online platform that centrally manages multiple cloud storage services. Users can effortlessly manage multiple cloud accounts on a single interface, eliminating the tedious process of individually logging into each cloud service provider's platform. Using RiceDrive for data migration not only avoids the cumbersome download and upload processes but also allows users to schedule automatic data migration at regular intervals, eliminating the hassle of manual operations. This is particularly suitable for users who require regular data backup or synchronization.
-
Visit the RiceDrive website (https://www.ricedrive.com/) without the need for registration. Simply provide an email, and proceed to log in after accepting the verification code.

-
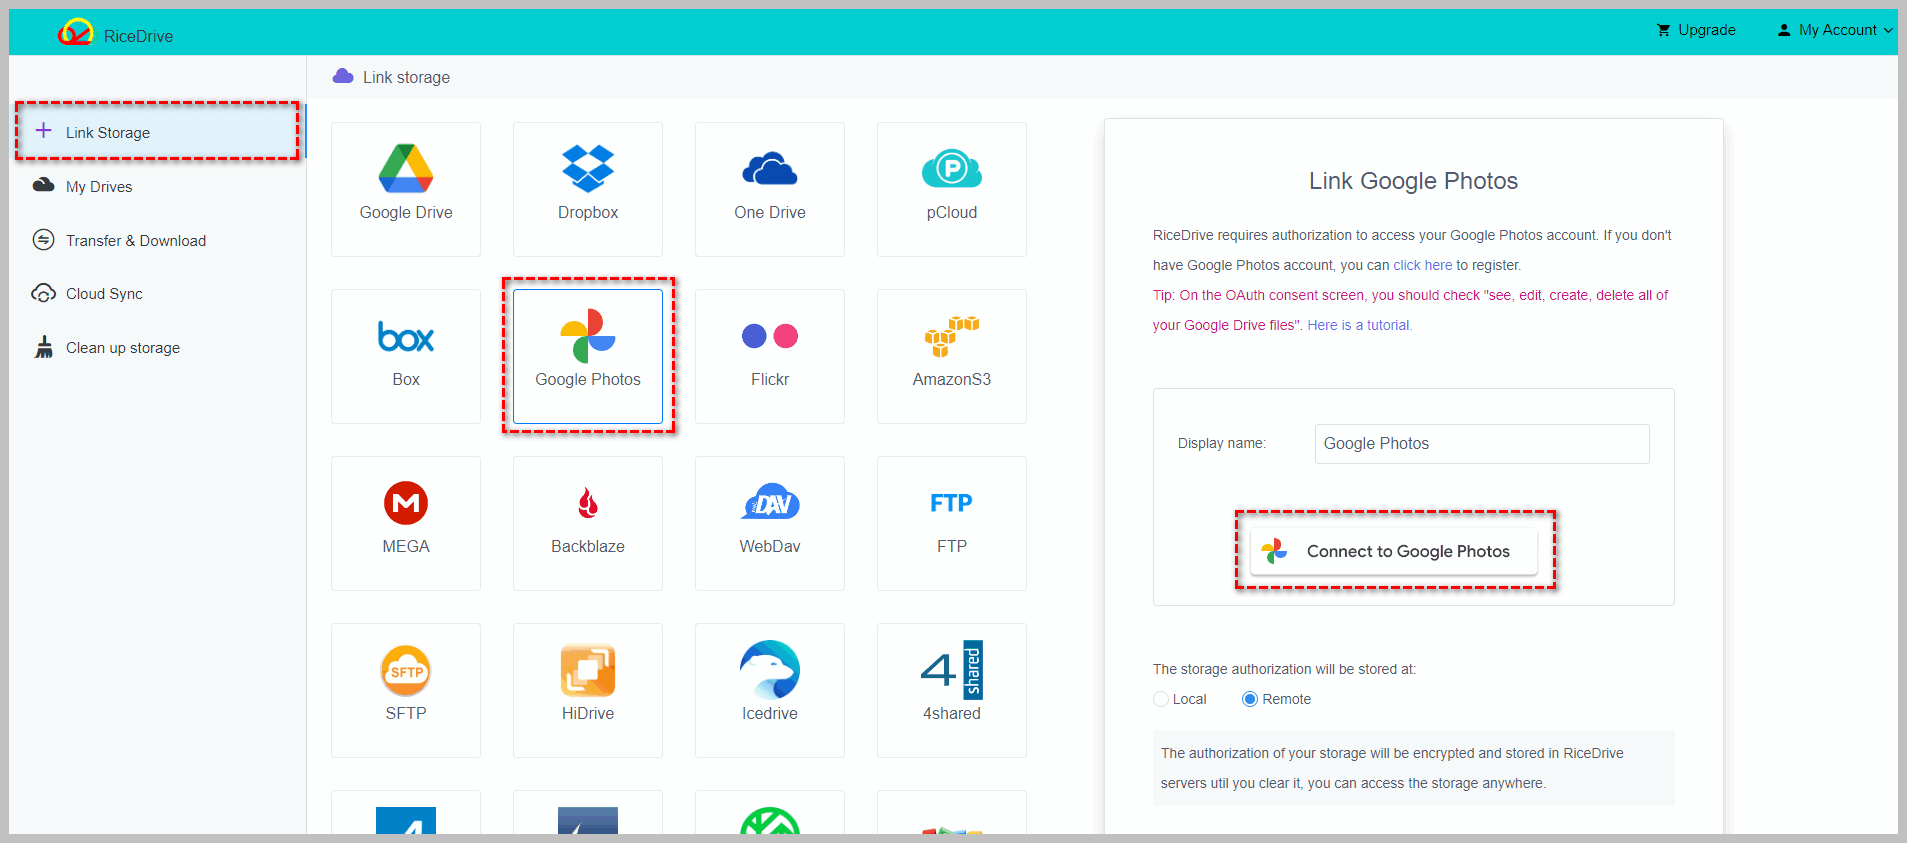
In the RiceDrive dashboard, Click the "Link Storage" button on the left, then select Google Photos. Click the "Connect" button on the right, and follow the prompts to connect Google Photos to RiceDrive.
-
Connect OneDrive to RiceDrive using the same method as connecting Google Photos.
-
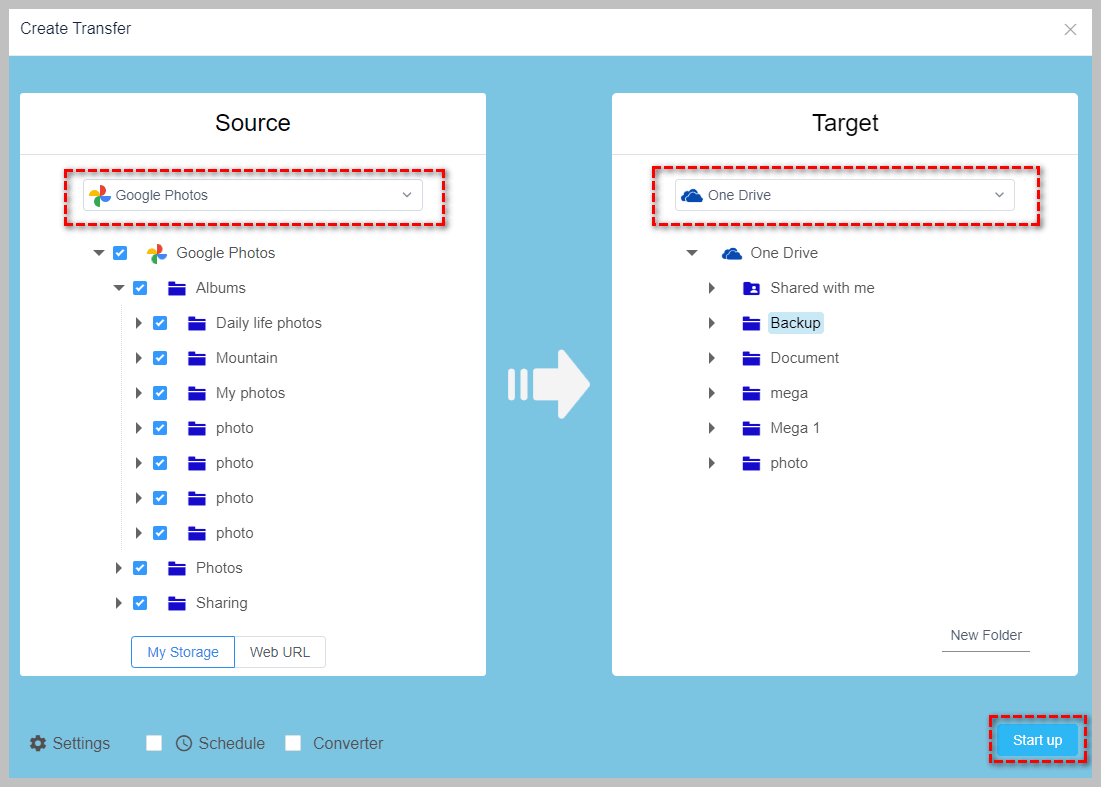
Access the transfer page, create a transfer task, choose Google Photos as the source, check the Photos or folders you want to transfer, and select OneDrive as the target cloud storage (i.e., the cloud storage service you want to transfer to).
-
Once all settings are configured, click the "Start" button to initiate the transfer task. Throughout the task execution, you can track the migration progress in RiceDrive's task list. You may also close RiceDrive to attend to other important matters, as it will automatically continue the task in the background.
-
After the task is completed, you can review the transfer log to ensure the successful transfer of all files.
Tip: If you are using an Android phone, please download the app; if you have an iPhone, please visit RiceDrive's mobile site.
Move Google Photos To OneDrive With Google Takeout
Exporting photos and videos to OneDrive using Google Takeout is a simple method, especially suitable for users who infrequently perform data migrations. By exporting albums, you gain better control over your data, which is crucial for privacy-conscious users. However, for users requiring regular data migration, this method may not be ideal.
-
Log in to Google Takeout: Open your browser and visit the Google Takeout website.
-
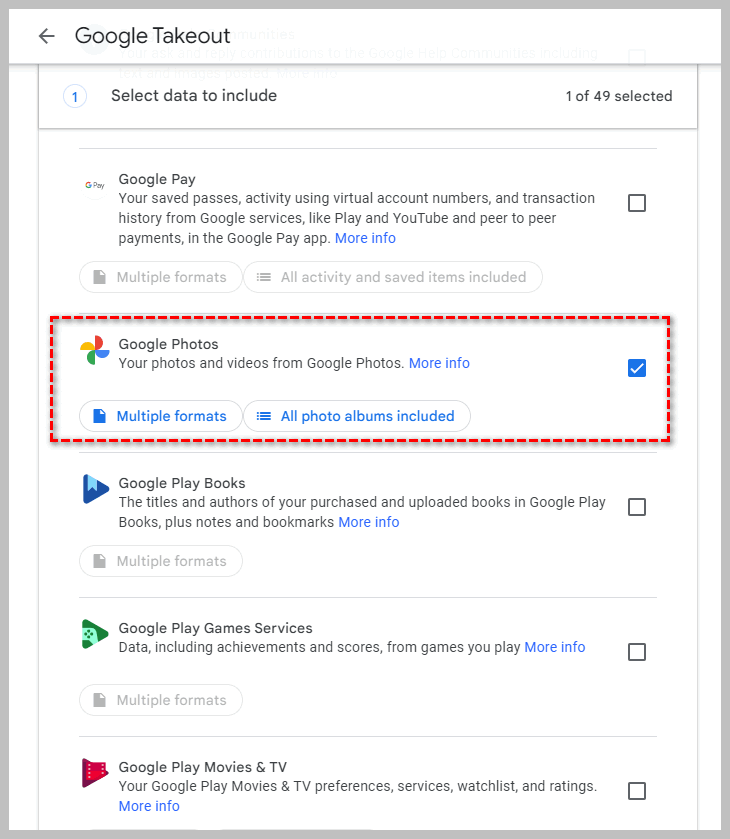
Select the data to export: On the Google Takeout page, you will see a list of all Google services. Unselect all services except for 'Google Photos,' then click the 'Next' button at the bottom of the page.
-
Customize export settings: In the next step, you can click the dropdown arrow next to 'All photo albums' to select specific albums for export. Alternatively, click 'Export all albums' to export data from all albums. Click 'Next' at the bottom of the page.
-
Choose export file type and size: In this step, you can select the file type and size for export. By default, it's usually recommended to choose the ZIP format and adjust the file size as needed. Click 'Create export.'
-
Wait for the export to complete: Google will start creating your export file and will notify you via notification or email once the export is finished. This may take some time, depending on the size of your albums.
-
Download the export file: Once the export is complete, you'll see an 'Export complete' indicator on the Google Takeout page. Click on this indicator, and you will be redirected to a page containing the link to your exported file. Click the link to download the ZIP file.
-
Unzip the file: After downloading, unzip the ZIP file to access all the photos and video files from the album.
-
Upload photos to OneDrive: Log in to the OneDrive website and upload the extracted files to OneDrive.
Migrate Google Photos to OneDrive (Download and Upload)
Manual downloading and uploading require users to invest time and effort, making it more suitable for users with a smaller amount of data.
-
Log in to your Google Photos through a browser.
-
Select the photos and videos you want to download and click the 'Download' button.
-
Log in to your OneDrive through a browser.
-
Click on 'Upload' to upload the files or folder.
Tip: Before uploading, unzip the downloaded ZIP file to ensure consistent file directory structure.
Transfer Google Photos to OneDrive Using Rclone App
Rclone is a free command-line tool designed for file synchronization and transfer between various cloud storage services. It supports numerous cloud service providers, including but not limited to Google Drive, OneDrive, Dropbox, Amazon S3, and more. As a robust and cross-platform cloud storage sync tool, Rclone enables users to conveniently manage and migrate files between different cloud services.
-
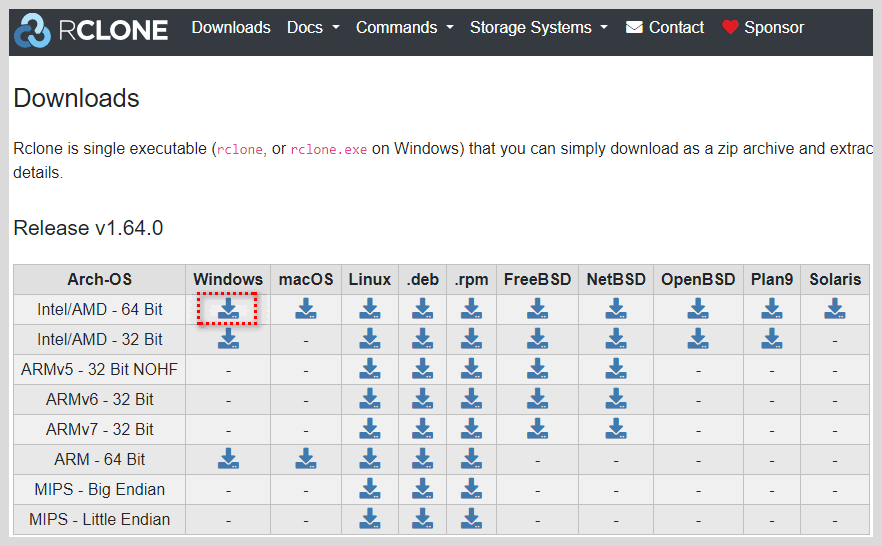
Download the Rclone command line program from the official website: https://rclone.org/downloads/. Unzip it to your local disk after downloading.
-
Download Rclone Browser software
It is an open source GUI (Graphical User Interface) tool built on top of Rclone for managing and operating multiple cloud storage services. It enables easy management and syncing of data across cloud storage. Please click here for the download link.
After successfully downloading, install it on your Windows system.
-
Configure Rclone Browser
Run the installed Rclone Browser and open the Rclone Browser configuration interface (file->preferences). In the rclone location textbox, click the 3 dot button on the right and browse to the uncompressed rclone.exe program, then click ok button to save.

-
Configure OneDrive in Rclone Browser
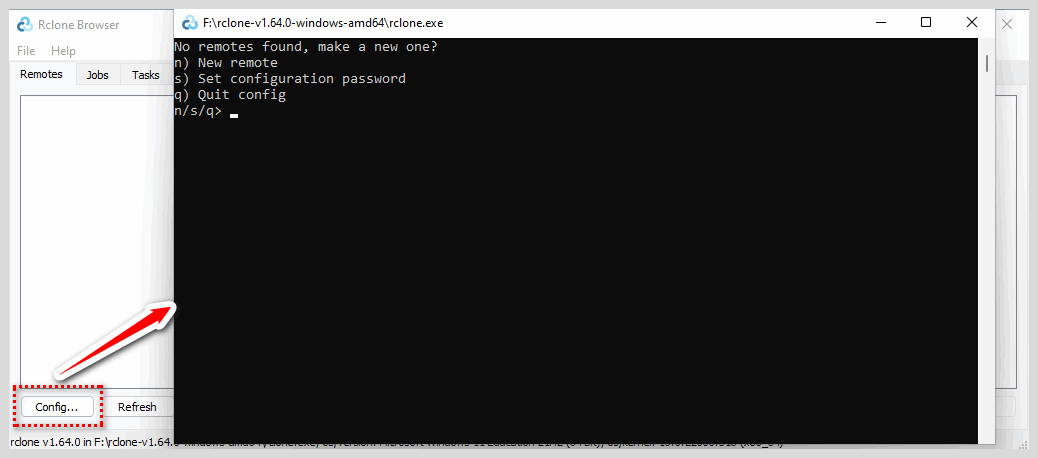
Click the Config button at the bottom of Remote page to open the rclone command line window.
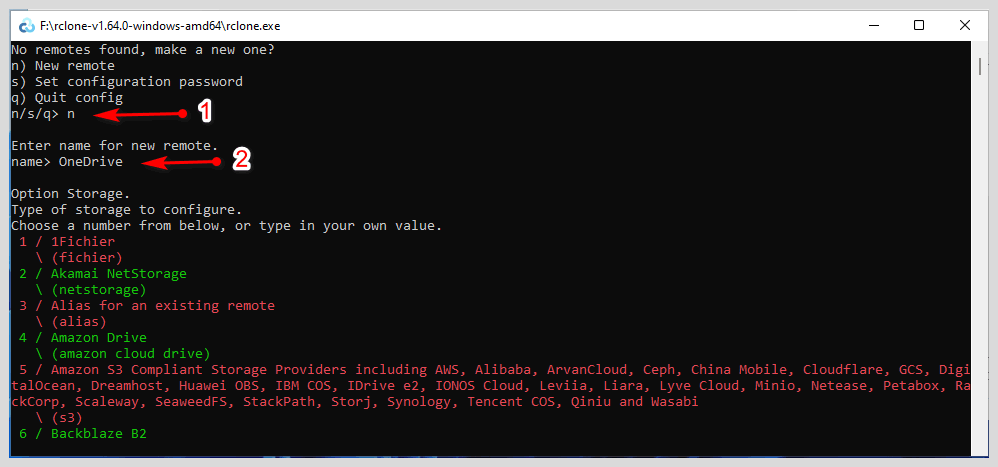
In the cmd, type "n" and press enter to create a new config. Then assign a name to the config, here I will call it "OneDrive", and press enter to confirm.
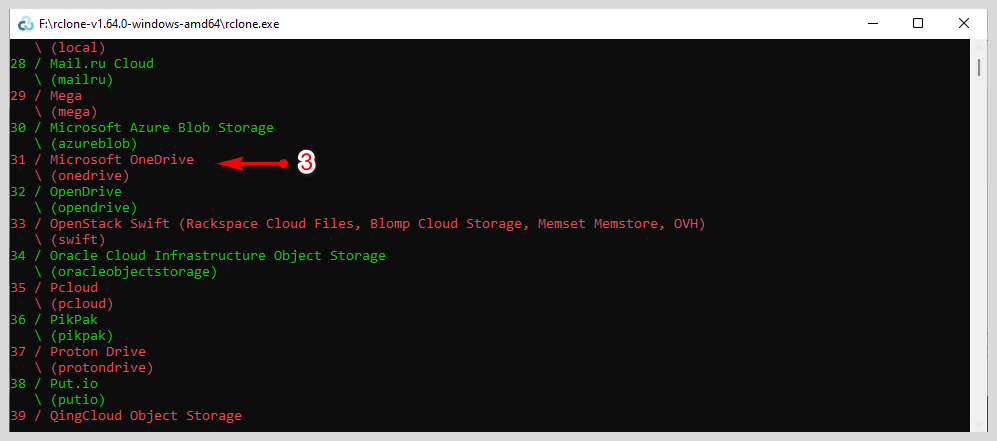
Next select the config type, here we choose the OneDrive type, the onedrive number is 31, we enter 31 and press enter.
Then for client_id and client_secret we simply press enter to skip them.

For the region we select 1, then in step 7 press enter to skip default.

In step 8 press enter for default and it will automatically open the browser to start the OneDrive authorization process. Login to your OneDrive account on the web page and click Agree.

Note that if browser doesn't open automatically, you need to manually copy the URL in cmd and paste it in browser to open it.
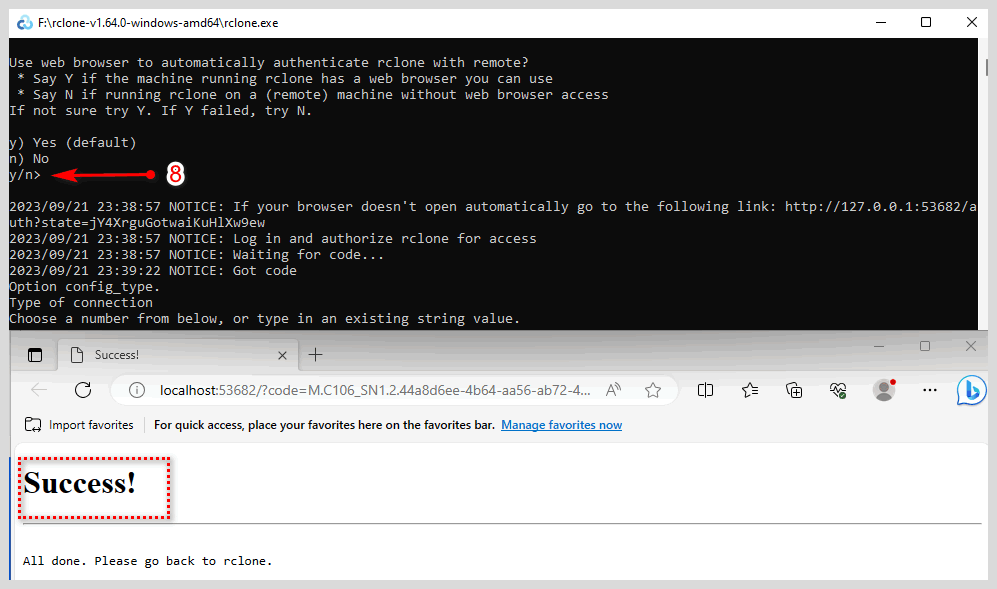
In step 9 we enter 1, in steps 10 and 11 press enter to skip, and OneDrive is configured.
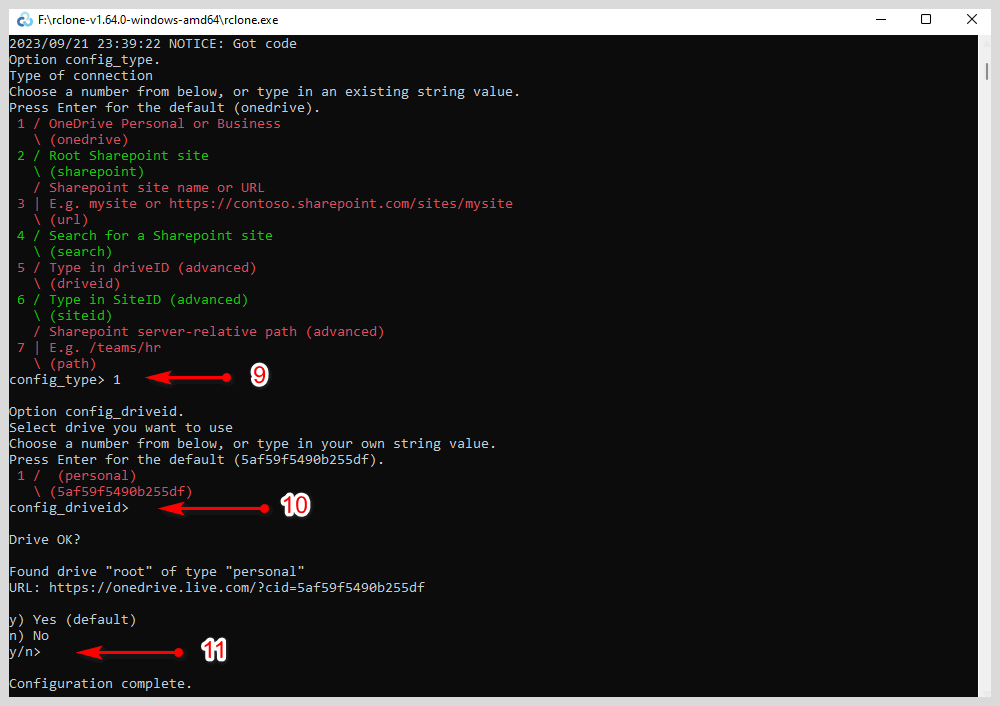
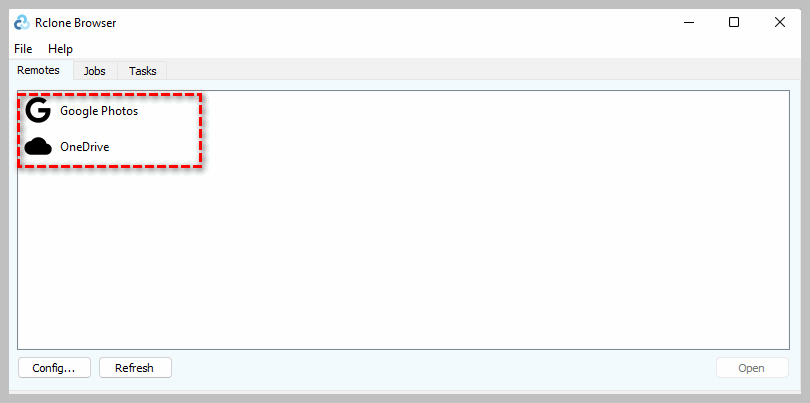
Go back to Rclone Browser interface, click the Refresh button and you should see the OneDrive storage configured successfully.

-
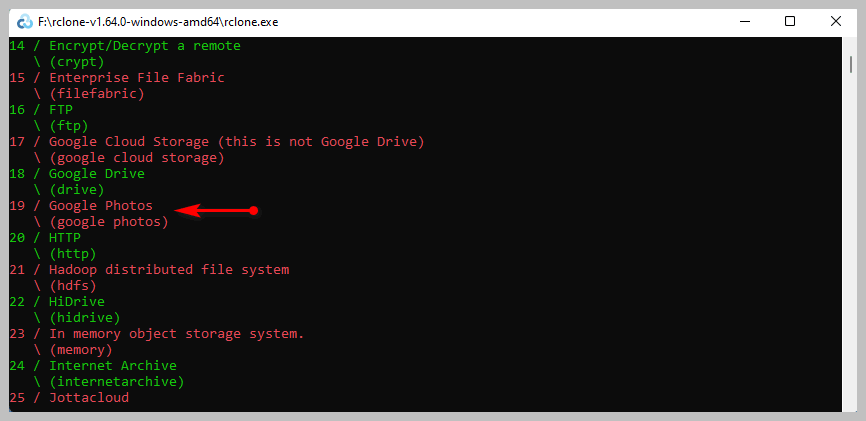
Configure Google Photos in Rclone Browser
The process of configuring Google Photos and configuring OneDrive is fundamentally similar, but you need to be careful when choosing the cloud storage type to avoid mistakes.
Tip: When authorizing in the browser section, you need to check the "See, upload" checkbox to grant rclone access to your Google account.
When Google Drive is configured, you can click the refresh button in Rclone Browser to view it.
-
Create a Google Photos to OneDrive transfer task in Rclone Browser
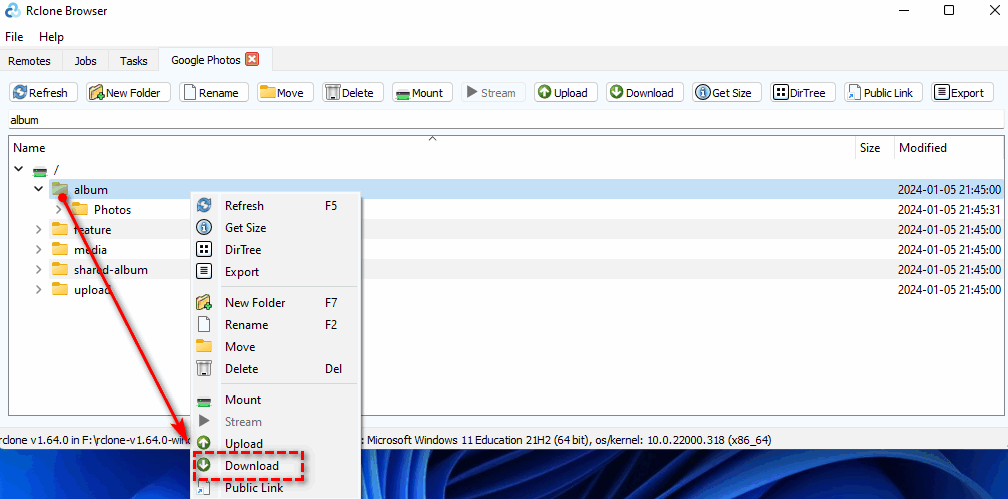
In the Remotes interface, double click OneDrive to open it. Once inside Google Photos, right click the folder you want to transfer then press the download button.
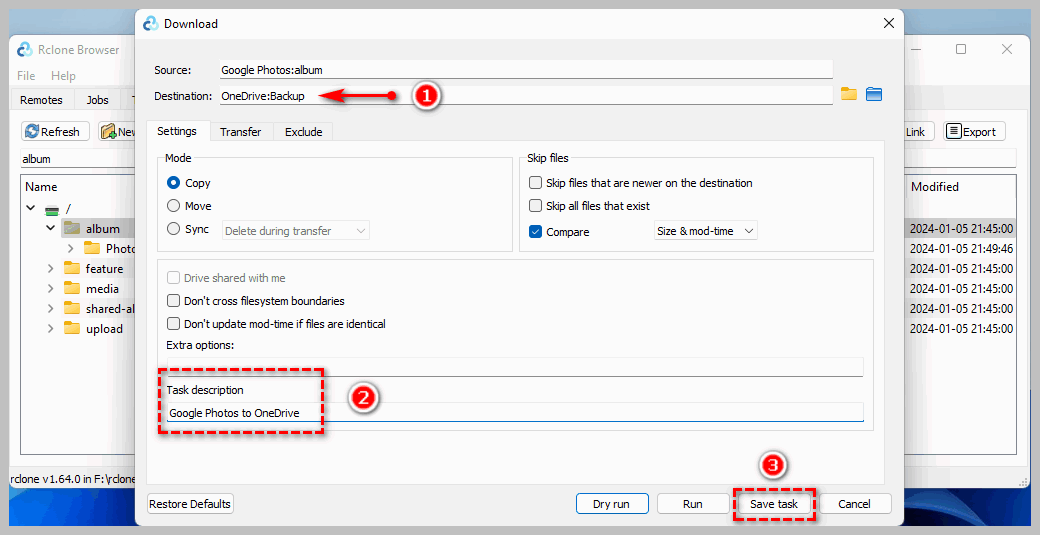
In the destination path input box, enter the folder path in OneDrive, in the format OneDrive:Backup. Here I'm entering the "Backup" folder in OneDrive. Then enter a task description and click the "Save Task" button to facilitate incremental transfer next time.
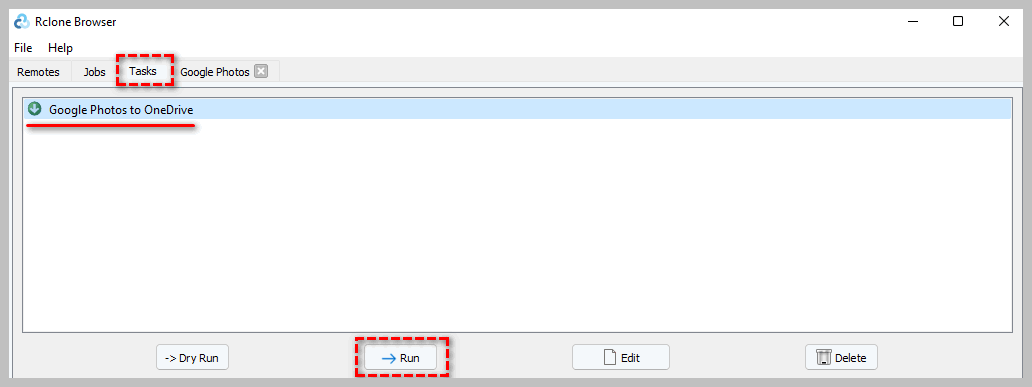
Go into the task interface and click the "Run" button to start the task.
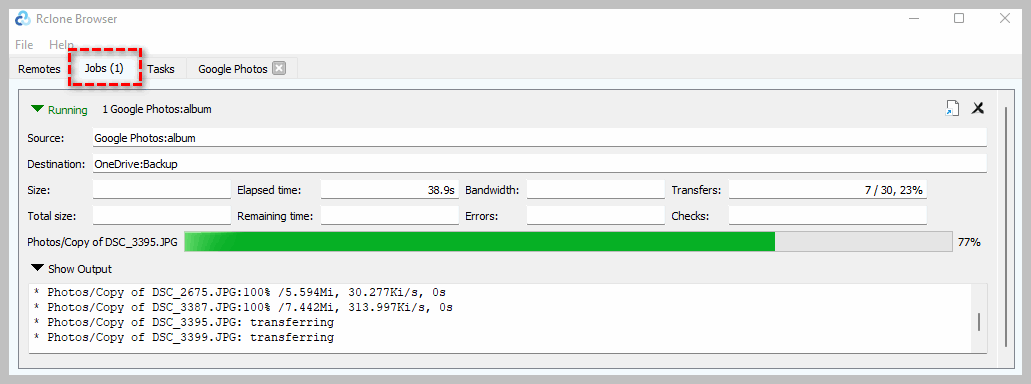
In the jobs page, the task execution starts and then wait for the task to complete successfully.
Conclusion
This article presents four methods for transferring Google Photos to OneDrive. You can choose the method that best suits your individual needs. Regardless of the method chosen, the key is to ensure the safety and integrity of your data. We hope this article proves helpful to you.