Juggling multiple cloud storage platforms like Google Drive, Dropbox, OneDrive, Mega.nz, PCloud, Icedrive, Box.net, Google Photos, Flickr, Imgur, WebDAV, SFTP and FTP can make it difficult to seamlessly manage your files.
RiceDrive provides a simplified way to transfer, sync, and organize files across over 30+ major cloud services through one web-based application. This comprehensive guide will teach you how to leverage the full potential of RiceDrive to take control of your cloud storage ecosystem.
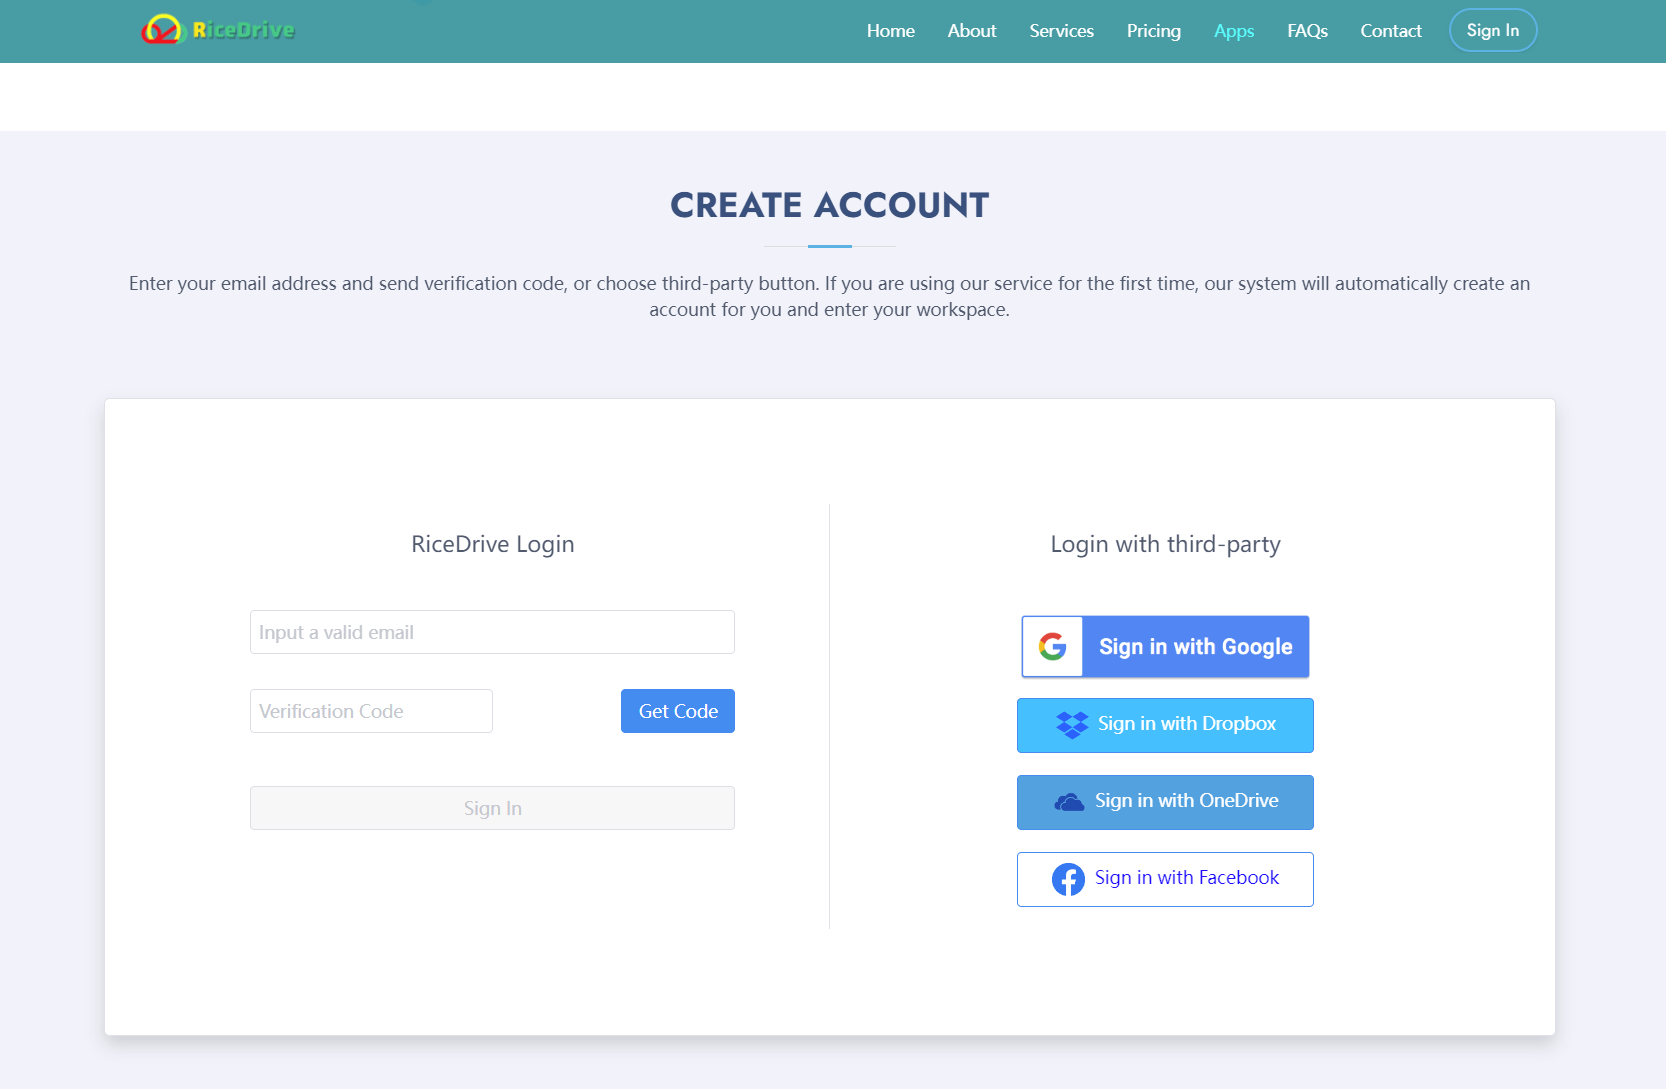
Create RiceDrive Account
Create a free RiceDrive account without providing personal information. Only an email is required to login directly to RiceDrive. Upon logging in, you get 10GB of free bandwidth and can access most key features of RiceDrive.
If you are unable to receive a login code, you can also sign up for a RiceDrive account using Google, Dropbox, OneDrive, and Facebook.
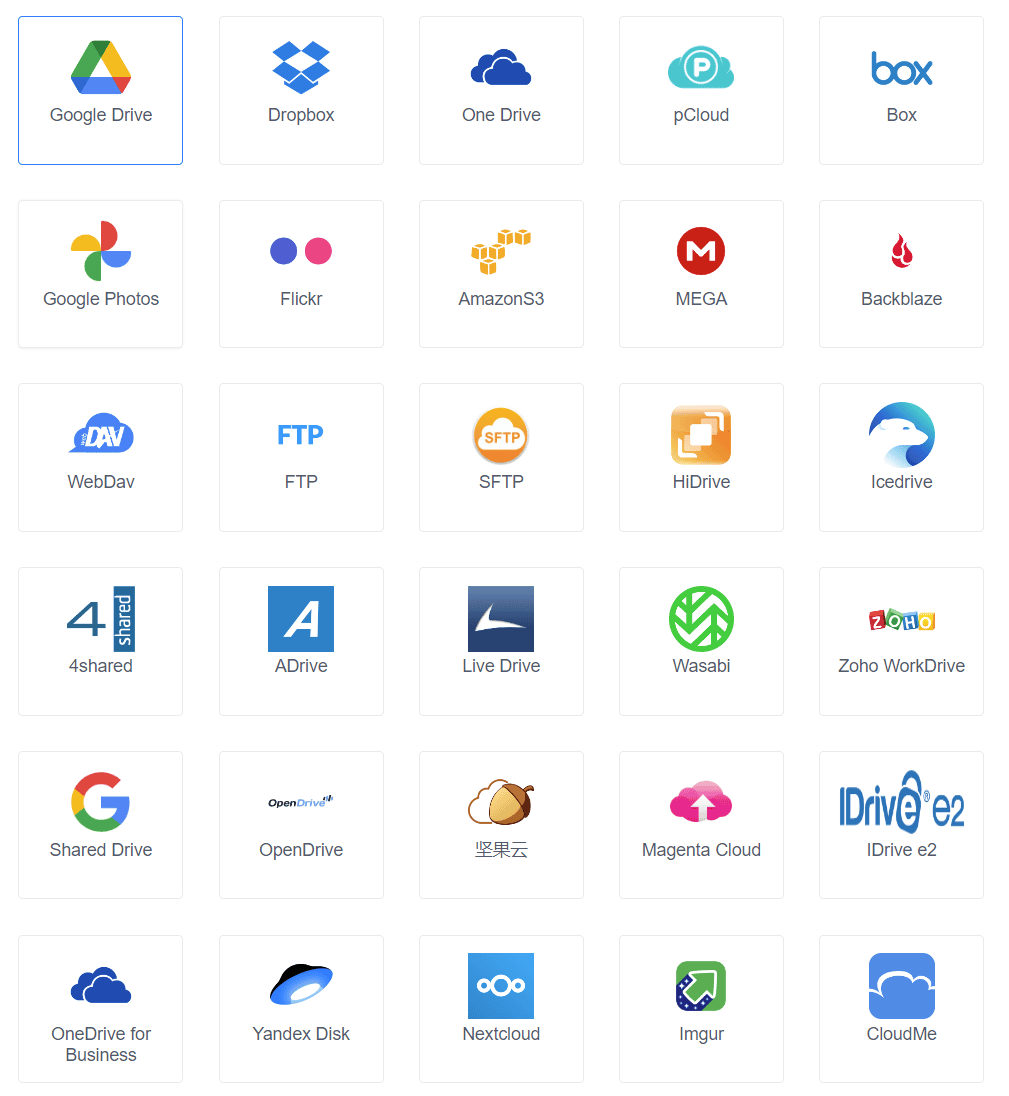
Link Storages
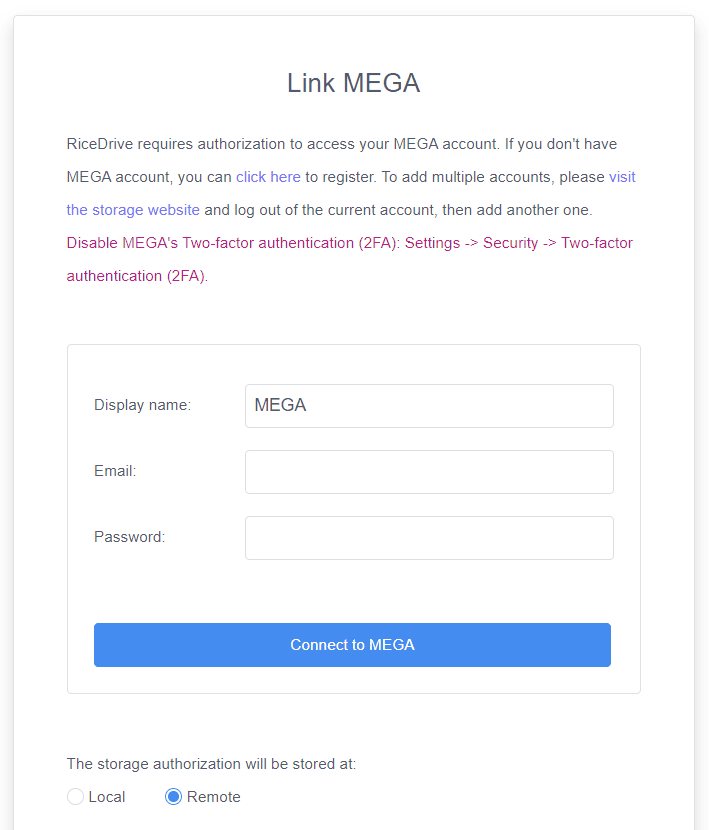
Click on "Link Storage" and list 30+ supported cloud drives like Google Drive, Google Photos, Dropbox, OneDrive, and Mega.nz. You can select your cloud drives to add them to RiceDrive.
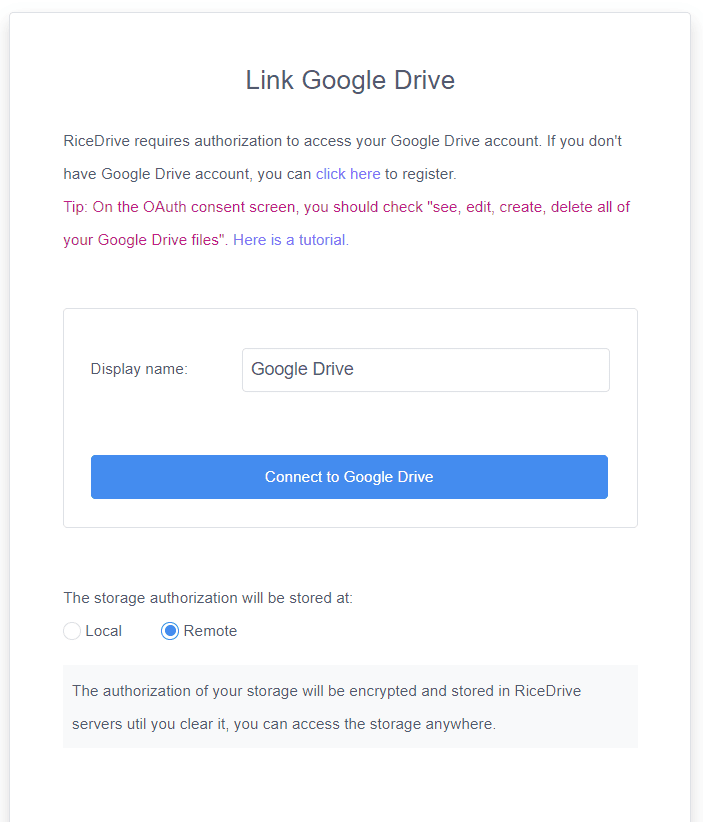
There are mainly three types of cloud drive authorization methods here:
-
OAuth2 Authorization - An open standard for authorization that allows users to grant limited access to their data/accounts on one site to another site without exposing their credentials.
This allows them to sign into external services using existing accounts with sites like Google Drive, Dropbox, OneDrive, Google Photos etc.
-
Password authorization - Refers to the process of authorizing access to a user account by entering the correct login credentials, typically a username/email and password combination.
This allows the user to grant access to their account resources to an application or service by directly providing their existing login information. Such as Mega.nz, Icedrive, OpenDrive, 4Shared, WebDav, SFTP, FTP etc.
-
Access authorization - Refers to authorizing an application or service to access a user's data or account resources without needing their login credentials.
Access Key ID and Secret Access Key can be created for certain applications in the account settings of cloud storage. Such as Amazon s3, Backblaze, IDrive e2, Wasabi etc.
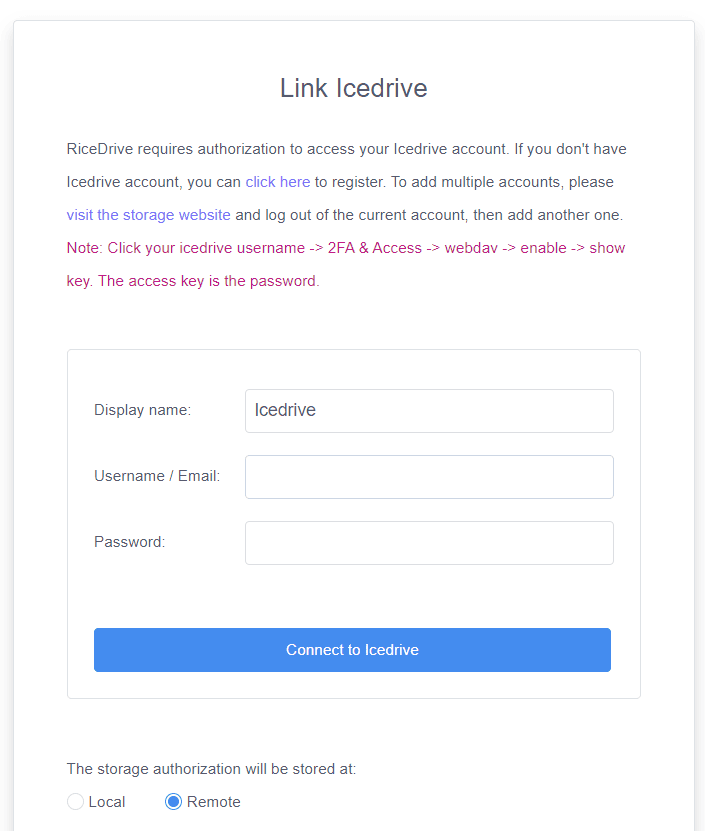
Note: Refer to the red text on the add interface for instructions on how to add these cloud drives.
-
When adding multiple accounts using OAuth2 Authorization, you need to log out of existing logged in accounts.
-
For Password Authorization, the password may not be the login password and needs to be set up on the account side.
-
Access Authorization needs to be created in your account management.
Manage My Drives
Click on "My Drives" and you can view the cloud drives that have been added. You can open these cloud drives and browse the files within the drives.
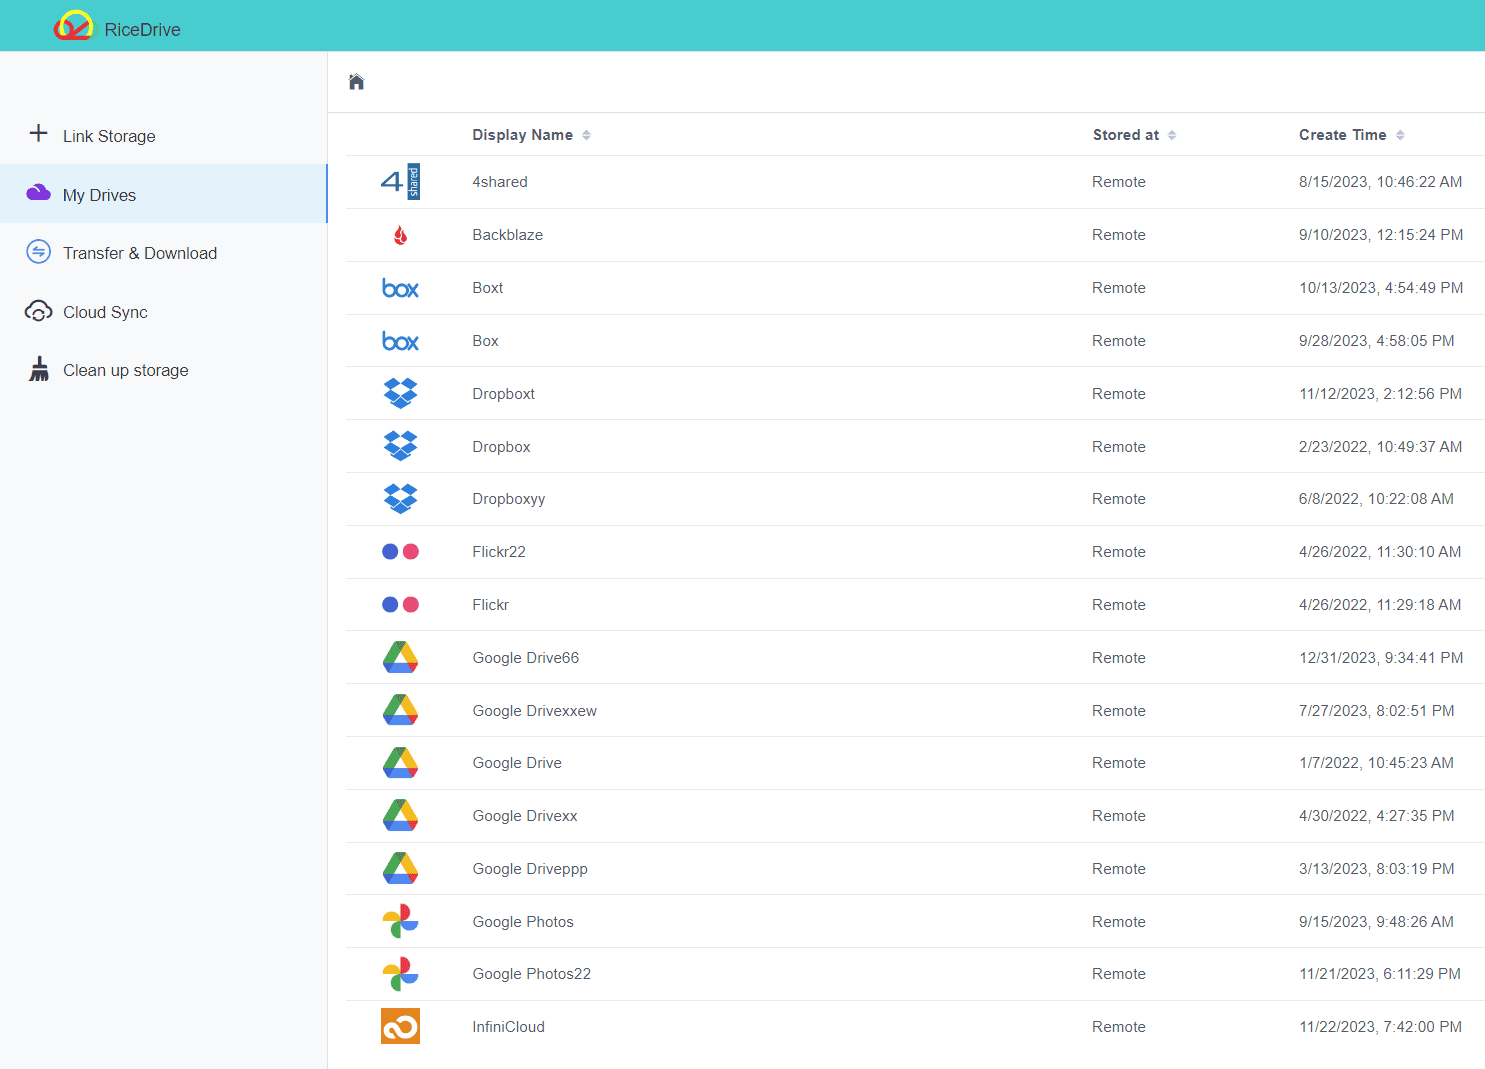
In "My Drives", the icons in the upper right can help you manage these cloud drives. You can remove or click Details to view the detailed information of the cloud drive. Open your cloud drive, you can manage these files, such as uploading, downloading, copying, moving, renaming, previewing images and PDFs, etc.
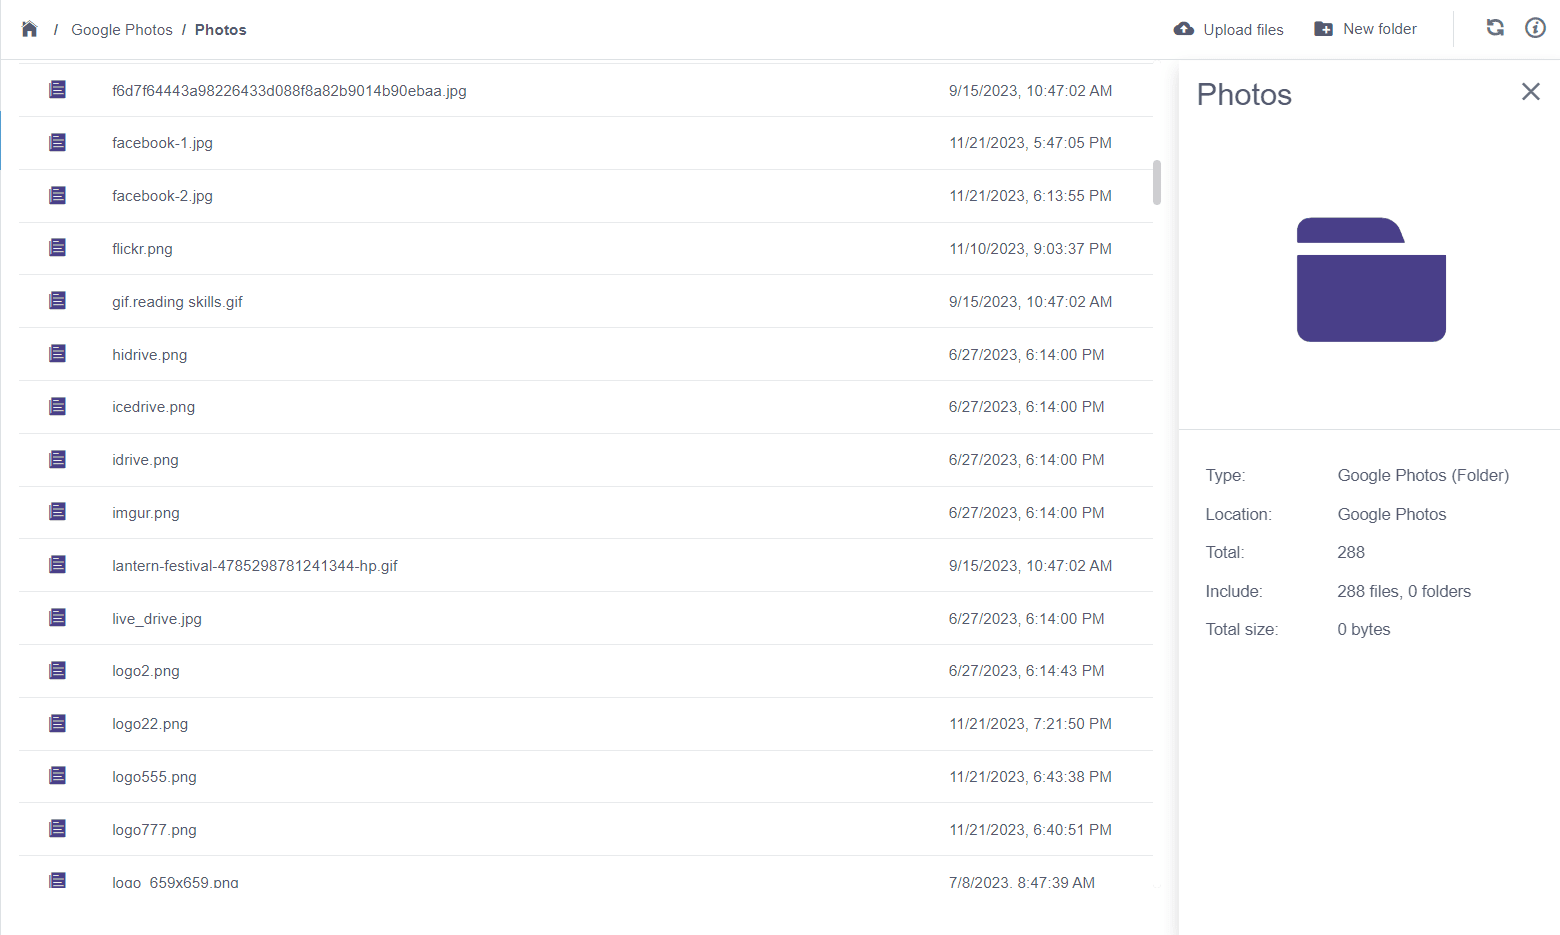
It is possible that not all files in the current directory are loaded here initially. You need to scroll to the bottom of the scroll bar to trigger loading the next page of files. (When transferring or synchronizing, all files will be transferred, not some).
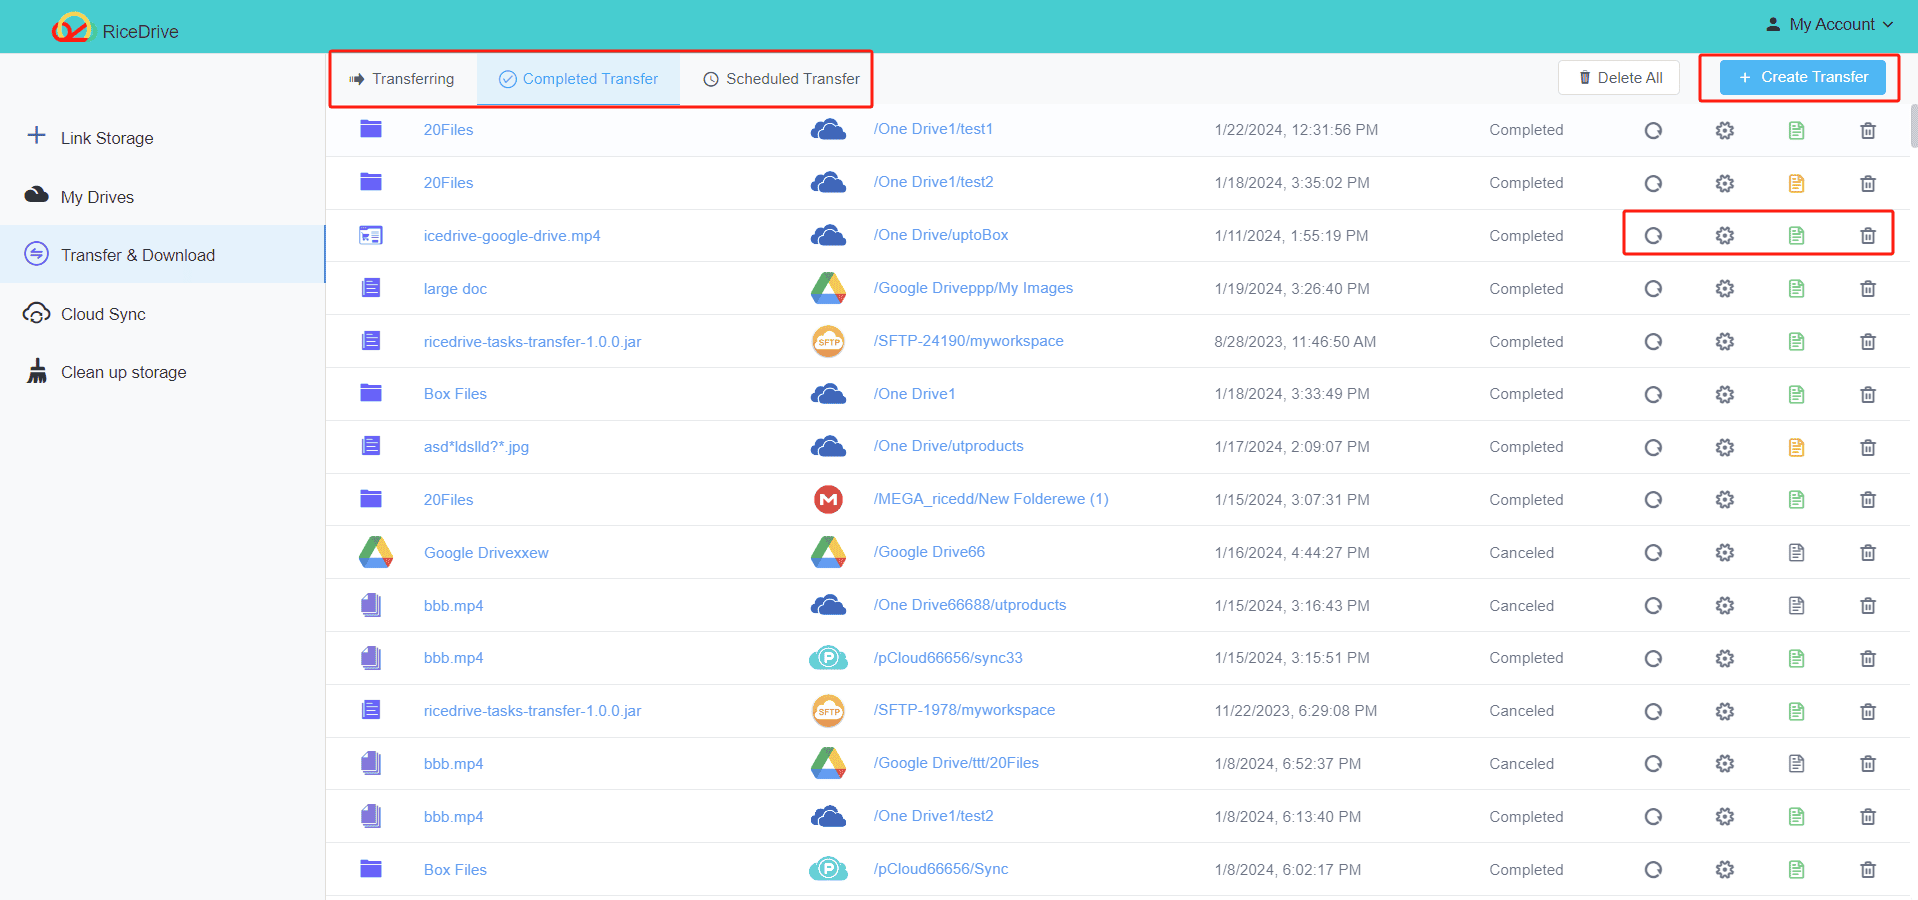
Cloud Transfer
Cloud Transfer are important features of RiceDrive. On your computer or phone, you can transfer, migrate, and backup files across different cloud drives. In addition, you can also directly download or save online images, videos, and music to your cloud drive.
On the Cloud Transfer interface, it will list out the Transferring, Completed Transfers, and Scheduled Transfers you have created. You can restart, delete, check the progress and logs of the tasks.
In the file list of the cloud drive, you can select the files you need to transfer, and then right-click with your mouse. In the opened menu, select "Transfer to" to quickly create a transfer task. The following are the detailed steps for creating a task:
-
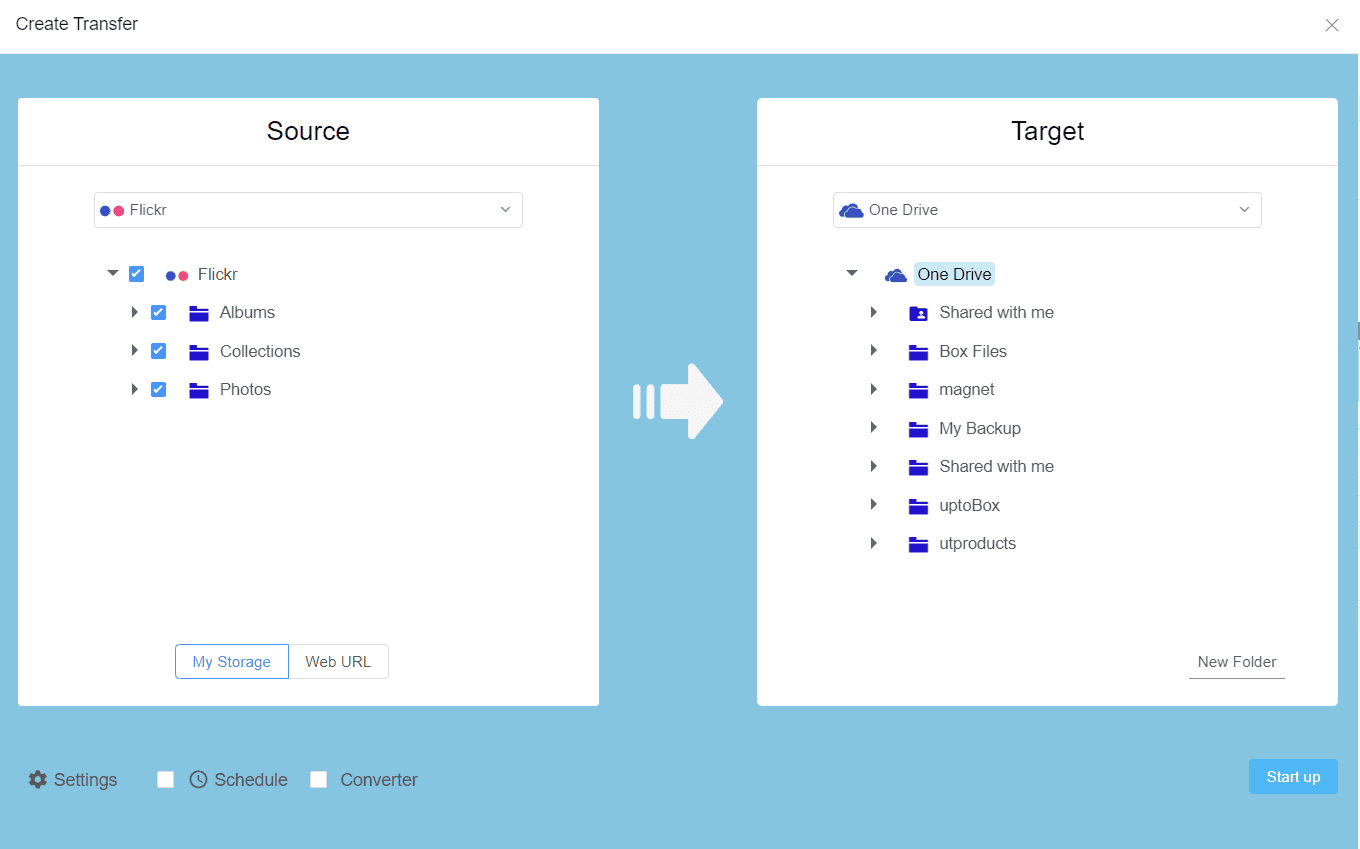
Click on Create Transfer, and there are two main sections in the pop-up interface: Source and Target.
-
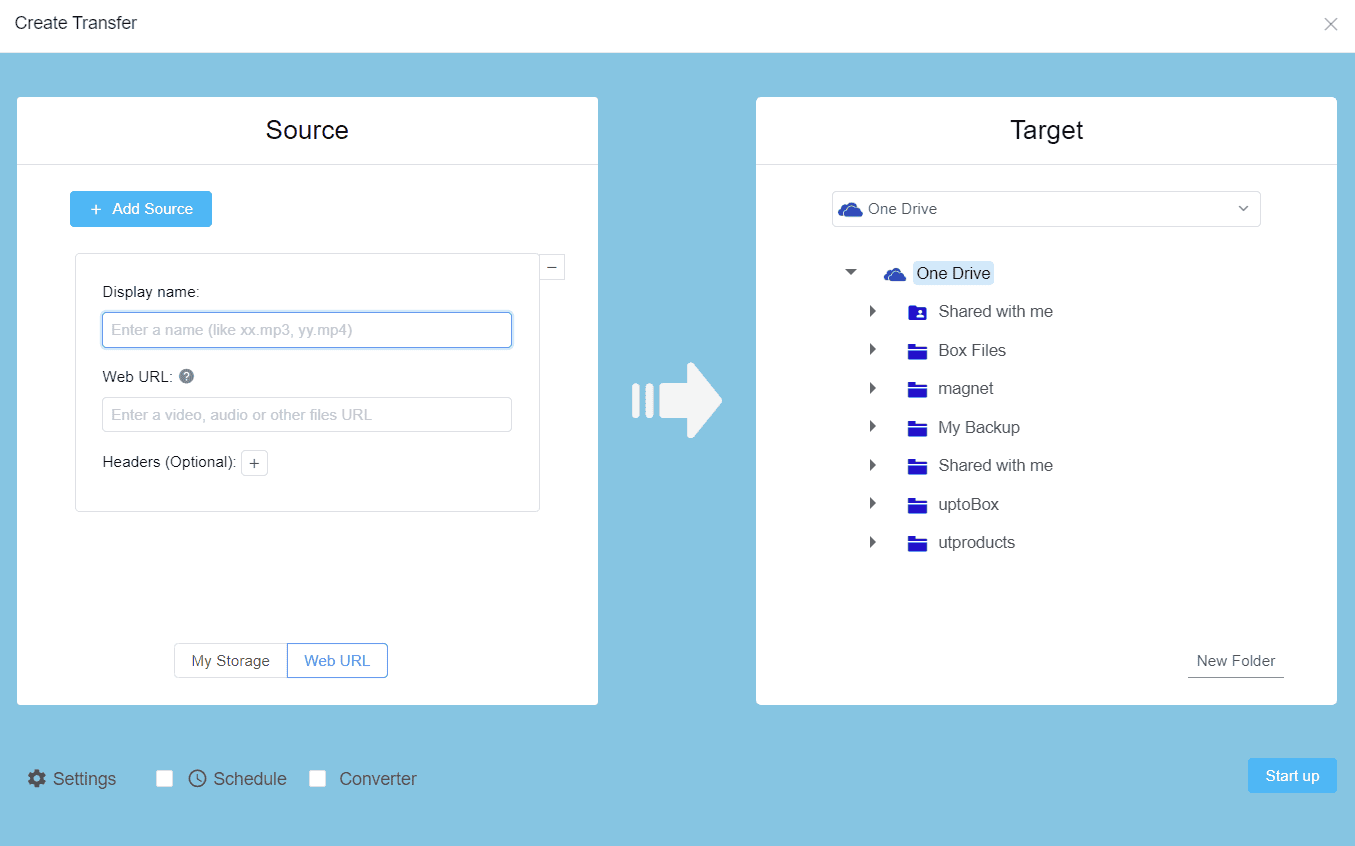
There are My Storage and Web Url in the source. If you need to transfer files from the cloud drive, select My Storage; If it is a network file, select the Web URL, but not all URLs can be transferred. Multiple WebURL files can be added at once for bulk download, view the article: Download Video from Any Website to Cloud Drive [2024 & Free].
-
Switch to your cloud drive and select the file you want to transfer as the source.
-
Switch to your cloud drive and select a folder as the target.
-
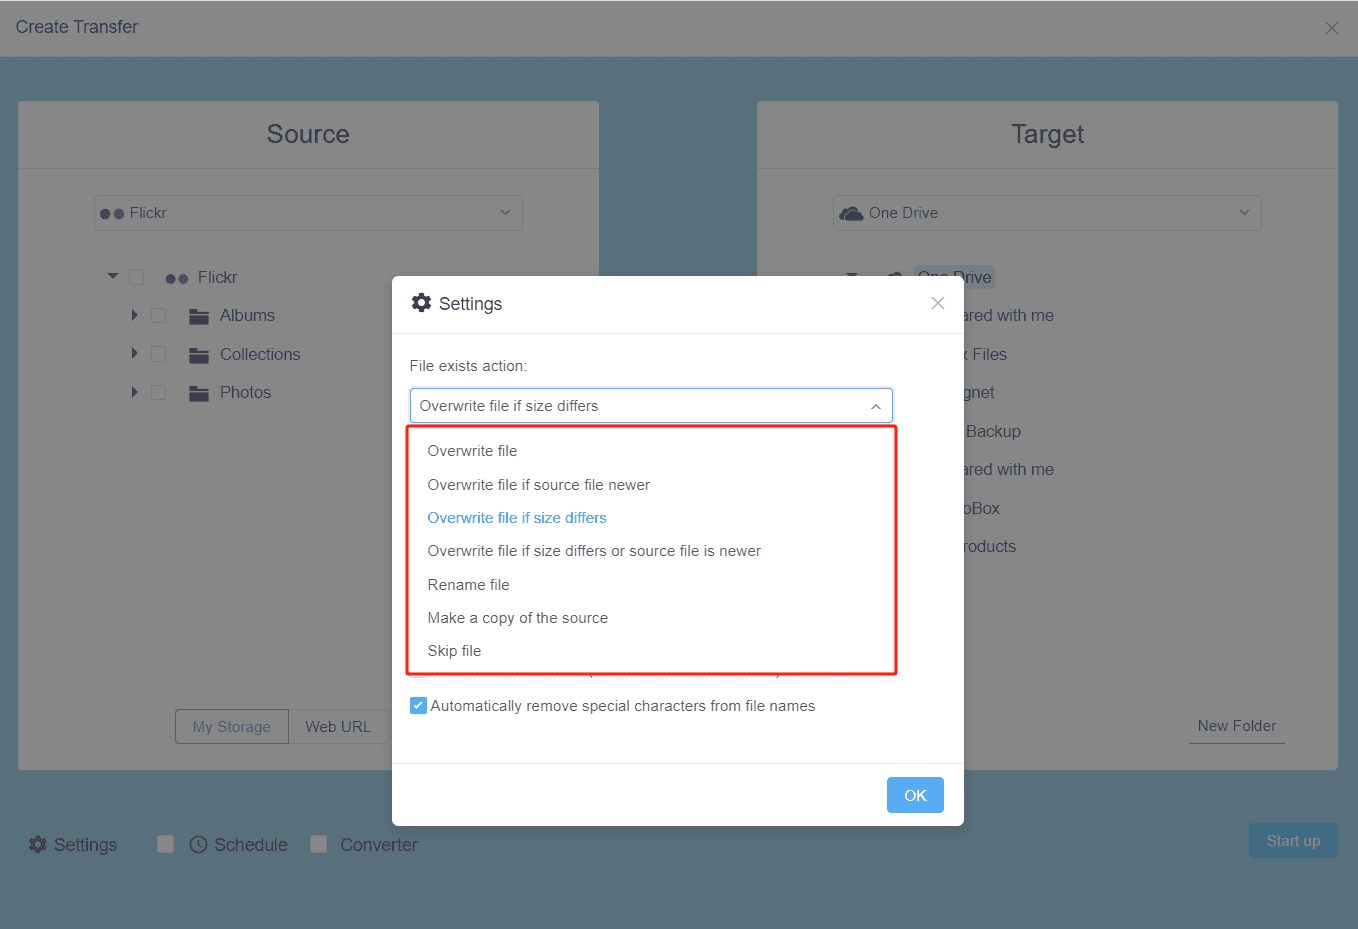
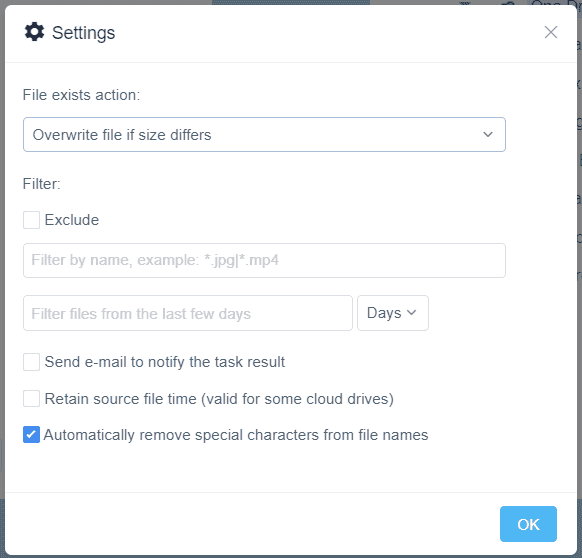
Under "Source", you can find the "Settings" button. After clicking it, you can configure the File exists action, filtering rules, email notification for results, preserve source timestamp, and auto remove special characters in filenames.
- File exists action: If the file already exists in the target folder, the system should handle it. If used incorrectly, it may cause all files to be re-transferred or duplicate files to appear. Try not to modify this item as much as possible.
-
Overwrite file - If the file already exists in the target folder, replace it directly.
-
Overwrite file if source file newer - Compare the modification time with source file, replace the updated source file, otherwise skip.
-
Overwrite file if size differs - Compare modification size with source file, replace if it is different, and skip if the size is the same (Defalt).
-
Overwrite file if size differs or source file is newer - Compare modification time and size with source file. Replace if source file is updated or size differs, otherwise skip.
-
Rename file - Compare size with source file. Rename if size differs, otherwise skip.
-
Make a copy of the source - If the selected transfer source already exists in the target folder, make a copy of the source (Used for backing up different versions).
-
Skip file - If the file already exists in the target folder, skip directly.
- File filter: Transfer or exclude some files based on their name or modification time. If used incorrectly, it can result in the folder being empty and no files being transferred.
-
Exclude - If checked, exclude files that meet the filtering criteria.
Filter by name - Filter files based on their names. "*" means any one or more characters, | means separates multiple matches. For example, *. png means transferring all png files.
Filter by time - Filter the files that need to be transferred based on the modification time. Select Days to transfer files in the last few days. Select Range to transfer files within the time range.
- Send e-mail to notify the task result: When the task is completed, the system will send the report to your email.
- Retain source file time: Keep the modification and creation time of the source file, but only support Google Drive, Google Photos, OneDrive, PCloud, etc
- Automatically remove special characters: If checked, the system will automatically remove special characters. Some cloud drives do not support special characters in file names, which can cause transfer failure during transfer. Special characters include:*|\"/:<>.
-
-
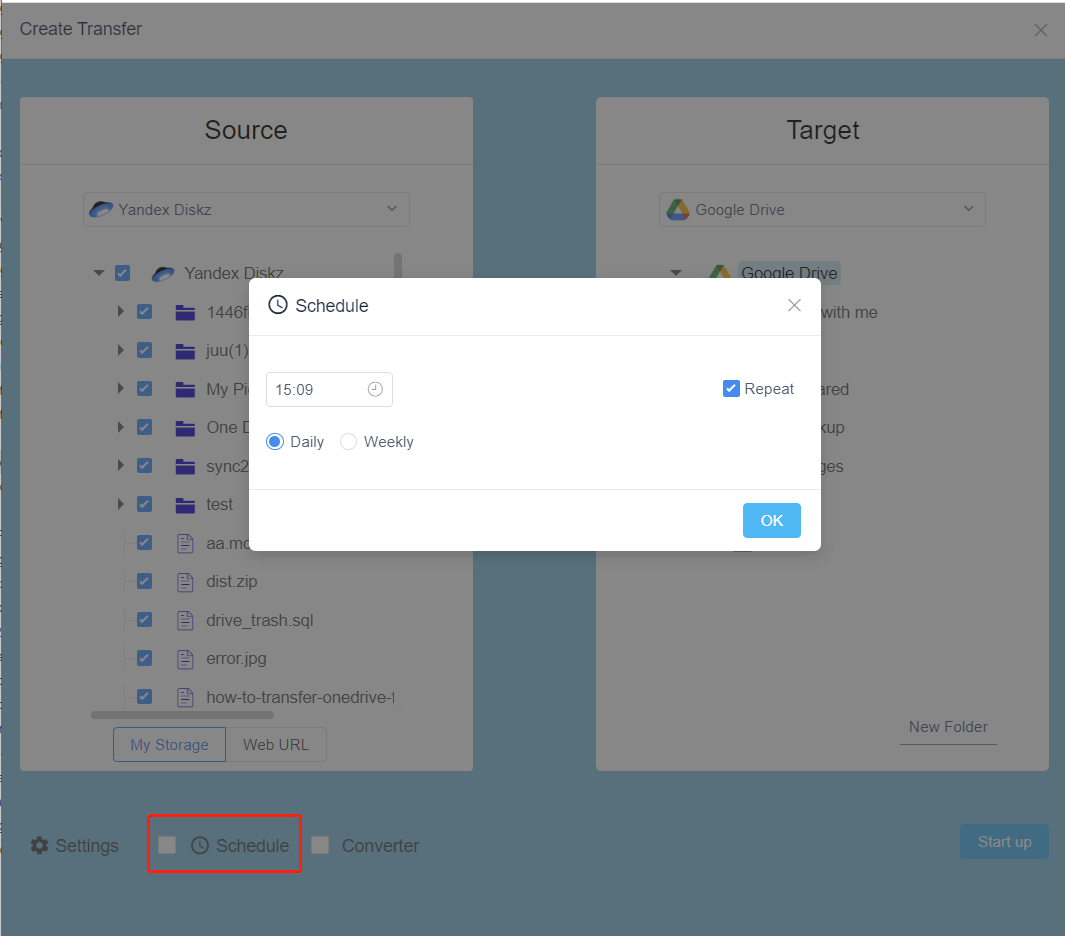
Click the schedule to specify a time for the task to run. Tasks can be set to run daily, weekly, and on specified dates. Used for backing up frequently modified files such as databases, SFTP, FTP, etc.
-
Clicking the Converter can convert PDF files in the source into JPG, DOC, or multiple PDFs.
-
If the task has been set, click Start up to start transferring files.
The Task Progress
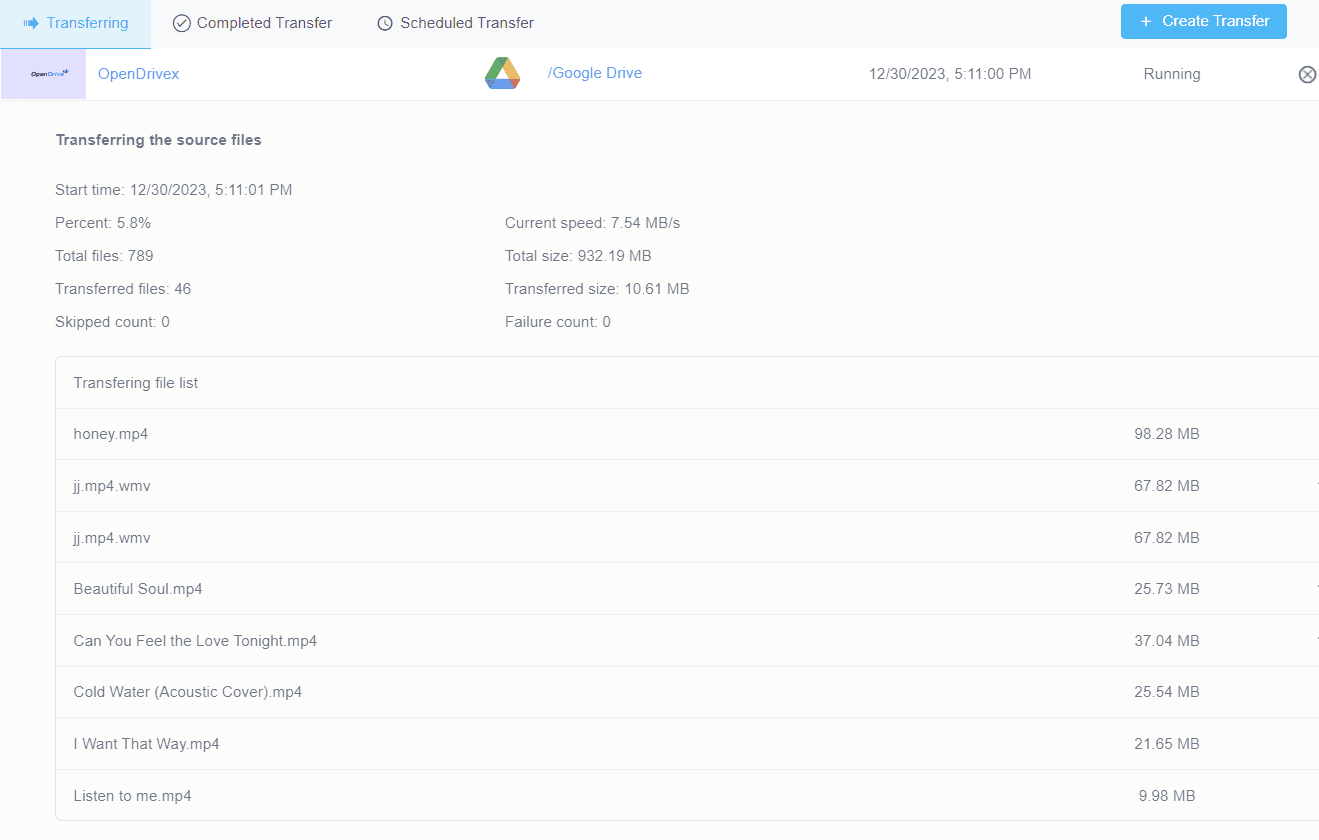
By clicking Transfer, you can view the transferring and pending tasks. Click cancel to abort the task.
In the transferring task progress, detailed information such as the total number of files, total file size, number of transferred files, and size of transferred files will be displayed in real-time. The progress of the files being transferred will be displayed in the transfer list.
The Task Log
After the task is completed, a log will be recorded. Click on the Logs icon of the task to view it. The task log will record the total number of files, total file size, number of transferred files, size of transferred files, number of skipped files, number of incorrect files, and reason for failed files.
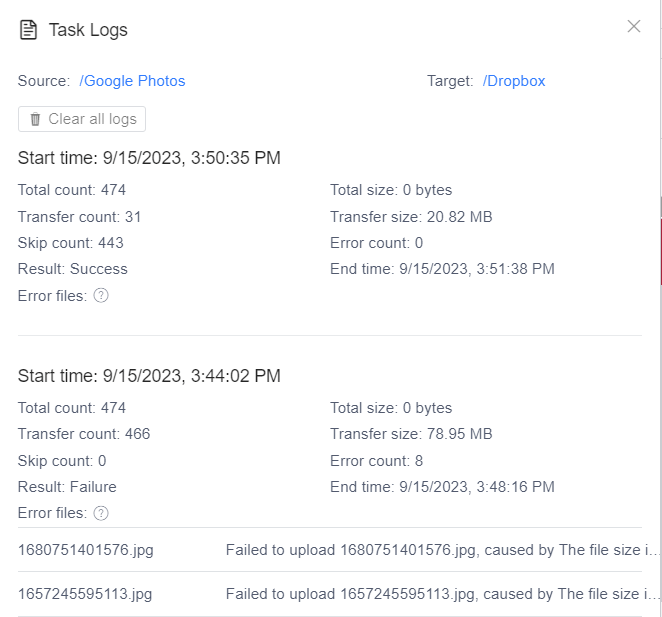
Task logs can help you check and analyze the status of files very well. If there are error files in the task log, you can click the Restart icon to restart the task. The system will search for and transfer these failed files, and successful files will not be transferred again. If the number of skipped files in the task log is equal to the total number, it means that all files have been transferred.
View this article to handle error files in tasks: How to Handle Error Files?.
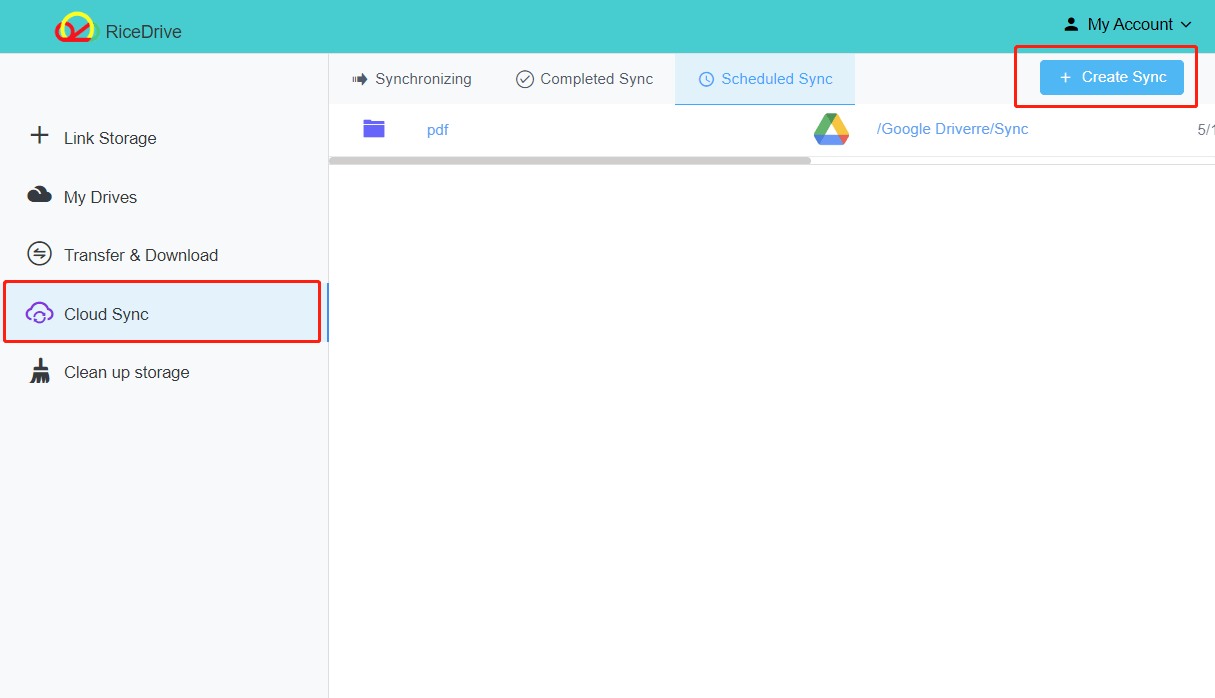
Cloud Sync
Cloud Sync and Cloud Transfer both transfer files between cloud storage. The key differences are:
-
Cloud Sync synchronizes the contents of a folder, transferring sub-files. Cloud Transfer moves the specific folder you select.
-
Cloud Sync supports basic sync, mirror sync, and two-way sync, with default conflict resolution set by the system. Cloud Transfer allows you to customize what happens if files exist in the destination.
-
Cloud Transfer's transfer speed is typically faster than Cloud Sync.
-
The reports for Cloud Sync and Cloud Transfer differ.
-
Two-way sync can delete files from the source location.
Before using cloud sync, you need to learn how this feature works. Otherwise, improper use can lead to data confusion in the destination folder. Beginners should use Cloud Transfer as much as possible instead of Cloud Sync.
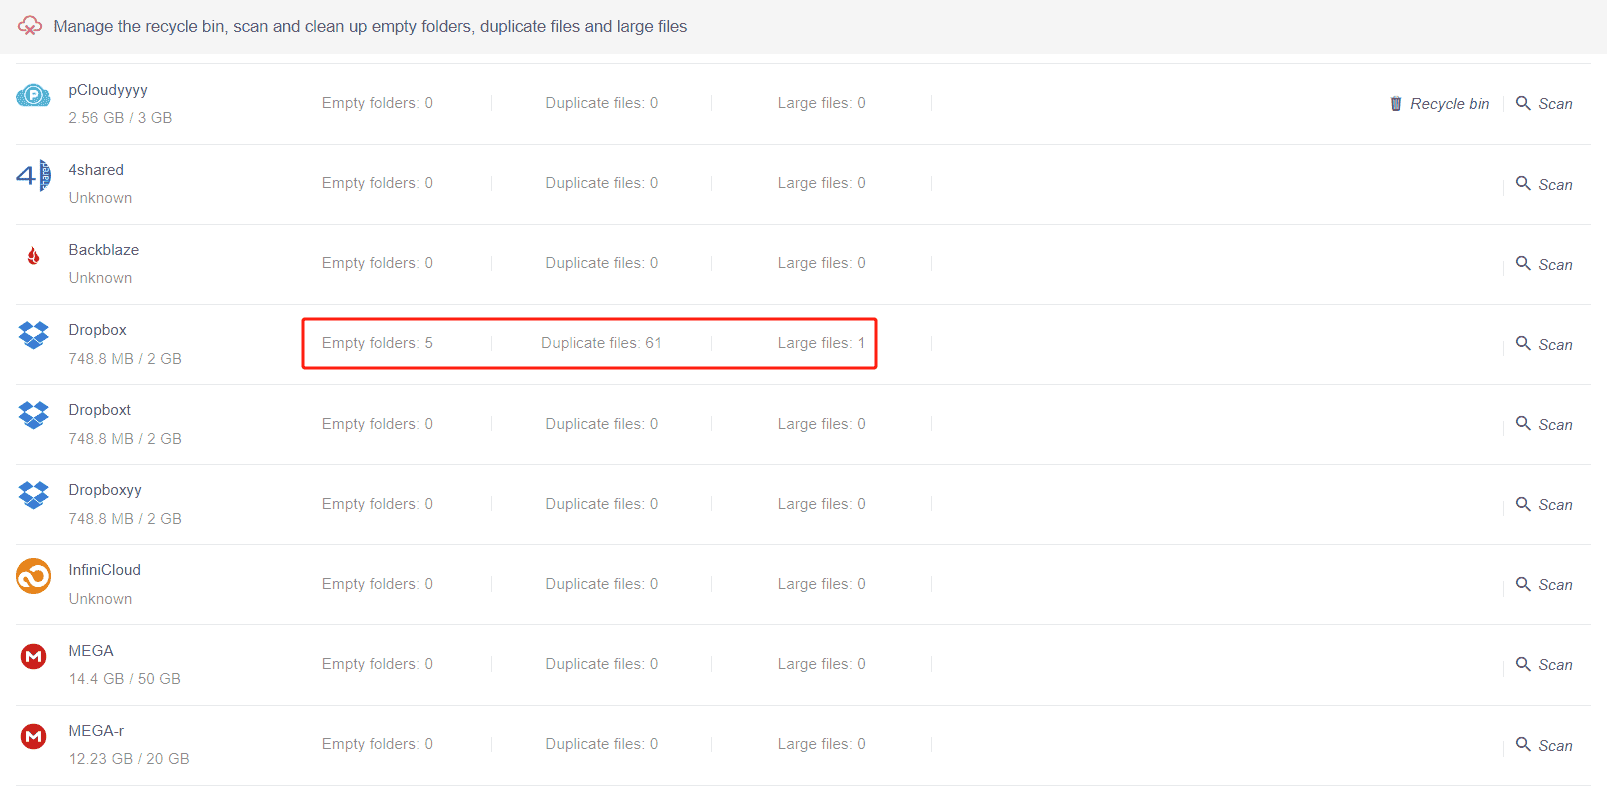
Clean up storage
Clean up storage is to identify empty folders, duplicate files, and larger files in the cloud drive to help you clean them up. You can also enter the recycle bin of some cloud drives to delete unnecessary files
The steps are as follows:
-
Click the Scan button of the cloud drive, and the system will scan your cloud drive.
-
After the scan is completed, the number of empty folders, duplicate files, and large files will be displayed.
-
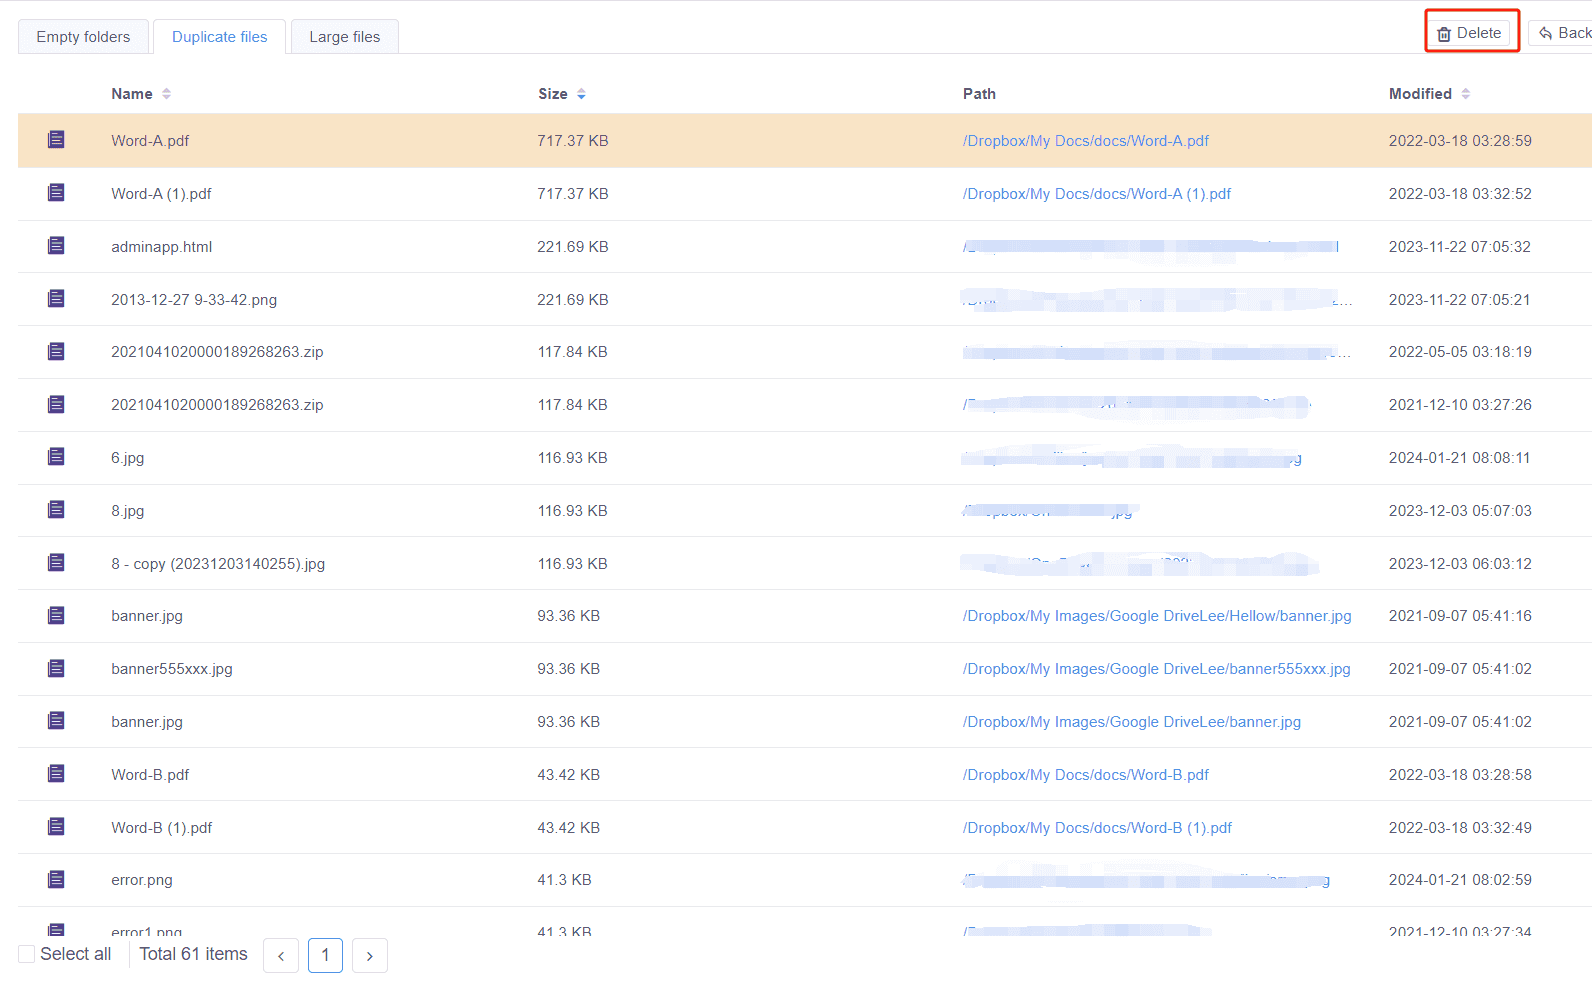
Click Empty Folders, Duplicate Files, and Large Files to view these files.
-
In the open file list, you can start deleting empty folders, duplicate files, or larger files. When deleting duplicate files, you cannot delete all files and need to choose to keep at least one file.
-
After processing these files, you can scan again to check.
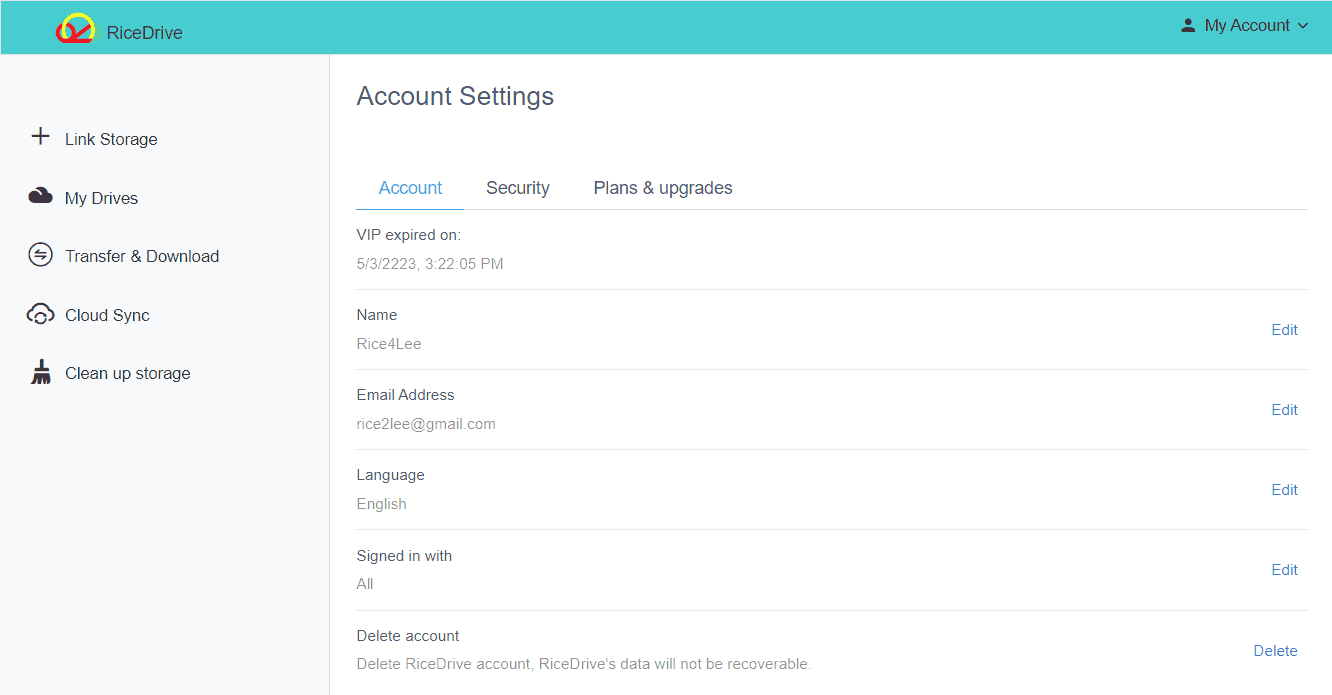
My Account
In My Account, you can manage your account (such as changing the language, upgrading the account, deleting the account, etc.), Contact US, View Guides, Exit Account, etc.
In Summary
With just a few clicks in RiceDrive, you gain tremendous flexibility over your fragmented cloud storage ecosystem. Follow the best practices in this guide to transfer, sync and manage files across platforms with ease. Reach out with any other questions!