Honestly, the first time I tried to move my PikPak library to Dropbox, I nearly gave up. Downloading hundreds of gigabytes of videos and archives to my laptop, then uploading them again – it ate up all my disk space, took days, and I kept losing track of what had already been transferred. There had to be a better way.
Then I discovered RiceDrive. It connects directly to PikPak via WebDAV and moves files to Dropbox in the cloud – my computer never even sees the data. In this guide, I’ll walk you through exactly how I did it, including the little tricks I learned along the way.
Why Move from PikPak to Dropbox?
PikPak is great for grabbing online resources quickly, but Dropbox shines when you need:
- Desktop sync – files automatically appear on your Windows or Mac without manual downloads.
- Easy sharing – generate links or invite collaborators, which works better for team projects.
- Centralized file management – keep everything in one place alongside your work documents and photos.
- Cross‑device access – mobile, tablet, web – Dropbox just works everywhere.
- Extra backup – having a second copy on Dropbox adds peace of mind if anything happens to your PikPak account.
If you only store a few movies, maybe it’s not worth the effort. But if your PikPak is packed with important data, migrating to Dropbox will save you headaches in the long run.
What Is RiceDrive? A Smarter Cloud Transfer Tool
RiceDrive is a web‑based multi‑cloud manager that connects various storage services and remote file systems – including WebDAV – into one dashboard. For this migration, we just need to add PikPak via WebDAV and authorize Dropbox as the destination. Everything else happens automatically.
Why I Like RiceDrive (and You Will Too)
- No local download – zero storage used on your computer.
- Background processing – start the task, close the browser, and come back later.
- Selective sync – choose specific folders or even filter by file type.
- Scheduled runs – set it to run at night to avoid peak traffic.
- Smart duplicate handling – skip, rename, or overwrite as you prefer.
- Detailed logs – every success, failure, and skip is recorded for easy troubleshooting.
Pre‑migration Checklist (Get This Right First)
You’ll need:
- A RiceDrive account (free to sign up).
- A PikPak account with WebDAV enabled (most paid plans support it).
- The WebDAV host URL, username, and password generated by PikPak (not your regular login password).
- A Dropbox account with enough free space for the data you plan to move.
- Read access to all PikPak folders you want to transfer.
Step‑by‑Step: Migrate PikPak to Dropbox with RiceDrive
Step 1: Sign Up for RiceDrive
Go to RiceDrive.com, create an account, and log in to the dashboard. It looks like a file manager – very intuitive.

Step 2: Enable WebDAV in PikPak
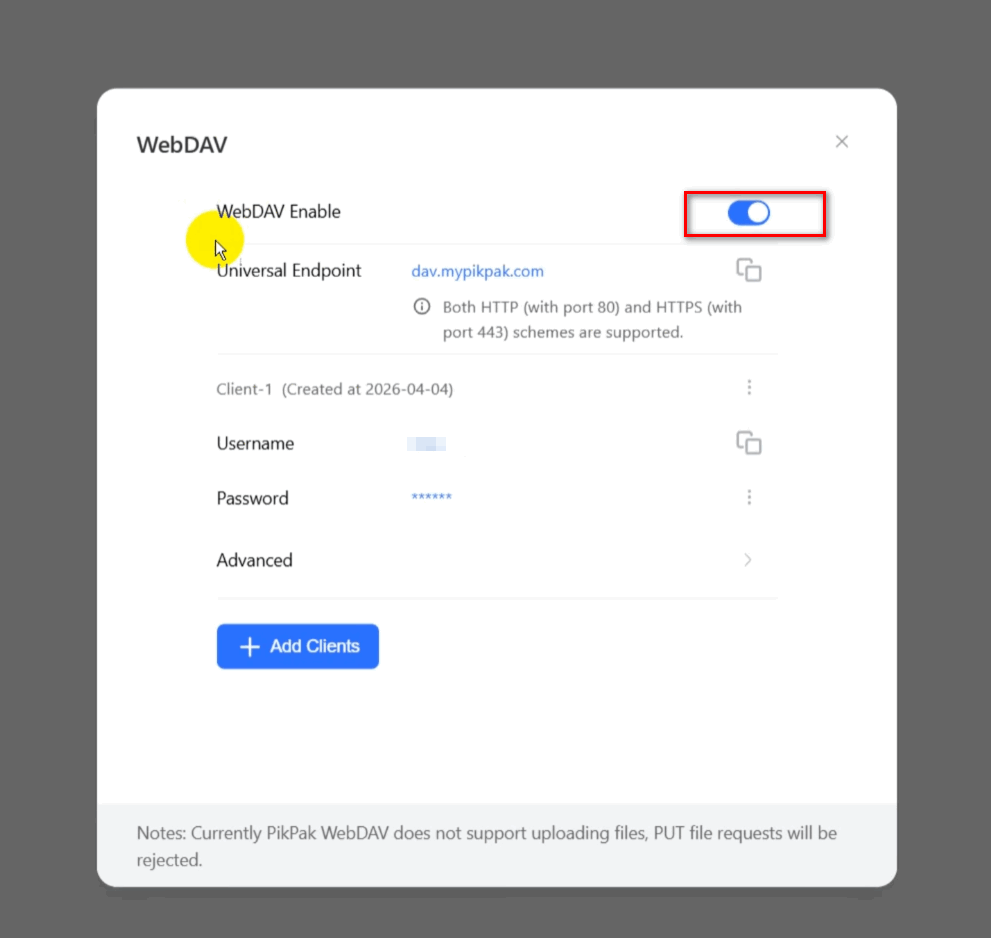
Log in to PikPak web, go to Settings → Experimental
Features, and turn on WebDAV. You’ll see a host address (e.g.,
https://dav.mypikpak.com/), a username, and a generated
password. Copy all three and save them somewhere safe.
Step 3: Connect PikPak and Dropbox to RiceDrive
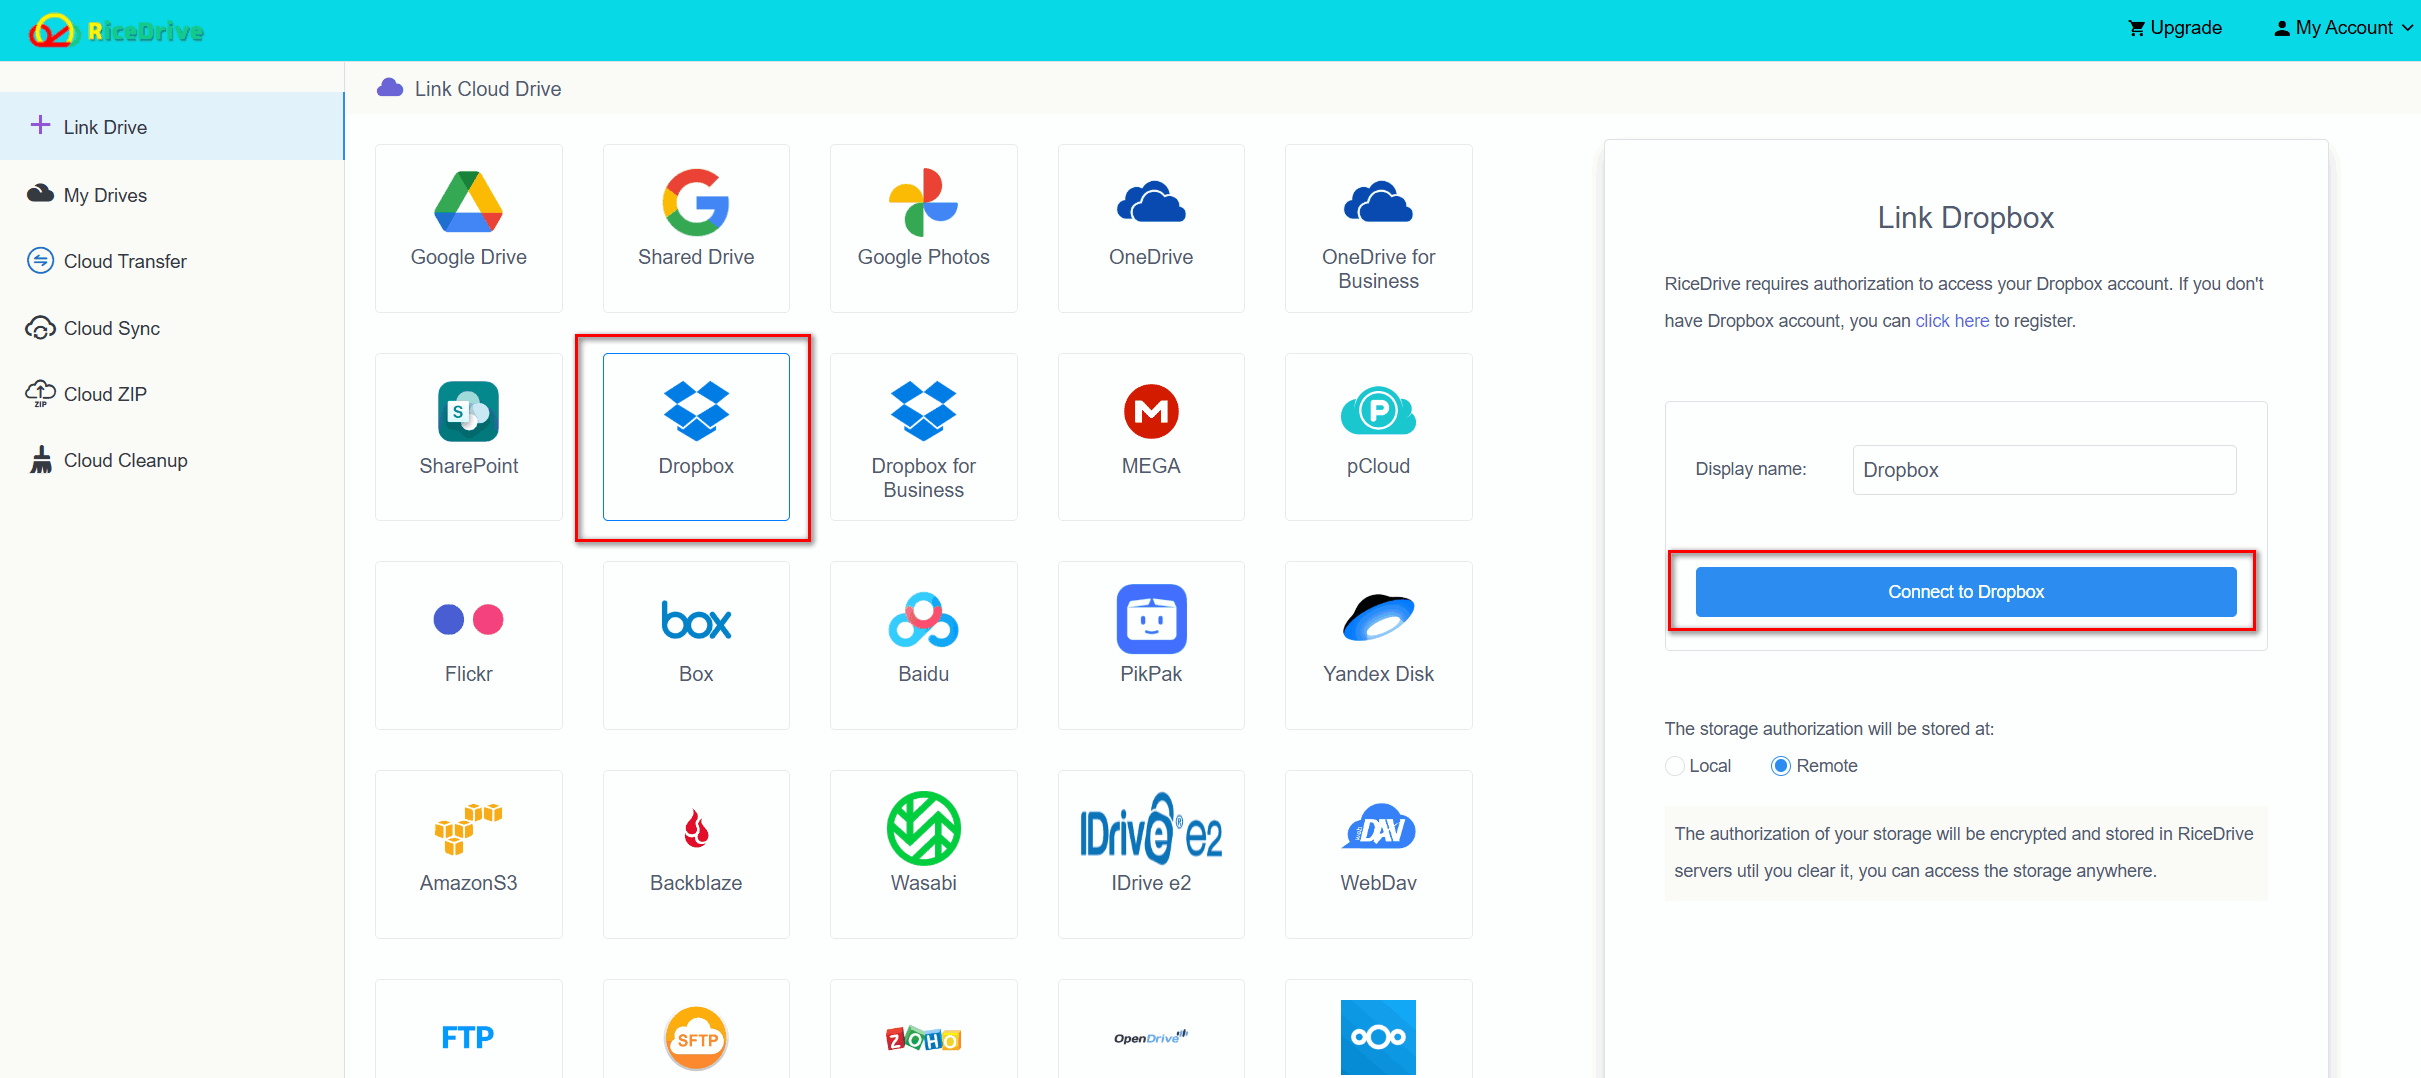
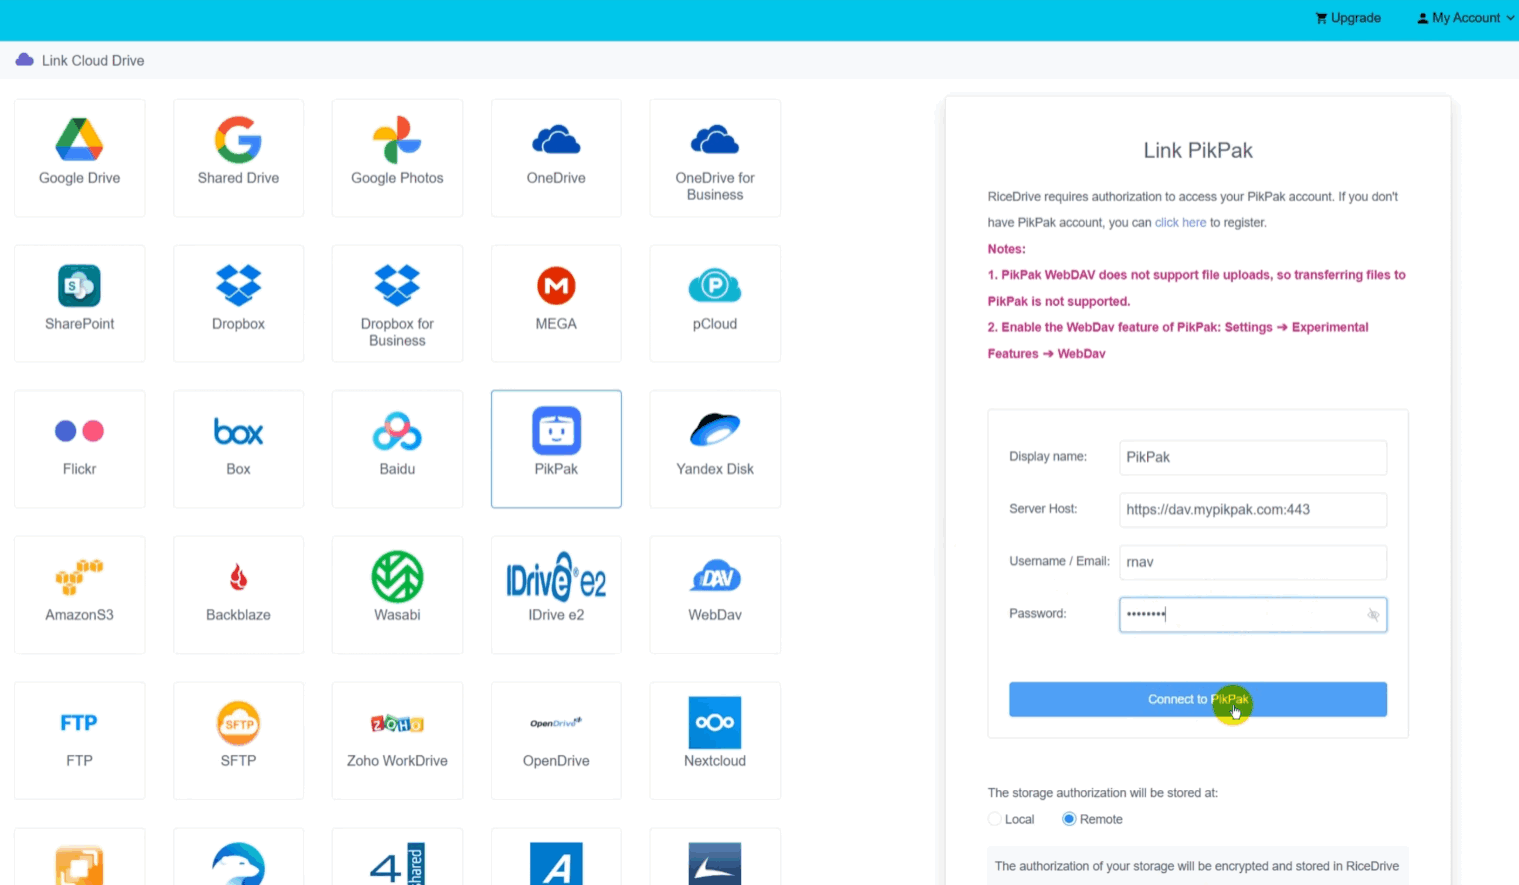
In RiceDrive, click “Link Drive” (or “Connect Cloud”). Choose WebDAV, fill in the host, username, and password you just copied. Once connected, PikPak appears in your drive list.
Then click “Link Drive” again, choose Dropbox, and authorize RiceDrive to access your Dropbox (it only reads/writes files you explicitly select). Now both clouds are ready.
Step 4: Create a Cloud Transfer Task
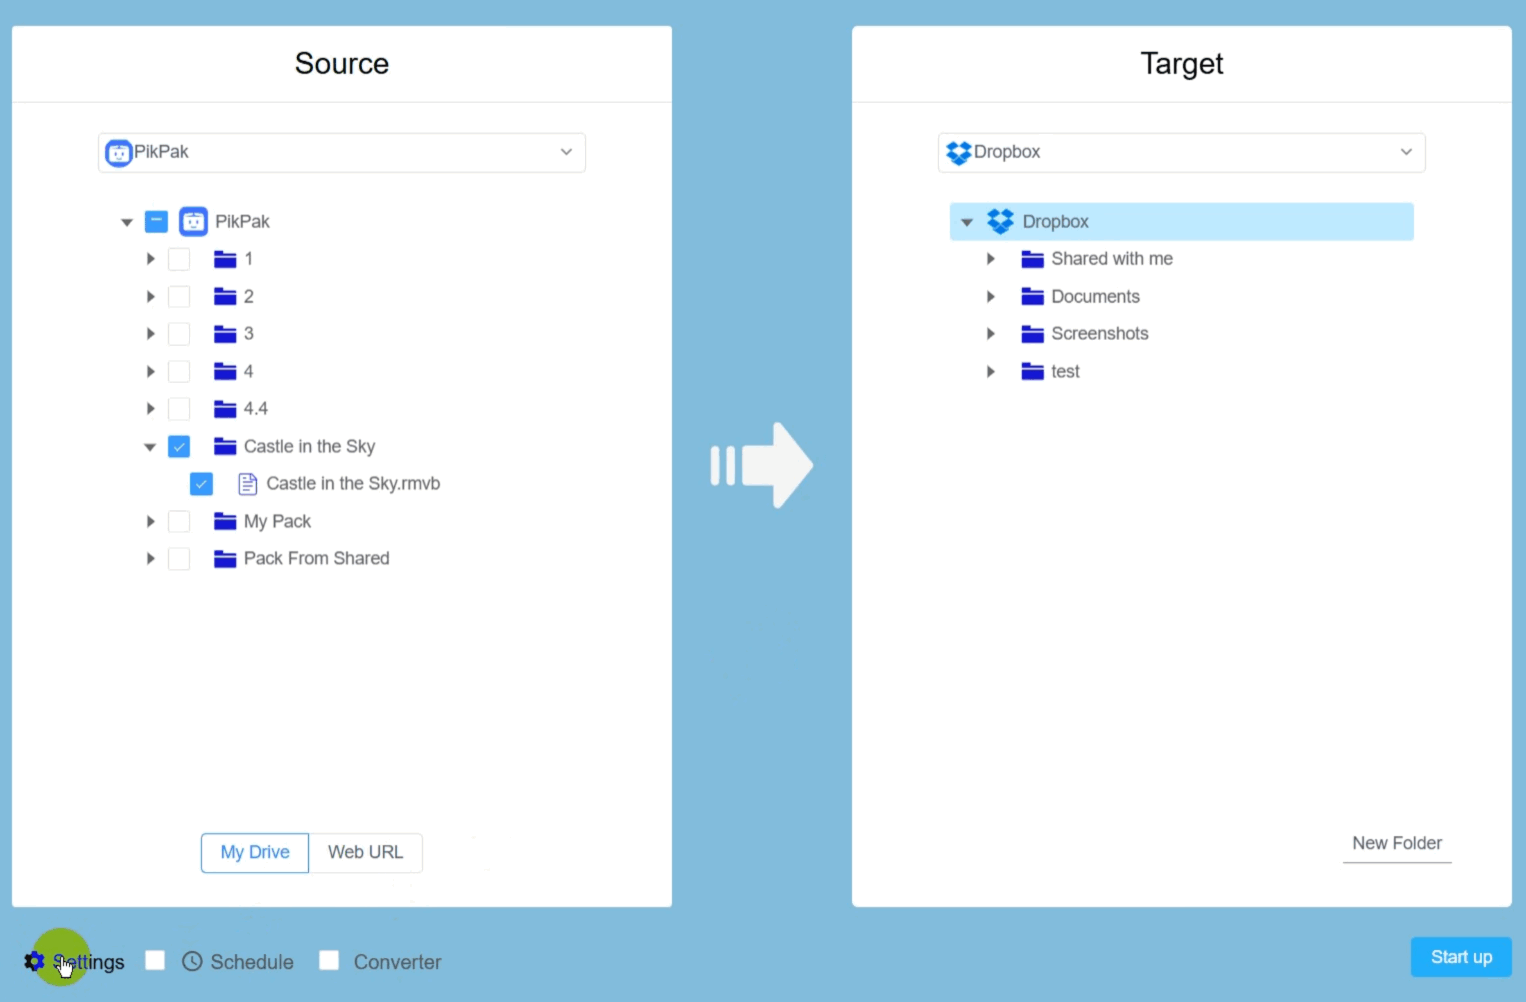
Go to Cloud Transfer → New Task. Pick PikPak as the source,
browse and select the folders/files you want. For the destination, choose Dropbox and
specify a target folder, e.g., /PikPak_Backup/.
Step 5: Configure Transfer Options
Here’s where you can fine‑tune:
- Schedule – run now or later.
- File filters – include only
.mp4,.mkv, etc. - Duplicate handling – I recommend “skip” or “rename” for the first run to avoid accidental overwrites.
- Incremental sync – if you run it again later, only new/changed files will be copied.
I personally use “skip duplicates” to keep things clean, then manually delete extras afterward.
Step 6: Start the Migration
Double‑check that the source is PikPak and destination is Dropbox, then hit “Start”. The task will queue and begin processing. You can close your browser – the transfer continues on RiceDrive’s servers.
Step 7: Review Logs and Verify in Dropbox
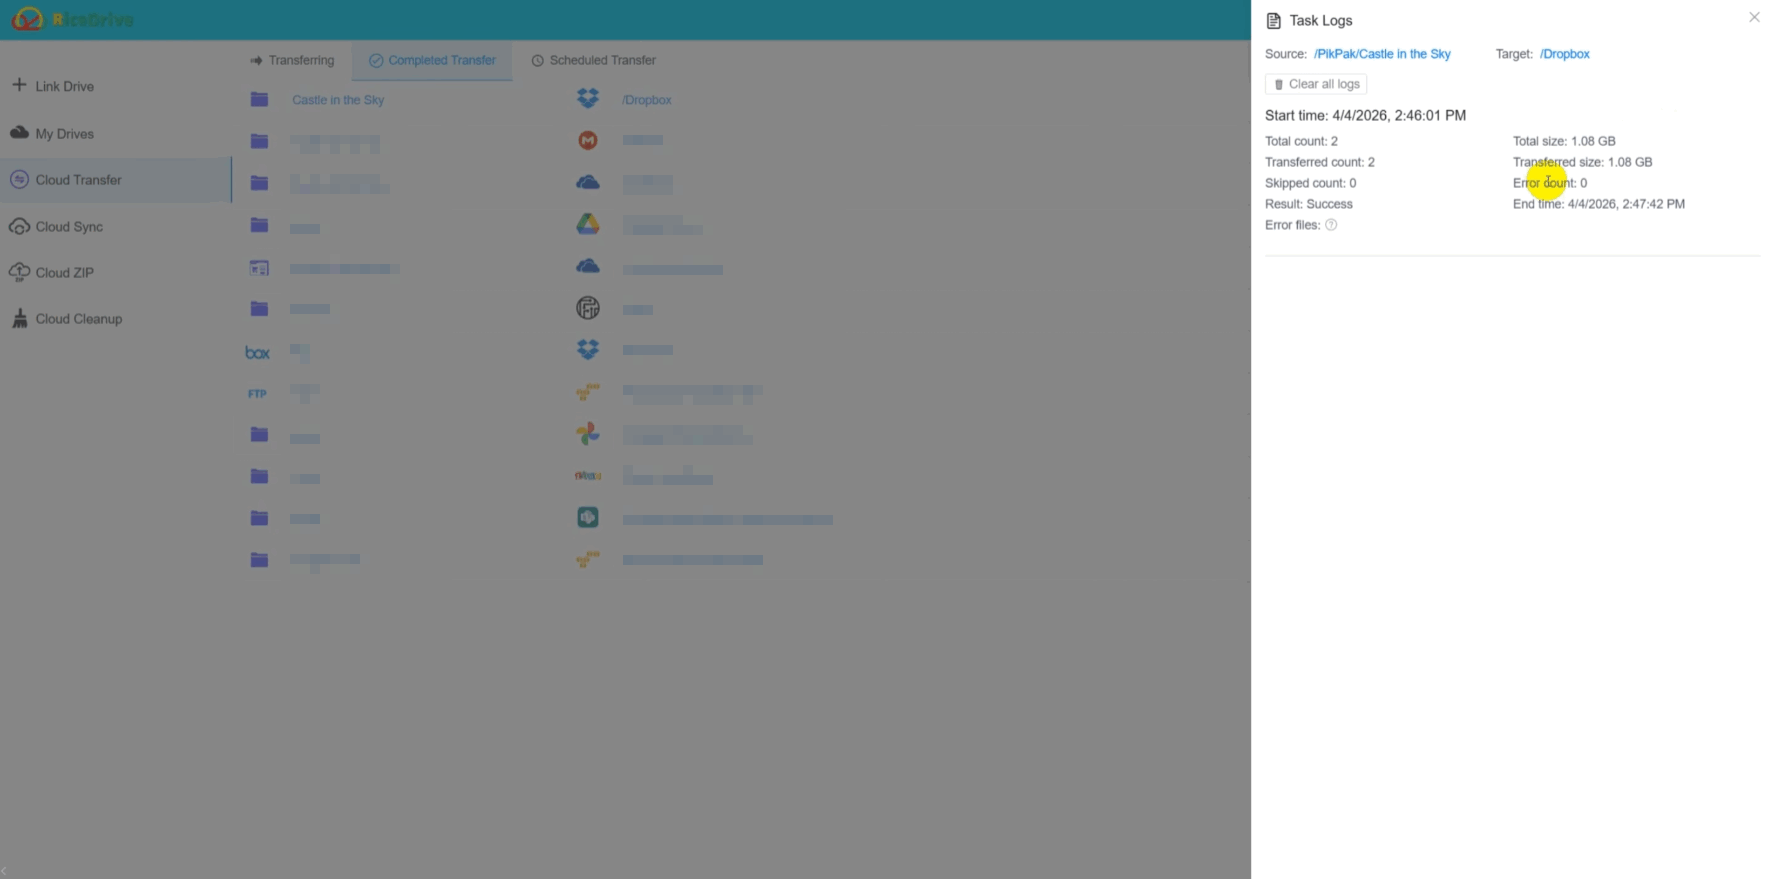
When the task finishes (you’ll get an email or notification), go back to RiceDrive and check the task log. Pay special attention to failures and skips. Then open Dropbox, navigate to your target folder, and spot‑check a few files – play a video, open a document – to ensure everything is intact.
Alternative: Manual Download & Upload (Free but Tedious)
If you have only a handful of small files, the old‑school way might work:
- Download the files from PikPak to your computer.
- Wait for all downloads to finish and verify integrity.
- Upload them to Dropbox via the web or desktop app.
Drawbacks: You need twice the bandwidth, local disk space, and manual monitoring. For anything over 50GB, I strongly recommend the RiceDrive method – it’s far less painful.
RiceDrive vs. Manual Transfer – At a Glance
| Feature | RiceDrive | Manual (Download + Upload) |
|---|---|---|
| Local download needed? | No | Yes |
| Local storage required | Virtually none | Full data size |
| Double bandwidth usage | No | Yes |
| Background processing (close browser) | Yes | No |
| Scheduled tasks | Supported | No |
| Detailed transfer logs | Yes | Limited |
| Good for large data | Excellent | Painful |
| Requires PikPak WebDAV | Yes | No |
Dropbox Limits You Shouldn’t Ignore
Dropbox has some hard caps. Knowing them upfront saves you from failed transfers:
| Limit | What to Check |
|---|---|
| Storage quota | Make sure your remaining Dropbox space ≥ total data to migrate. |
| Individual file size | Dropbox web upload limit is 50GB (API may allow larger, but keep under 20GB to be safe). |
| Path length | Total path (including filename) must be ≤ 255 characters (Windows restriction). Shorten deep folders if needed. |
| Illegal characters | Avoid / \ : * ? " < > | and control characters. |
| Trailing spaces or dots | Filenames ending with a space or dot will be rejected – rename them first. |
| Duplicate names | Set your handling rule (skip/rename/replace) wisely. |
Also note: only the actual files are copied. PikPak‑specific metadata like download history, share links, or playback progress won’t transfer.
Common Issues and How I Fixed Them
Can’t connect to PikPak
Mostly because I accidentally copied a trailing space, or used my main password instead of the WebDAV one. Regenerate and paste carefully.
Some folders don’t show up in RiceDrive
WebDAV sometimes struggles with special characters. Try renaming the folder to plain English or numbers, then refresh the connection.
Dropbox runs out of space mid‑transfer
Delete unneeded files, upgrade, or split the migration into smaller batches. The log will tell you which files failed due to quota.
Files fail because of invalid names
Check the error log – it lists the exact filenames. Rename them in PikPak and retry only those items.
Transfer is painfully slow
If you have thousands of tiny files (e.g., photos), consider zipping them first. Large files move faster per gigabyte.
Task finished but file count doesn’t match
Check the “skipped” list – duplicates are often skipped. If some are truly missing, create a new task just for those.
Frequently Asked Questions
Conclusion: Stop Downloading, Start Moving
If you’re tired of the download‑upload grind, RiceDrive is the solution I wish I’d found years ago. It’s simple, fast, and doesn’t tie up your computer.
My final advice: Test with a small folder first, watch out for Dropbox’s filename and space limits, and always review the logs after completion. Once you’ve verified everything, you can safely clean up your PikPak.
🚀 Ready to move your PikPak to Dropbox?
Start Your Free Migration →10GB free · No download · Background cloud transfer