When using Box and OneDrive, it may be necessary to switch from Box to OneDrive due to business, price, or functionality requirements. In this case, we need to transfer Box data to OneDrive. Below, I will introduce two methods to help you quickly migrate files from Box to OneDrive.
Method 1: Migrating files from Box to OneDrive via upload and download
-
Open the Box official website and log in to your Box account.
-
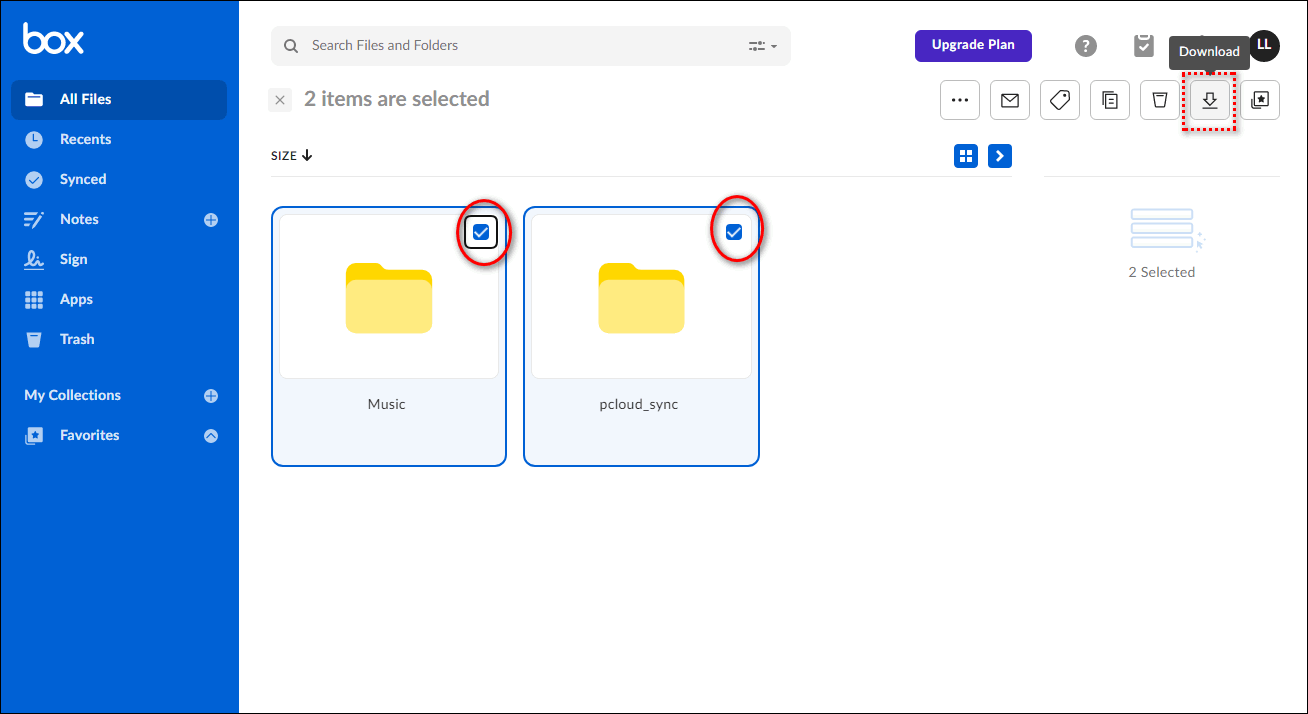
Select the files or folders that you want to migrate to OneDrive, and click the download button to download them to your local disk.
-
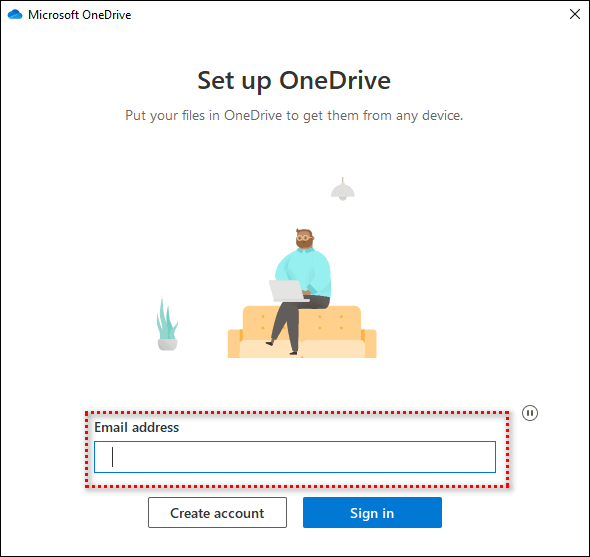
Download the OneDrive client. If you are using Windows 10 or later, you do not need to download it because the OneDrive desktop app is already built into the system. For Windows systems older than 10, you need to download the OneDrive client manually. After installing the client, log in to your OneDrive account and set the local folder path for OneDrive.

-
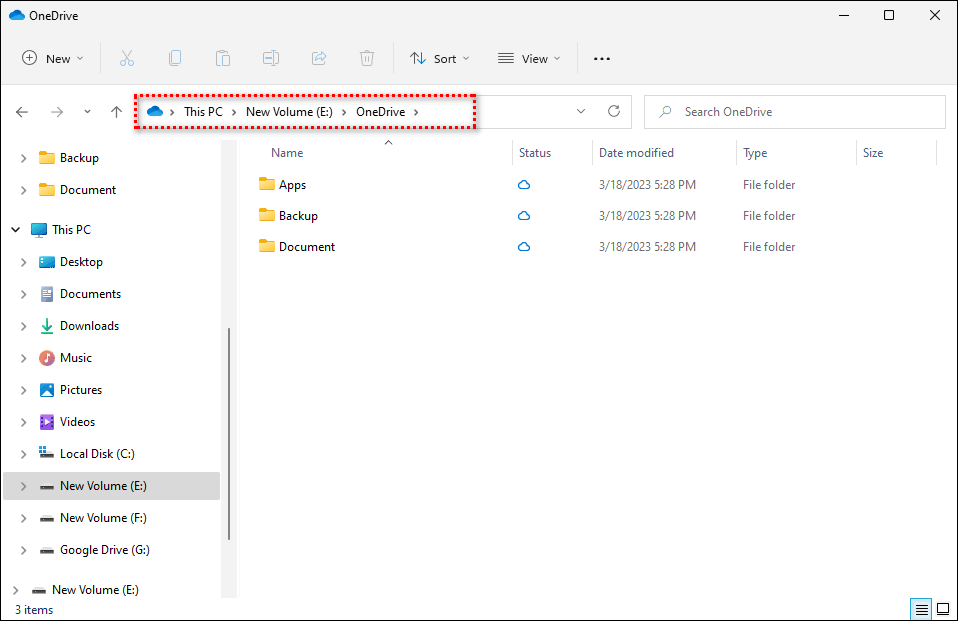
Copy and paste the Box files/folders that you want to sync into the OneDrive folder. The client will automatically sync them to the OneDrive website.
Method 1: Migrating files from Box to OneDrive via upload and download
RiceDrive is a cloud storage manager that can manage over 30+ cloud storages. It can transfer data from any cloud storage to any other cloud storage, and it supports scheduled transfer to help you better sync your cloud storage data incrementally.
-
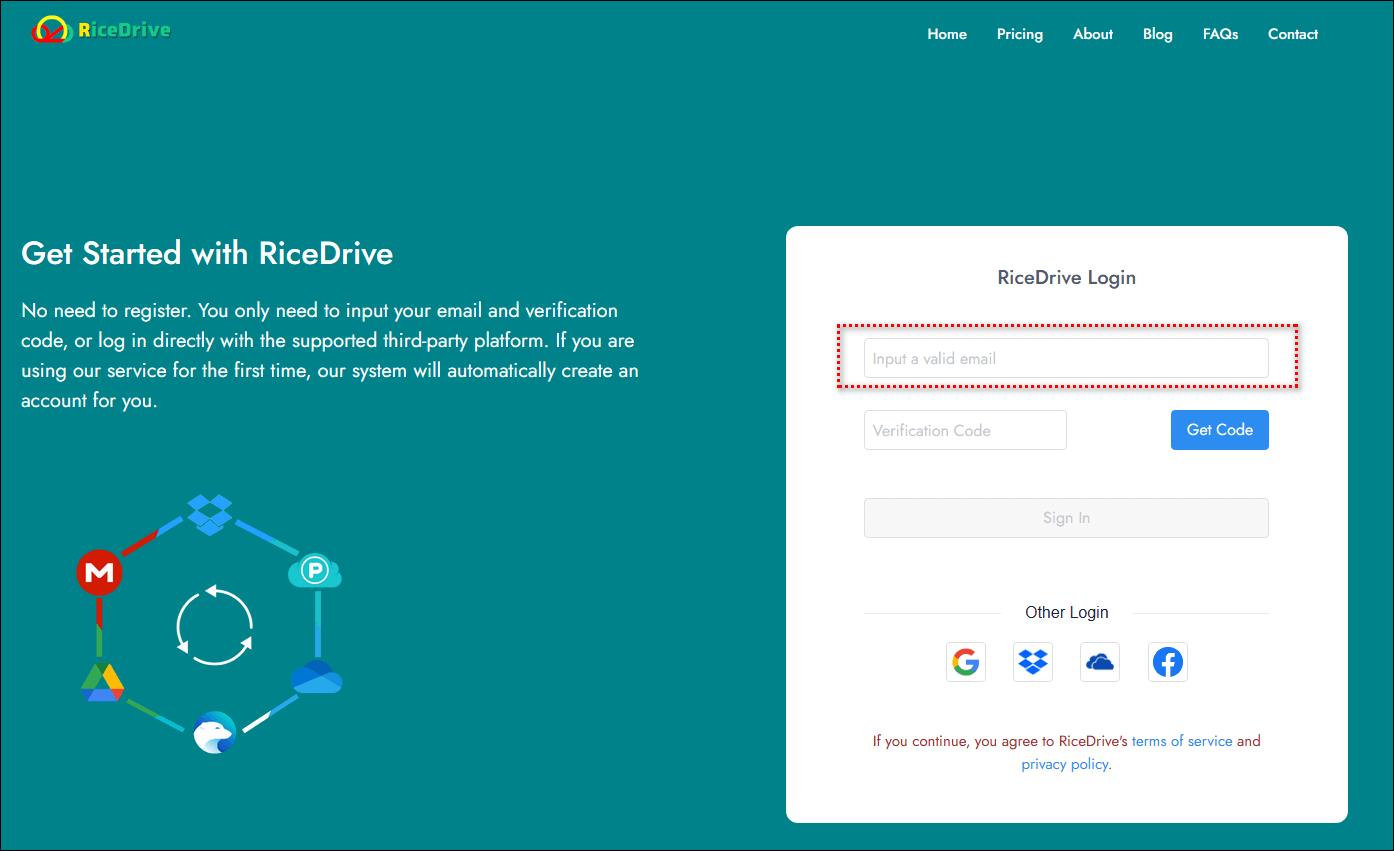
Open the RiceDrive official website and login to RiceDrive. Enter your email address in the email input box and accept a verification code to log in.
-
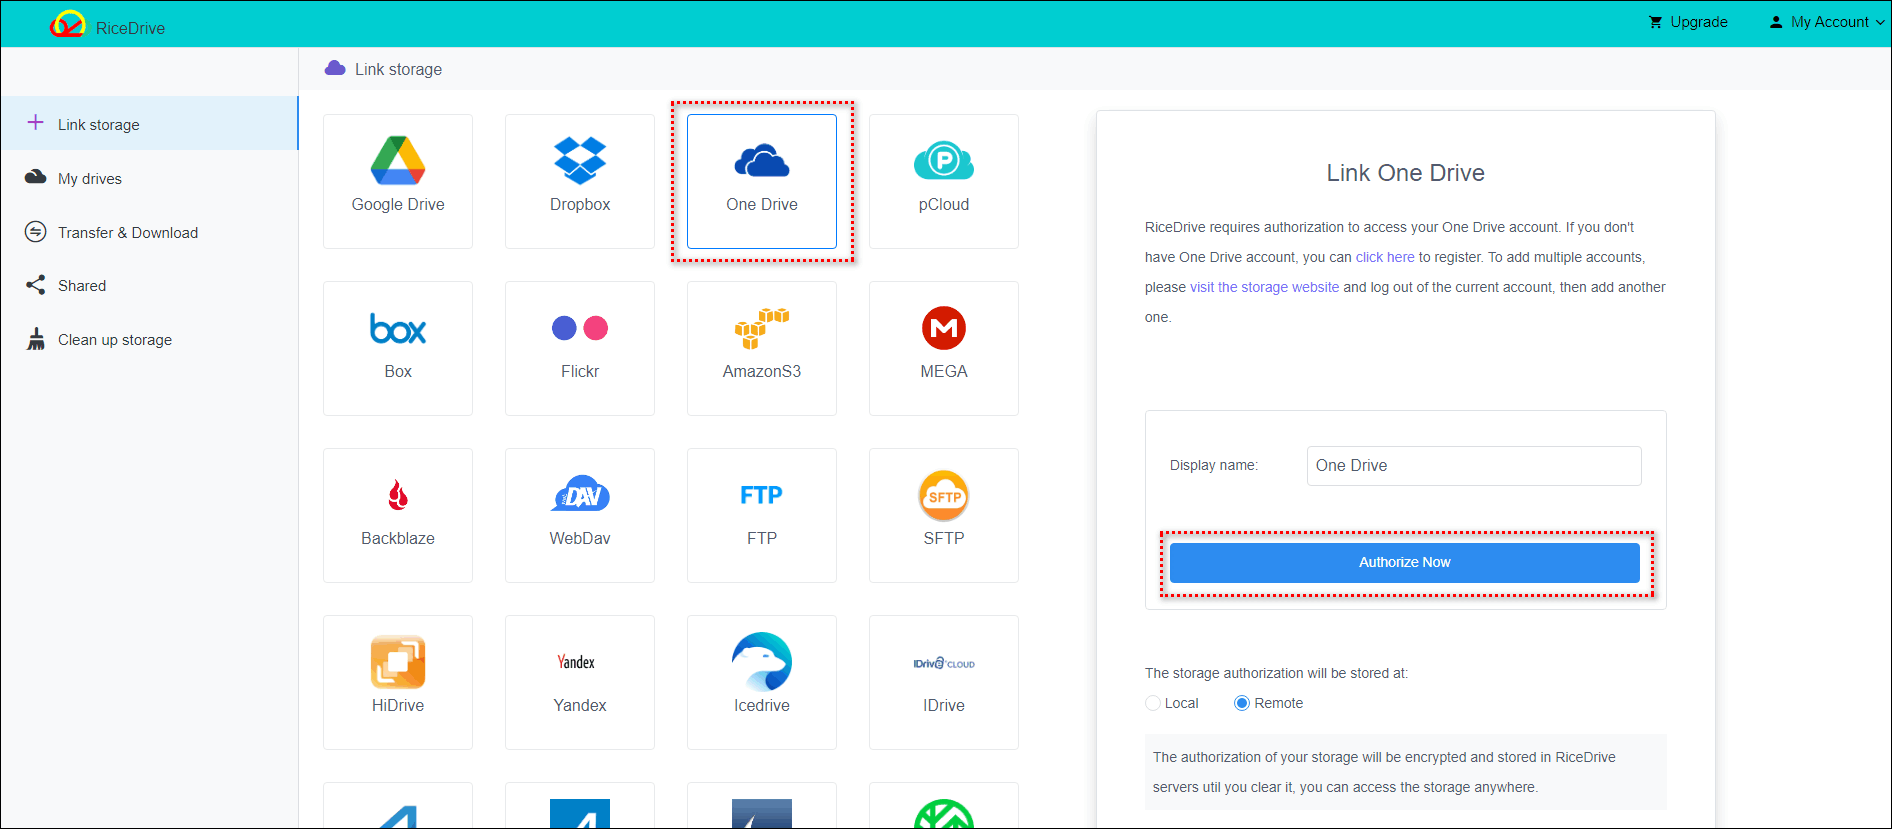
Go to the "Link storage" page, select OneDrive cloud storage, and click the "Authorize Now" button to start the authorization process.
-
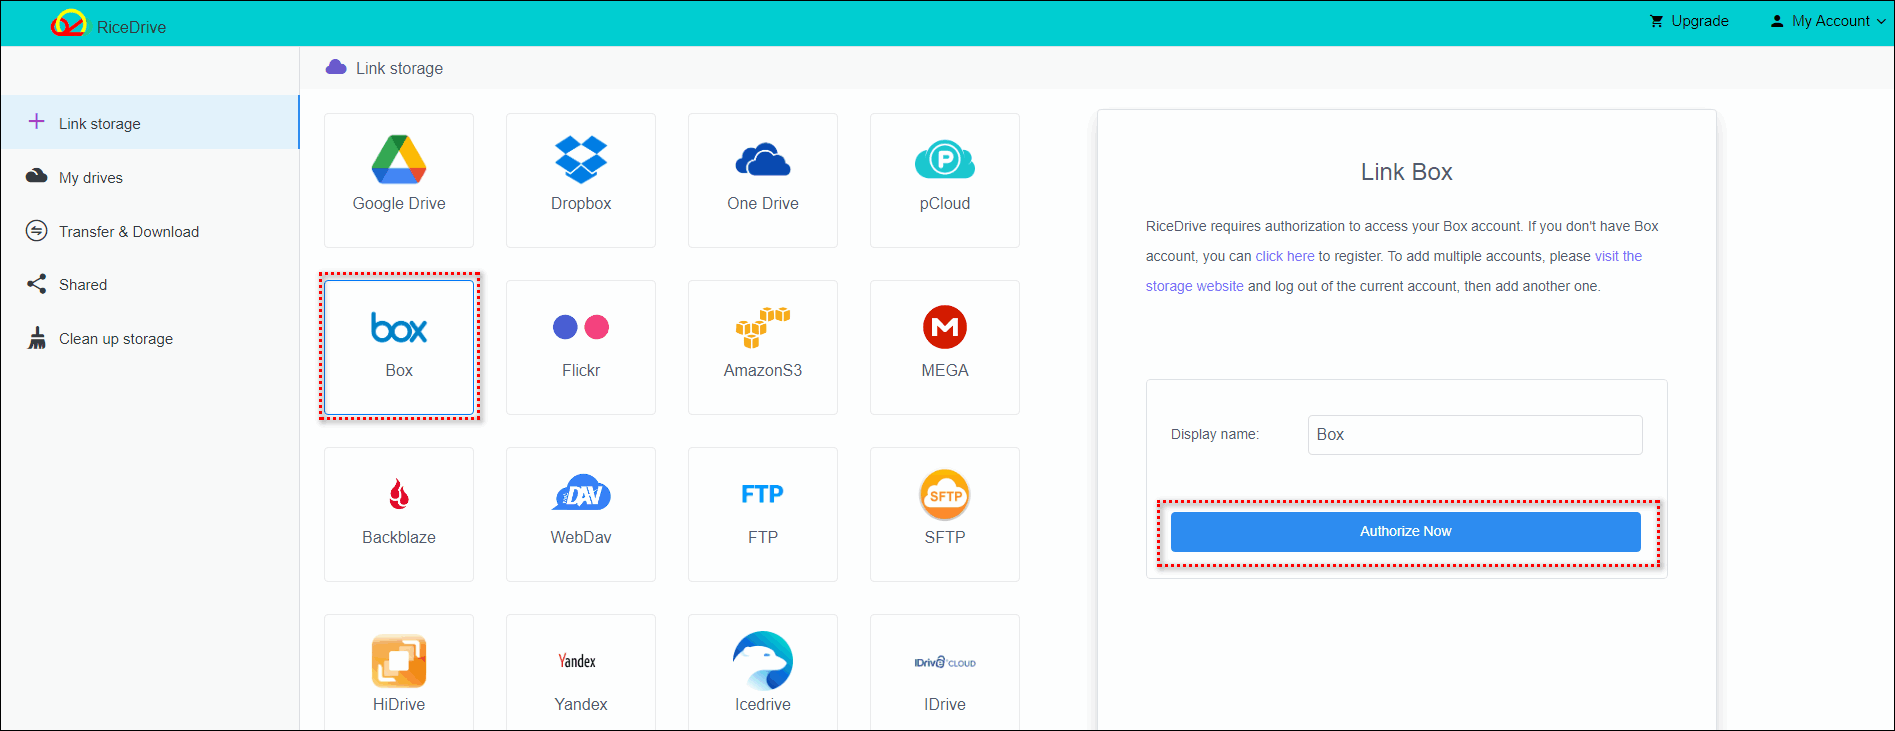
Authorize Box to RiceDrive by selecting Box cloud storage and clicking the "Authorize Now" button. Then, log in to your Box account on the authorization page and grant RiceDrive access to your Box account.
-
After authorization is successful, you can view the successfully authorized Box cloud storage and OneDrive in "My drives".
-
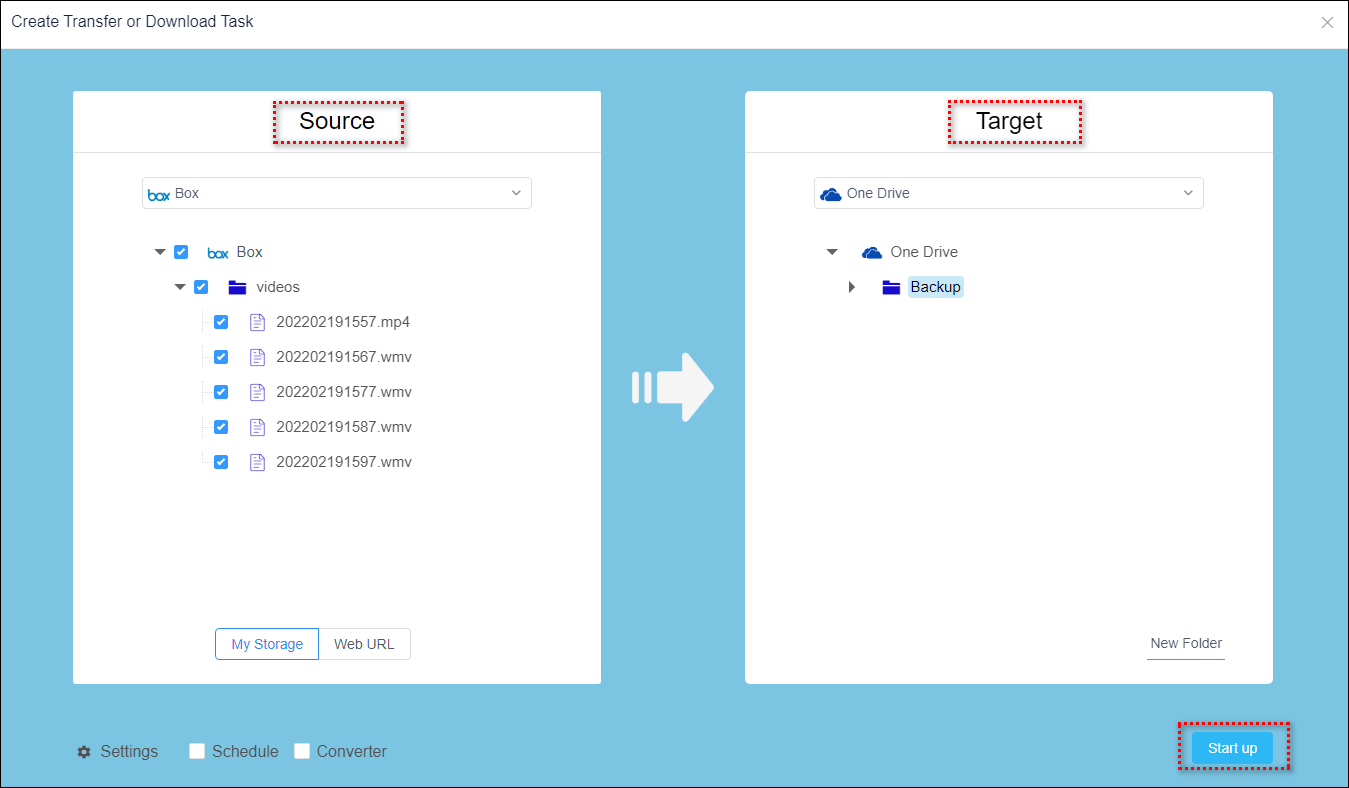
Create a transfer task from Box to OneDrive by going to the "Transfer & Download" page, clicking the "New task" button and entering the task creation process. In the task creation page, select the file or folder you want to transfer in the source, select OneDrive as the destination where you want to store the data, and click the "start up" button to start the task. You can also open the "Schedule" settings in the lower left corner to set a daily schedule to help you synchronize newly added files on time. During the task execution, you do not need to wait, and you can even close RiceDrive to do other things, as RiceDrive will automatically complete the task in the background.
-
Check the execution results and execution logs, as well as the files or folders transferred in the destination path to ensure the successful execution of the transfer task.
Tip: If you're on a mobile device, click here to access RiceDrive's mobile version and complete the same tasks.
Compared with methods 1 and 2, this method not only can quickly move large data from Box to OneDrive but also can create a scheduled task to incrementally transfer files or folders, which can help you better synchronize data between the two cloud storage in the long term.
Conclusion
The choice of migration method depends on the size of the data and the frequency of migration. If you need to migrate large data and need to synchronize data between two cloud storage frequently, it is recommended to choose the RiceDrive migration service, as it can perform incremental migration on schedule and does not occupy local storage space and bandwidth. If you only need to migrate a small amount of data and only need to migrate once, then the first method is the most cost-effective.