
Gmail is one of the most popular email services in the world with millions of users relying on it for personal and professional communication. However, despite being a reliable platform, users should always have an email backup in case of accidental deletion or hacking attacks. Through backup, you can ensure the safety and reliability of your Gmail mailbox data and view or restore the data as needed at any time. At the same time, backup is also very useful when expanding storage space, switching phones, or changing computers. With continuously improved technological means, backup operations are now easier and faster than ever before. In this article, we will guide you on how to backup Gmail emails so that you won't lose any important emails.
Google Takeout is a free service provided by Google. It is a simple and free method that allows users to download their data stored on Google services (such as Gmail, Google Photos, contacts, Google Drive documents, etc.). This is a very useful feature because it allows users to retain their data and use them across platforms. The specific steps are as follows.
Step 1: First, open the browser and log in to your Google account. Then enter the address of Google Takeout (https://takeout.google.com/) in the address bar to enter the website.
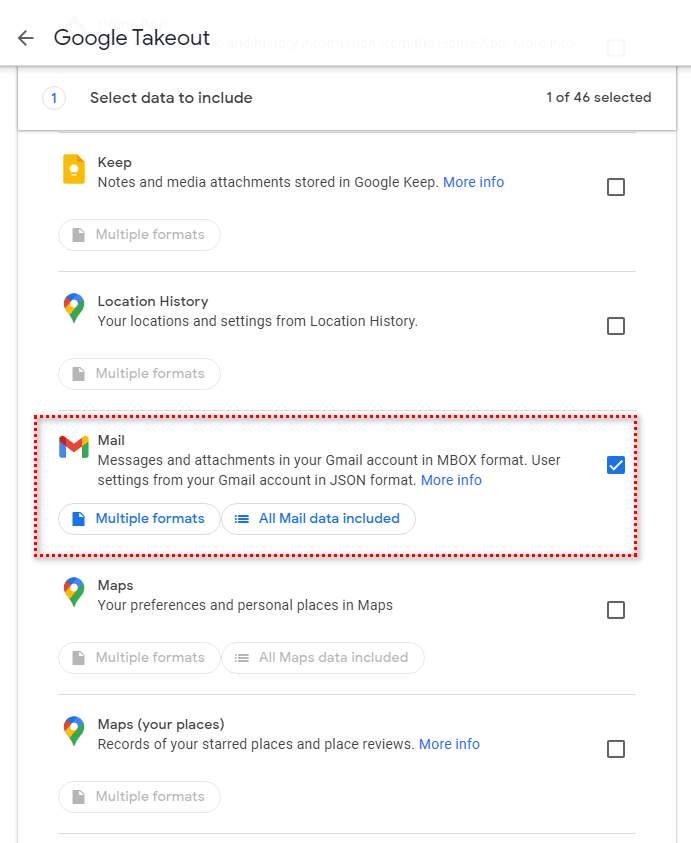
Step 2: At the top of the webpage, you can see a list of export items for multiple Google services. You only need to check the Mail checkbox, then scroll to the bottom of the page and click the "Next" button.
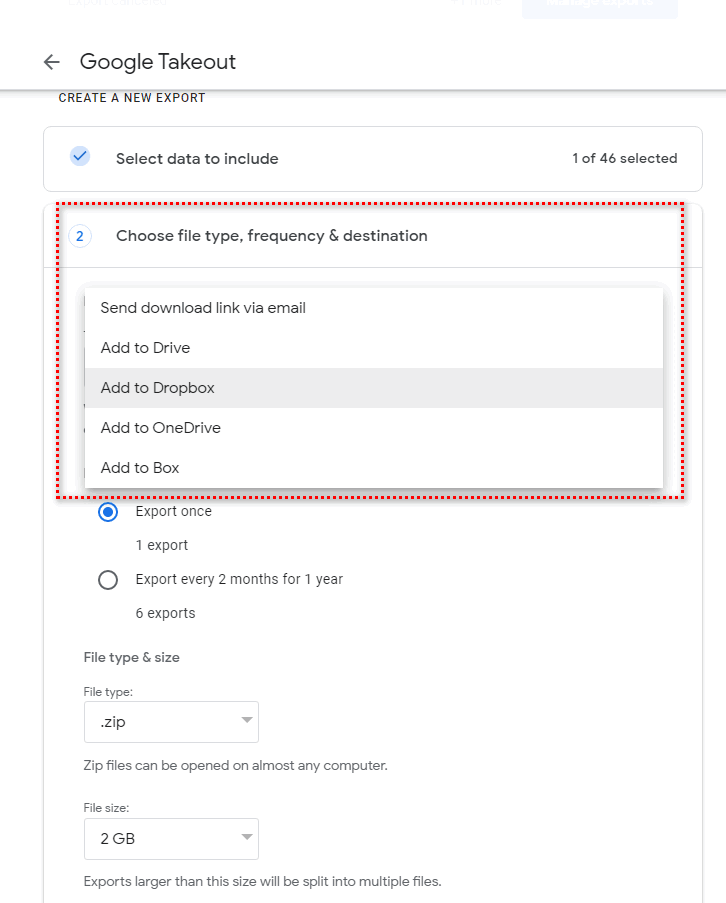
Step 3: In the next filtering screen, you can choose the target location for export, such as Google Drive, OneDrive, Box, Dropbox, etc., as the storage path. You can also specify options such as type, format, and size limit of backup files. If you don't need to change it, the default ZIP format should be enough.
Step 4: After completing all custom settings, click the "Create export job" button. Then it will start creating and compressing a zip file containing Gmail data for you. This process may take some time, depending on the amount of data to be backed up, network transmission speed, and other factors.
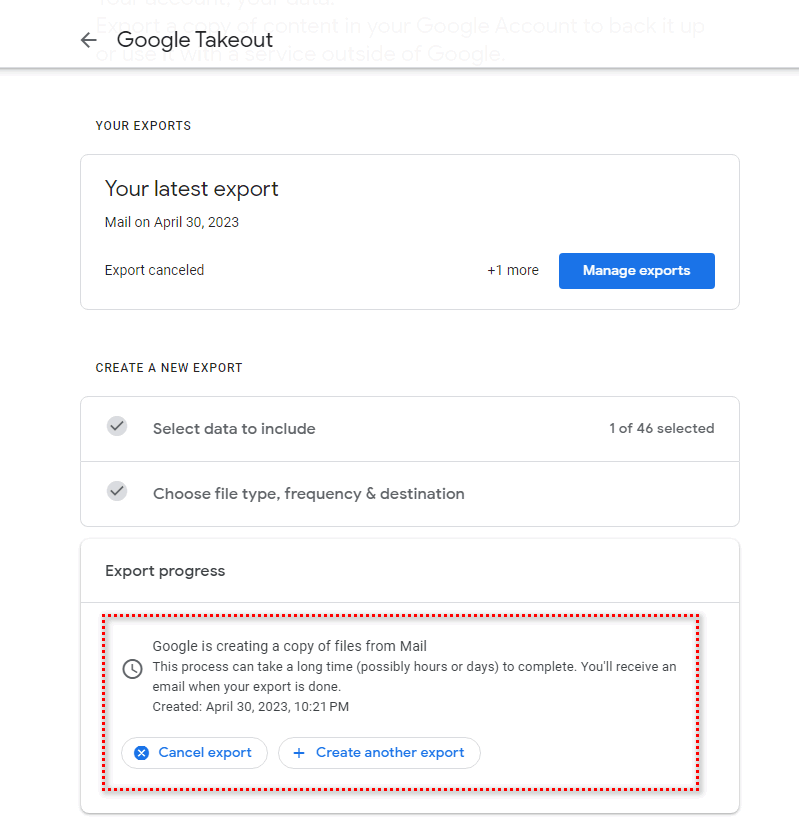
This method is easy to operate and allows you to easily download all emails. However, it also has some disadvantages, such as waiting for Google to process your request, which may take a long time, and the file format of the downloaded data is not easy to read. You still need to rely on other services to assist reading.
Using Outlook to sync Gmail to local is a good backup method because it allows us to save and access emails and attachments locally and securely, even if there is a network interruption or other issues that may affect the availability of data. Here are the specific steps to sync Gmail to local using Outlook.
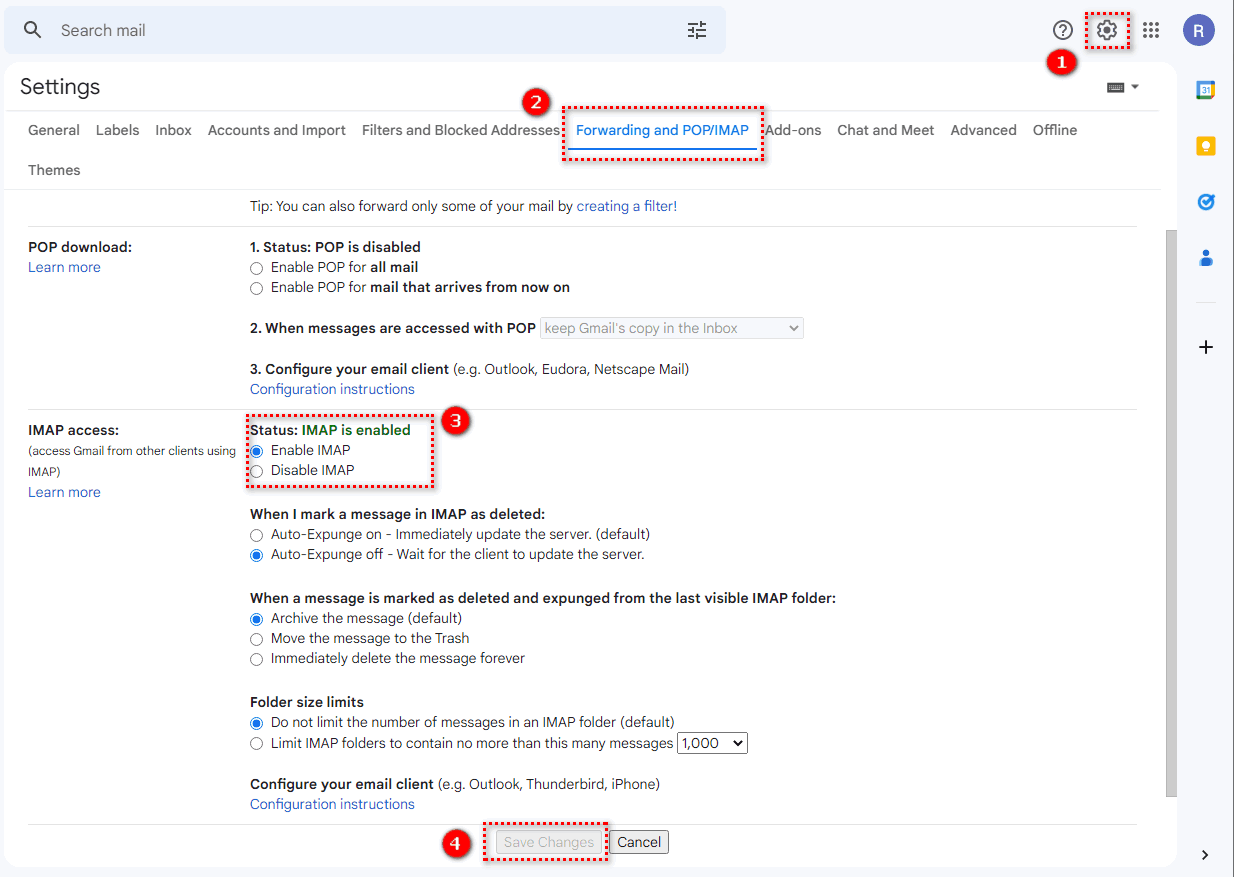
Step 1: Log in to Gmail, click "Forwarding" and "POP/IMAP" in the "Settings" menu. In the IMAP access section, select the Enable IMAP option and click Save Changes.
Step 2: Open the Outlook client and log in to your Microsoft account.
Step 3: Click "Add Account" on the "File" menu, and then enter your Gmail email address and select the IMAP account type in the pop-up dialog box.
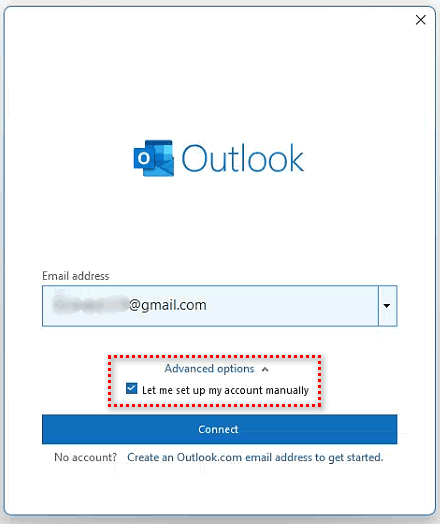


Step 4: Enter your Gmail account password, and then click "Connect".
Step 5: With this configuration complete, Outlook will start automatically syncing your Gmail mailbox content and attachments, including emails in the inbox, sent emails, and emails in the draft box.
If you follow the above steps, you can successfully back up your Gmail data to local. It is worth noting that when using Outlook to sync Gmail to local, please choose a suitable security authorization method to prevent account information from being impersonated or stolen by others. This method enables you to access and use your Gmail emails even when you are offline, and you can conveniently organize and manage your emails using an email client. At the same time, it also synchronizes your Gmail emails in real-time, keeping your data synced to your local device. However, the disadvantage of this method is that you need to download an email client and perform some corresponding email configurations, which can be quite cumbersome. Also, due to Google's restrictions on insecure applications, this method is relatively less secure.
This is also a simple method of email backup. By setting up forwarding rules, you can forward the emails you send or receive to another email address. The specific operation steps are as follows.
Step 1: Log in to your Gmail account.
Step 2: Find the settings button and open Settings > See all settings > Forwarding and POP/IMAP.
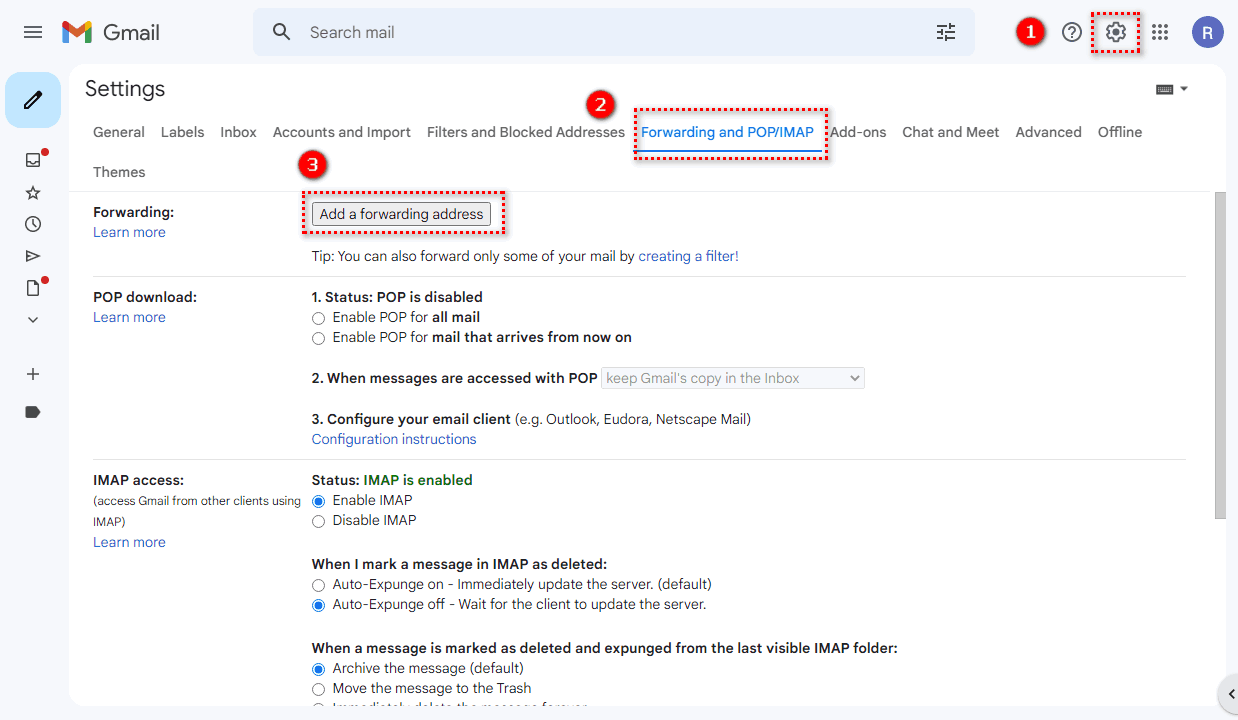
Step 3: Add the forwarding address and enter the set backup email address in the forwarding address input box.
Step 4: Log in to your backup email address, check the verification email from Gmail, and click the link in it to verify the forwarding address.
Step 5: Go back to Gmail, choose the type of emails you want to forward or set email filtering conditions to back up the emails you want.
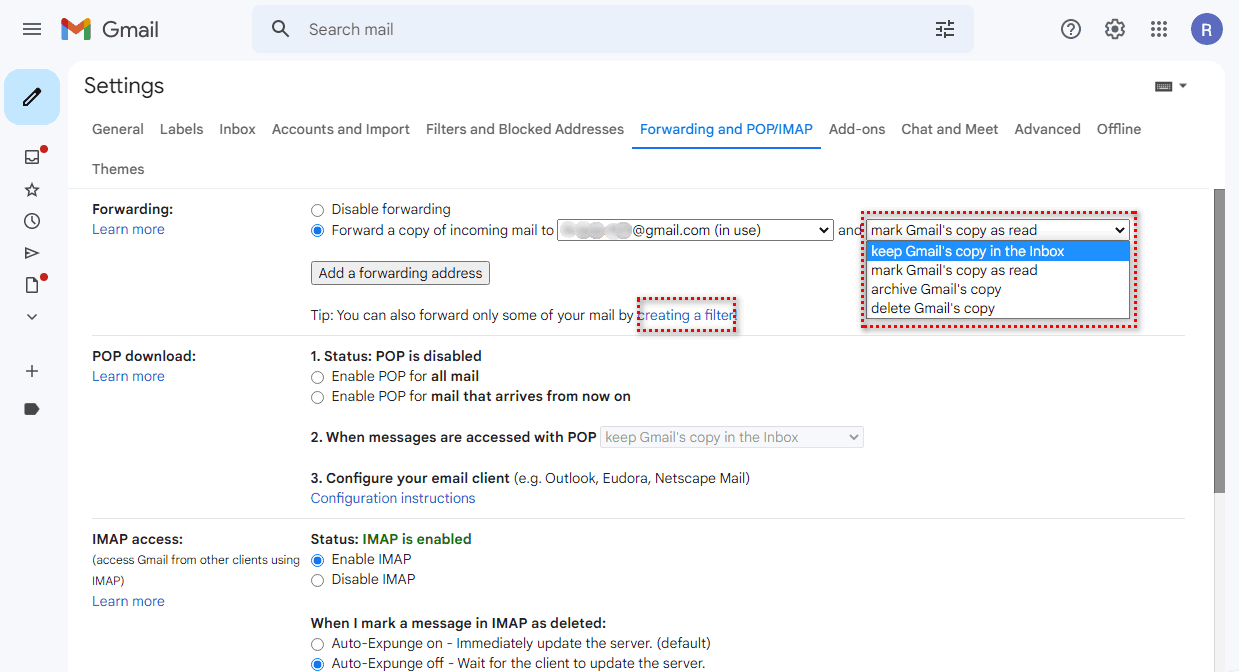
This method is a very good choice for those who pursue quick and convenient backup or for small-scale projects, using Gmail email forwarding to back up. However, for large-scale email backup and management, more professional backup solutions are necessary and more effective.
The above three methods of backing up Gmail are all free. You can choose the method that suits you based on your own needs and preferences. No matter which method you use, it is necessary to regularly back up Gmail emails to avoid important data loss. We hope this article has been helpful to you.